Detecting Water Damage in the Home: Signs, Solutions, and Prevention

Water damage in your home’s walls and ceilings can be a nightmare. However, identifying the signs early can save you from costly repairs and potential health hazards. This blog post will walk you through the most common signs of water damage, its causes, and how to prevent it. By the end, you’ll be equipped to tackle water damage head-on, ensuring your home remains safe and sound.

Call 317-269-7319 for Professional Water Damage Drywall Replacement in Indianapolis

The Importance of Early Water Damage Detection

Water damage doesn’t just ruin your walls and ceilings; it can lead to severe structural and health issues if left untreated. For homeowners and property managers, knowing what to look for is crucial. Early detection allows for prompt repair, preventing minor issues from escalating into major problems.

Common Signs of Water Damage in Walls and Ceilings

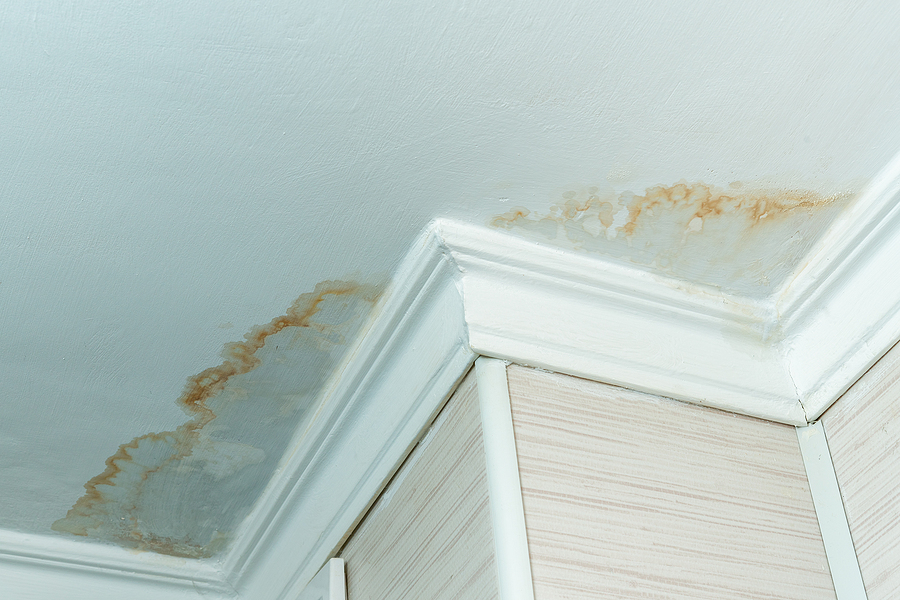
Discoloration and Water Stains

One of the first indicators of water damage is discoloration. Look for brownish or yellowish stains on your walls and ceilings. Water stains often indicate that water has seeped through the layers of your drywall or ceiling material. Discoloration can appear in various patterns, from small spots to large patches. Pay attention to areas around windows, doors, and roof lines, as these are common entry points for water.

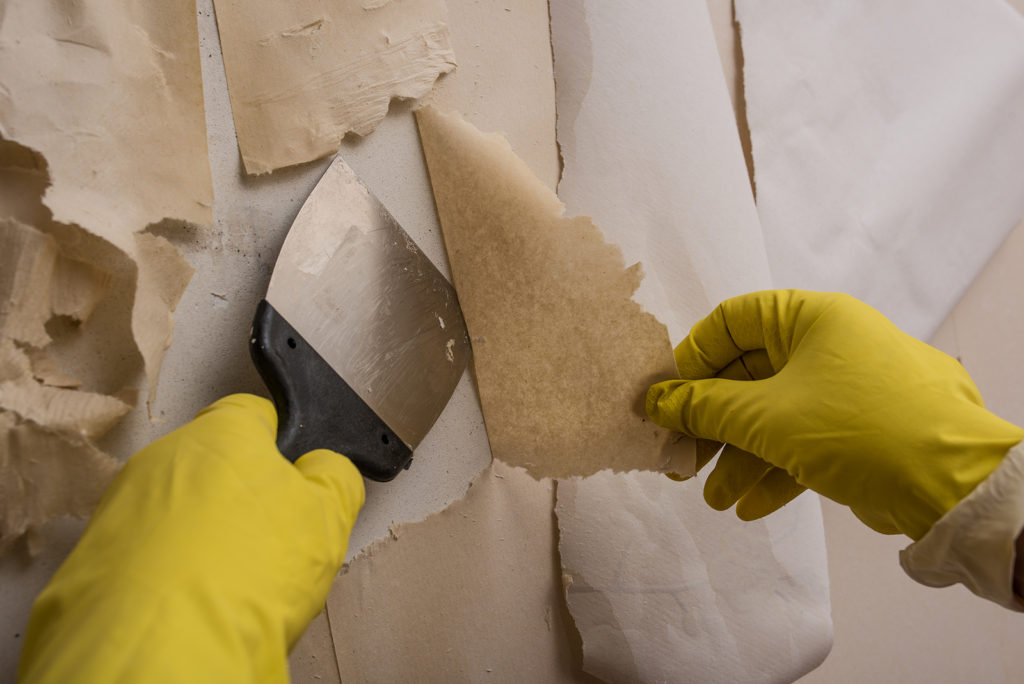
Peeling or Bubbling Paint

If you notice paint peeling or bubbling on your walls or ceilings, it’s a strong sign of water damage. When water seeps into the walls, it disrupts the adhesion between the paint and the surface, causing it to peel or bubble. This is not just an aesthetic issue. It indicates underlying moisture problems that need addressing. Ignoring peeling or bubbling paint can lead to more extensive damage over time.

Sagging or Bulging Areas

Sagging or bulging in the walls or ceilings is a clear sign of water accumulation. This occurs when water saturates the material, making it heavy and weak. If you see areas that appear to be drooping or bulging out, it’s essential to investigate immediately. These spots are at risk of collapsing, posing a danger to anyone in the vicinity.
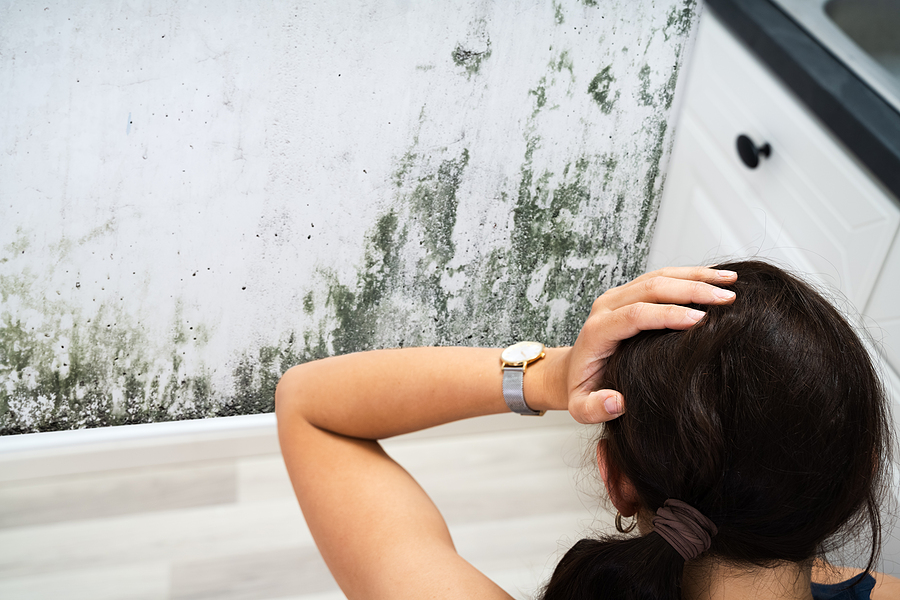
Musty Odors

A musty smell is often a hidden sign of water damage. This odor usually indicates mold or mildew growth due to prolonged moisture exposure. Musty odors are commonly found in basements, attics, and other areas with poor ventilation. If you detect a persistent musty smell, it’s time to inspect your home for water damage.

Top Causes of Residential Water Damage

Leaking Pipes

Leaking pipes are one of the most widespread sources of water damage. Pipes can leak due to age, corrosion, or high water pressure. Regularly inspect your plumbing for signs of leaks, such as pooling water, corrosion, or unusual dampness. Promptly fixing leaks can prevent significant water damage.

Roof Leaks

Roof leaks are another major cause of water damage in ceilings. Damaged shingles, cracked flashings, or clogged gutters can allow water to seep into your home. Regular roof inspections, especially after storms, can help identify and fix leaks before they cause extensive damage.

Poor Ventilation

Poor ventilation can trap moisture inside your home, leading to water damage. Bathrooms, kitchens, and basements are particularly susceptible to this issue. Ensure proper ventilation by using exhaust fans, opening windows, and installing dehumidifiers in areas prone to moisture buildup.

Flood Damage

Flooding can cause severe water damage to your home. Whether it’s from a natural disaster or a plumbing issue, floods can saturate walls, ceilings, and floors. It’s crucial to address flood damage immediately to mitigate its effects. Professional water damage restoration services can help dry and repair affected areas.

The Dangers of Ignoring Water Damage

Mold Growth

Mold thrives in damp environments, making water-damaged areas a perfect breeding ground. Mold can cause respiratory issues, allergies, and other health problems. Ignoring water damage can exacerbate mold growth, making it harder and more expensive to remove. Early detection and prompt action are key to preventing mold infestations.

Structural Damage

Prolonged water exposure can weaken the structural integrity of your home. Water can rot wood, corrode metal, and compromise the stability of walls and ceilings. If left unchecked, structural damage can lead to costly repairs and even pose a safety risk to occupants. It’s essential to address water damage promptly to maintain your home’s stability.

Health Risks

Water damage can create an unhealthy living environment. Mold, mildew, and bacteria can thrive in damp conditions, leading to various health issues. Respiratory problems, skin irritation, and allergic reactions are common in homes with untreated water damage. Protect your health by addressing water damage as soon as it’s detected.

How to Detect and Confirm Water Damage

Using Moisture Meters

Moisture meters are handy tools for detecting water damage. These devices measure the moisture content in walls and ceilings, helping you identify hidden water issues. Regularly using a moisture meter can help you catch water damage early, even before it becomes visible. Consider investing in one for routine home maintenance.

Inspecting for Visible Signs

Conduct regular visual inspections of your home, looking for the common signs of water damage mentioned earlier. Pay special attention to areas prone to moisture, such as basements, bathrooms, and attics. Keep an eye out for discoloration, peeling paint, sagging areas, and musty odors. Early detection can save you from more extensive repairs down the line.

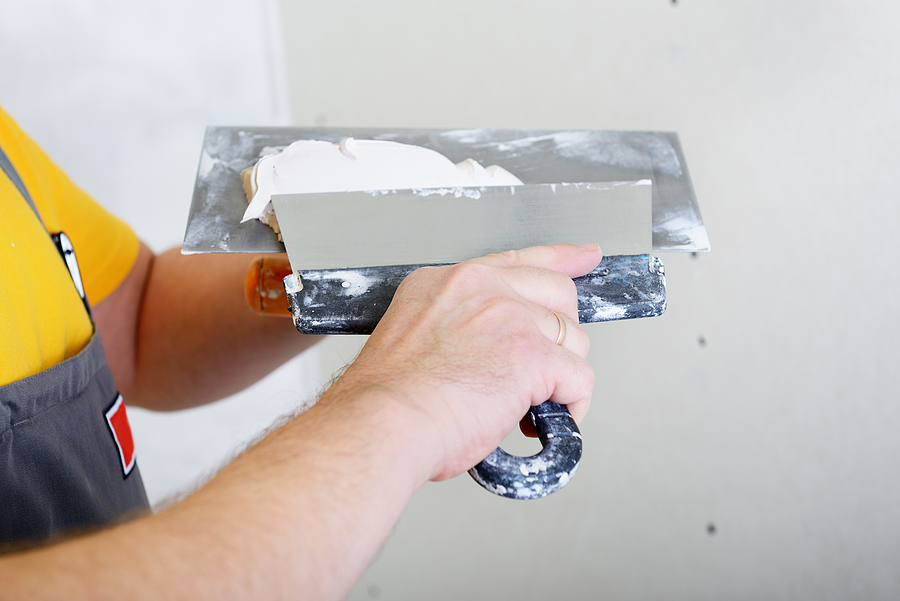
Seeking Professional Help

If you’re unsure about the extent of water damage or how to address it, seek professional help. Plumbing experts can assess the situation and recommend the best course of action for repairing the source of the water damage. Drywall contractors can remove and replace damaged drywall and ceilings, plus provide painting and texturing services. Professionals have the tools and expertise to thoroughly inspect and repair water damage, ensuring your home remains safe and dry.

Preventive Measures to Protect Against Water Damage

Regular Maintenance Checks

Regular maintenance checks are crucial in preventing water damage. Inspect your home’s plumbing, roof, and gutters regularly for signs of wear and tear. Promptly addressing minor issues can prevent them from escalating into major problems. Schedule routine inspections to keep your home in top condition.

Prompt Repairs of Leaks

Don’t delay in fixing leaks, no matter how minor they seem. Even small leaks can lead to significant water damage over time. Repairing leaks promptly can prevent water from seeping into walls and ceilings, reducing the risk of mold growth and structural damage.

Improving Home Ventilation

Improving ventilation can help prevent moisture buildup in your home. Use exhaust fans in bathrooms and kitchens, open windows to allow fresh air in, and install dehumidifiers in damp areas. Proper ventilation reduces the risk of water damage and creates a healthier living environment.

Waterproofing Strategies

Consider implementing waterproofing strategies to protect your home from water damage. Apply sealants to vulnerable areas, install sump pumps in basements, and ensure your home’s foundation is well-maintained. Waterproofing your home can provide an extra layer of protection against water damage, keeping your walls and ceilings dry and intact.

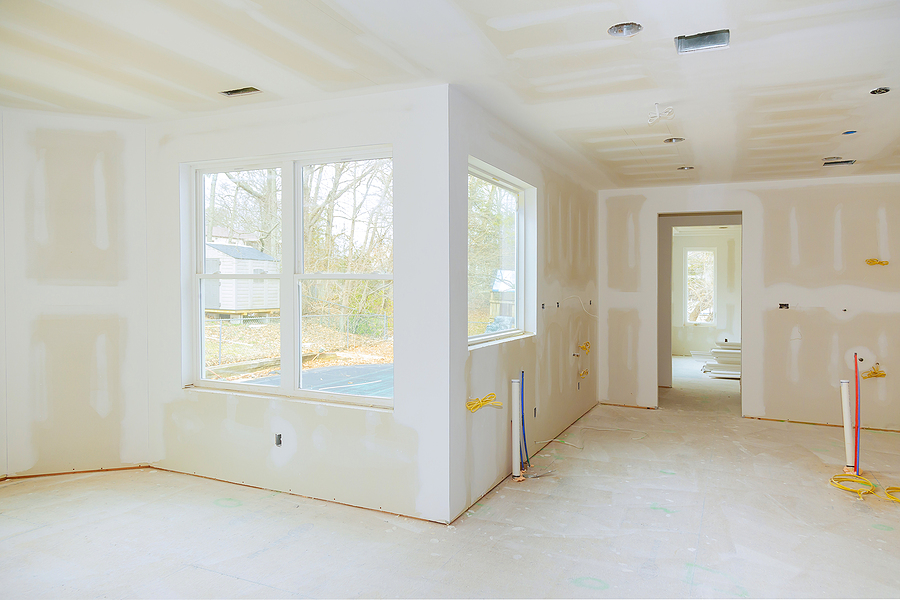
Taking Action to Safeguard Your Home

Water damage can be a homeowner’s worst nightmare, but early detection and prompt action can mitigate its effects. By understanding the common signs of water damage, its causes, and preventive measures, you can protect your home from costly repairs and health risks.

Don’t wait until it’s too late. Regular maintenance, prompt repairs, and proper ventilation are key to preventing water damage. If you suspect water damage in your home, seek professional help to assess and address the issue.

Did you find some water-damaged walls or ceilings in your home? Contact Drywall By Renso at 317-269-7319 for expert drywall replacement services in Indianapolis, Indiana. We serve residential and commercial clients throughout the Greater Indy areas. Protect your home and enjoy peace of mind knowing your walls and ceilings are in good hands. Request an estimate, today.

Related Posts:

Tips for Drywall Water Damage Clean Up
How to Remove Water Damaged Drywall
The Meaning Behind the Color of Mold on Your Walls

Troublesome Nail Pops? Here’s How to Spot, Fix, and Prevent Them

Walls are an essential part of every home, serving both functional and aesthetic purposes. However, when you start noticing bumps or cracks, your pristine walls can become a source of frustration. One common culprit behind these imperfections is nail pops. In this comprehensive guide, we’ll explore what nail pops are, how to identify them, the dangers of ignoring them, and how you can either fix them yourself or prevent them in the future.

Call 317-269-7319 for Professional Wall Damage Repair in Indianapolis Indiana

What are Nail Pops?

Nail pops are small bumps or cracks that appear on walls, usually where nails or screws have loosened and pushed through the drywall. These imperfections are especially common in newly constructed homes but can occur in older homes as well.

Common Causes of Nail Pops

One major cause of nail pops is the natural settling of a house. As the wooden frame of a house contracts and expands with changes in humidity and temperature, the nails or screws securing the drywall may loosen. Another common cause is improper installation during construction. If the drywall wasn’t secured tightly or the nails weren’t driven in at the correct angle, nail pops are more likely to occur.

How Nail Pops Form

When nails or screws push through the drywall, they create small, round bumps. Over time, these bumps can crack the paint and even lead to holes. Understanding the causes and process of nail pops can help you better identify and address them before they become a bigger problem.

Identifying Nail Pops

Spotting nail pops early is crucial for maintaining the integrity and appearance of your walls. Here are some tips to help you identify them:

Visual Cues – Nail pops often manifest as small, round bumps on the surface of your wall. They may be more noticeable under certain lighting conditions. Look for areas where the paint has cracked or chipped away in a circular pattern.

Practical Tests – To confirm whether a bump is a nail pop, gently press around the bump with your fingers. If it feels like there’s a small, hard object beneath the surface, it’s likely a nail or screw that has popped.

Regular Inspections – Make it a habit to regularly inspect your walls, especially in rooms with high humidity or significant temperature changes. Early identification can save you from more extensive repairs later on.

The Dangers of Ignoring Nail Pops

Ignoring nail pops can lead to more serious issues down the line. Here’s why you shouldn’t procrastinate on fixing them.

Structural Integrity – While a single nail pop might not seem like a big deal, multiple nail pops can indicate a larger issue with your home’s structural integrity. Over time, this can lead to more severe drywall damage, including large cracks and holes.

Aesthetic Damage – Nail pops can quickly turn a smooth, clean wall into an eyesore. The longer you wait to fix them, the more noticeable and unappealing they become. This can detract from the overall appearance of your home, especially if you’re planning to sell.

Costly Repairs – The longer you ignore nail pops, the more extensive the damage can become. What starts as a simple DIY repair can turn into a costly professional job if left unaddressed.

DIY vs. Professional Repair

When it comes to fixing nail pops, you have two options: doing it yourself or hiring a professional. Let’s weigh the pros and cons of each.

DIY Repair

DIY repair is a cost-effective option if you have the right tools and some basic handyman skills. You’ll need a few materials like a hammer, nails or screws, drywall compound, and sandpaper. However, keep in mind that improper repair can lead to recurring issues.

Professional Repair

Hiring a professional drywall repair company ensures the job is done correctly and efficiently. Professionals have the expertise and tools needed to fix nail pops without causing further damage. Although this option is more expensive, it offers peace of mind and long-lasting results.

When to Choose Which

If you’re dealing with a few isolated nail pops and feel confident in your skills, a DIY approach may be sufficient. However, if you notice multiple nail pops, suspect there’s a deeper issue, or require additional drywall or painting beyond nail pop repair, it’s best to consult a professional.

Step-by-Step DIY Repair Guide

Ready to tackle nail pops on your own? Follow these detailed steps to ensure a smooth and effective repair process:

Tools and Materials Needed:

  • Hammer or screwdriver
  • Drywall compound
  • Sandpaper
  • Paint and primer
  • Nail or screw replacements
  1. Preparing the Area – Start by removing any loose paint or drywall around the nail pop. Use a utility knife to cut away damaged material, creating a clean surface for repair.
  2. Reinforcing the Drywall – Using a hammer or screwdriver, drive a new nail or screw into the drywall about an inch above or below the original nail pop. Be sure to countersink the nail or screw slightly to prevent future pops.
  3. Applying Drywall Compound – Apply a generous amount of drywall compound over the nail or screw head, smoothing it out with a putty knife. Allow the compound to dry completely before sanding it smooth.
  4. Finishing Touches – Once the compound is dry and smooth, apply a coat of primer and paint to match the rest of the wall. Voila! Your wall should now look good as new.

Preventing Nail Pops in the Future

Prevention is always better than cure. Here are some tips to help you avoid nail pops in the future.

  • Use the Right Materials – When constructing or renovating your home, use high-quality materials and follow proper installation techniques. Opt for screws instead of nails, as they are less likely to loosen over time.
  • Maintain Humidity Levels – Fluctuating humidity levels can cause wood to expand and contract, leading to nail pops. Use a humidifier or dehumidifier to maintain consistent humidity levels in your home.
  • Regular Inspections – Regularly inspect your walls for any signs of nail pops. Early detection and prompt repair can prevent more extensive damage down the line.

Key Takeaways

Nail pops may seem like a minor issue, but they can lead to significant problems if left unaddressed. By understanding what nail pops are, how to identify them, and how to fix and prevent them, you can keep your walls looking pristine and ensure the structural integrity of your home. Whether you choose to tackle the repairs yourself or hire a professional, addressing nail pops promptly will save you time, money, and stress in the long run.

Don’t wait until nail pops become a bigger problem. Take action today to protect your home and maintain its beauty. Contact Drywall By Renso at 317-269-7319 for reliable and efficient drywall repair service in Indianapolis, Indiana. Your walls and your wallet will thank you! We serve residential and commercial clients throughout the Greater Indy areas. Request an estimate, today.

Related Posts:

Tips for Avoiding DIY Drywall Mistakes
How to Hang Pictures on Walls
Basic Toolbox for Drywall Repair

The Complete Handbook on Drywall Repairs and Maintenance

Drywall is an essential part of modern construction, providing a smooth and durable surface for walls and ceilings. However, like any material, it can incur damage over time. From minor cracks to significant holes, understanding how to repair drywall can save homeowners, business owners, property managers, and home buyers both time and money. In this comprehensive guide, we will explore frequently asked questions about drywall repair, offering practical advice and highlighting when it’s best to call a professional.

Call 317-269-7319 for Professional Drywall Repair in Indianapolis Indiana

What You Need to Know About Drywall

Drywall, also referred to as plasterboard or gypsum board, consists of a panel made from calcium sulfate dihydrate (gypsum) sandwiched between layers of thick facer and backer paper. It is commonly used in the construction of interior walls and ceilings due to its ease of installation and finishing. Despite its widespread use, drywall is susceptible to various forms of damage, which can affect the aesthetics and integrity of your property.

Typical Drywall Problems

Understanding the common issues that affect drywall can help you anticipate repairs and take preventive measures. Here are some frequently encountered drywall problems:

Cracks: Cracks in drywall are often caused by settling of the building, temperature fluctuations, or improper installation. These cracks can vary in size and severity, from hairline fractures to more significant splits.

Holes: Holes in drywall can result from various sources, such as doorknob impacts, furniture mishaps, or accidental damage. They range from small punctures to larger openings that expose the underlying structure.

Water Damage: Water damage occurs when drywall is exposed to moisture, leading to stains, softening, and even mold growth. Common causes include leaks from plumbing, roof damage, or flooding.

Nail Pops: Nail pops happen when the drywall nails or screws loosen and push the drywall surface outward, creating noticeable bumps. These are usually due to natural settling or incorrect fastening during installation.

Joint Tape Issues: Joint tape can bubble, wrinkle, or peel away from the drywall surface over time. This is typically due to poor adhesion during installation or moisture infiltration.

Common Drywall Repairs and Their Techniques

While some drywall renovations are straightforward and suitable for DIY enthusiasts, others require more skill and expertise. Here are step-by-step guides to common DIY drywall repairs:

Filling Small Holes and Cracks

Materials Needed:

  • Putty knife
  • Spackling compound or joint compound
  • Sandpaper
  • Paint (optional)

Steps:

  1. Clean the Area: Remove any loose debris or dust from the hole or crack.
  2. Apply Spackling Compound: Use a putty knife to fill the hole or crack with spackling compound. Smooth it over the surface, ensuring it is level with the surrounding drywall.
  3. Sand the Surface: Once the compound is dry, sand the area until it is smooth and seamless.
  4. Paint: If necessary, paint over the repaired area to match the rest of the wall.

Patching Larger Holes

Materials Needed:

  • Drywall patch or mesh tape
  • Joint compound
  • Putty knife
  • Sandpaper
  • Paint (optional)

Steps:

  1. Prepare the Hole: Cut away any loose or damaged drywall around the hole.
  2. Apply the Patch: Place a drywall patch or mesh tape over the hole.
  3. Cover with Joint Compound: Spread a layer of joint compound over the patch, feathering the edges to blend with the surrounding wall.
  4. Sand and Paint: Once dry, sand the area smooth and apply paint if needed.

Repairing Water Damage

Materials Needed:

  • Utility knife
  • Replacement drywall
  • Joint compound
  • Putty knife
  • Sandpaper
  • Paint (optional)

Steps:

  1. Remove Damaged Drywall: Use a utility knife to cut out the damaged section of drywall.
  2. Replace with New Drywall: Cut a piece of replacement drywall to fit the hole and secure it in place.
  3. Apply Joint Compound: Cover the seams with joint compound, ensuring a smooth transition between the old and new drywall.
  4. Sand and Paint: Sand the repaired area and paint as needed.

When to Call a Professional Drywall Repair Company

While many drywall repairs can be handled by DIY enthusiasts, some situations require the expertise of a professional. Here are signs that it’s time to call a drywall contractor:

  • Extensive Damage: If the damage covers a large area or affects the structural integrity of the wall, it is best to seek professional help.
  • Water and Mold Issues: Water damage that has led to mold growth requires specialized treatment to ensure the mold is fully eradicated and the area is safe.
  • Complex Repairs: Repairs involving multiple layers of drywall, intricate textures, or high ceilings may be beyond the capabilities of a typical DIYer.

Benefits of Hiring a Professional:

  • Expertise: Professionals have the experience and skills to handle complex repairs efficiently.
  • Quality: A professional repair ensures a seamless finish that blends with the existing wall.
  • Time-Saving: Hiring a professional can save you time and effort, allowing you to focus on other tasks.

Cost Expectations for Drywall Repair

The cost of drywall repair can vary based on several factors, including the extent of the damage, the materials needed, and labor rates. Here are some average price ranges for common repairs:

  • Small Holes and Cracks: $50 – $150
  • Large Holes: $200 – $400
  • Water Damage Repair: $500 – $1,000
  • Professional Services: Rates vary but typically range from $50 to $100 per hour

Factors Influencing Cost:

  • Location: Prices may vary depending on your geographic location and local labor rates.
  • Material Quality: Higher-quality materials may increase the overall cost.
  • Extent of Damage: More extensive damage requires more time and resources to repair.

Tips for Preventing Drywall Damage

Preventing future drywall damage can save you time and money in the long run. Here are some tips for maintaining the integrity of your drywall:

Control Humidity: Keep indoor humidity levels between 30% and 50% to prevent moisture-related issues. Use dehumidifiers and proper ventilation in areas prone to humidity, such as bathrooms and basements.

Regular Maintenance: Inspect your walls and ceilings regularly for signs of damage. Address minor issues promptly to prevent them from becoming major problems.

Protect High-Traffic Areas: Install door stoppers and corner guards in high-traffic areas to prevent accidental damage from doorknobs and furniture.

Proper Installation: Ensure drywall is installed correctly by following industry standards and guidelines. Properly fasten drywall panels and use quality materials to minimize the risk of future damage.

Conclusion

Drywall repair is an essential aspect of maintaining the aesthetics and functionality of your property. Whether you’re a homeowner, business owner, property manager, or home buyer, understanding common drywall problems and repair techniques can help you address issues promptly and effectively. Remember, many repairs are perfect for DIY enthusiasts, but for more complex or extensive damage, don’t hesitate to call a professional.

While many repairs are suitable for DIY enthusiasts, don’t hesitate to call a professional for more complex or extensive damage. At Drywall By Renso, we specialize in professional drywall repair services in Indianapolis, ensuring your walls and ceilings look as good as new. Contact us today at 317-269-7319  for a consultation and let our experts handle all your drywall repair needs. Your satisfaction is our top priority, and we’re here to help you maintain a beautiful and functional space.

Related Posts:

What You Need for Minor Household Drywall Repairs
Where to Find Trusted Commercial Drywall Service in Indy
Want to Know Where Your Drywall Cracks Came From?

Avoid DIY Disasters: The Importance of Professional Drywall Installation

In the era of YouTube tutorials and a flourishing culture of “I can do it myself,” the allure of DIY projects has never been stronger. However, the satisfaction of personal achievement and potential cost savings comes with its risks, especially when tackling projects that require a specific skill set.

One such task is drywall installation—a common endeavor that many homeowners, property owners, and tenants consider doing themselves. But before you roll up your sleeves and start hanging sheetrock, it’s important to understand why professional drywall installation is not just a preference – it’s a necessity.

Call 317-269-7319 for Professional Drywall Installation in Indianapolis and Surrounding Areas

The Importance of Proper Drywall Installation

Drywall is a critical component of your home’s structure and aesthetics. It contributes to the insulation, soundproofing, and overall integrity of your living space. While it may seem like a straightforward task, improper drywall installation can lead to numerous problems.

Structural Integrity – Structural issues, such as sagging or cracking drywall, can arise from inadequate support or incorrect installation. This not only affects the appearance of your walls but can also pose safety risks.

Craftsmanship – Aesthetic concerns are another consequence of poor installation, where visible seams, bumps, and uneven surfaces can detract from your home’s beauty.

Safety – Additionally, improperly installed drywall may compromise your home’s safety features, failing to provide the necessary fire resistance or sound insulation expected of modern construction standards.

Common DIY Mistakes in Drywall Installation

DIY drywall installation is fraught with potential pitfalls, often leading to results that are far from satisfactory. Common mistakes include:

  • Uneven Seams: Without the proper technique, achieving smooth seams where sheets of drywall meet is a challenging task. This can result in noticeable lines or bulges on finished walls.
  • Improper Sanding: Over-sanding or under-sanding joint compound can leave walls looking patchy or uneven, making paint finishes appear sloppy.
  • Poor Joint Compound Application: Inexperienced DIYers may struggle with applying joint compound smoothly, leading to excessive sanding work and uneven textures.
  • Inadequate Measuring and Cutting: Misjudging measurements can result in gaps between sheets or wasted materials due to unnecessary cuts.

These errors not only affect the finished look but can also increase the cost and time invested in the project.

The Benefits of Professional Drywall Installation

Hiring a professional for your drywall installation project comes with several key advantages:

  • Expertise: Professionals bring years of experience, ensuring that your drywall is installed correctly and efficiently. They know how to handle various types of drywall and adapt their techniques to accommodate the unique aspects of your project.
  • Time-saving: A professional team can complete the job significantly faster than a DIY approach, minimizing the disruption to your daily life.
  • Quality Assurance: With a professional, you’re more likely to get a flawless finish that lasts. Experts know how to achieve smooth walls that serve as the perfect canvas for painting or wallpapering.
  • Warranty: Many contractors offer a warranty on their work, giving you peace of mind that any issues will be addressed without additional costs.

Choosing the Right Professional

Selecting a reputable drywall contractor is crucial. Start by conducting thorough research, reading reviews, and checking credentials. Ask for references and look at previous projects to assess the quality of their work. Obtaining multiple quotes can help you understand the market rate and make an informed decision. Remember, the cheapest option isn’t always the best when it comes to quality and reliability.

Conclusion

While the DIY route might seem tempting, professional drywall installation is essential for achieving a polished look and maintaining the structural integrity of your home. By choosing to hire a professional, you prioritize quality, safety, and peace of mind. Before you take on your next home improvement project, consult with a drywall professional who can guide you to the best outcomes for your home.

For your drywall needs, consider reaching out to a trusted drywall contractor. Your home deserves the expertise and attention to detail that only a professional can provide. Contact Drywall By Renso at 317-269-7319 to learn more about our expert drywall services in Indianapolis, Indiana. We serve residential and commercial clients throughout the Greater Indy areas. Request an estimate, today!

Related Posts:

Tips for Avoiding DIY Drywall Mistakes
Should I Install Basement Drywall On My Own?
Fundamental Information About Installing Water-Proof Drywall

Wall Anchor Removal Guide

Pesky old wall anchors are not appealing. So, it is only natural to want them removed. But many homeowners are scared to try this task on their own because they are concerned about damaging their drywall. Also, totally natural. If you are in the same position right now, you don’t have to fret much longer with your DIY decision.

Continue reading for a simple, step-by-step guide that just might change your mind about removing unwanted wall hangers by yourself!

Indianapolis IN Drywall Services 317-269-7319

What You Will Need to Remove Old Drywall Anchors

▷ Drill
▷ Drill Bit (or Set)
▷ Putty Knife
▷ Utility Gloves
▷ Old Towel

How to Prepare for the Project

It is important to gather all your items and supplies before you start. The gloves will protect your hands from scratches or blisters, while the towel can be laid on the floor below to manage any drywall mess. It is also important to choose the correct drill bit size for the best results. If you do not have a full set of drill bits, simply purchase one that is a couple sizes larger than the opening in the wall anchor.

Keep in mind that if you plan to paint the wall you are working on, you will first need to prime the patched areas where the wall anchor holes were. And if you are planning to install new drywall anchors, be sure to buy ones that can be easily removed for future convenience!

5 Step Guide to Get the Job Done:

Remove the screw from the wall anchor.

Place the bit inside the center hole of the wall anchor and begin slowly drilling. Use a drill bit that is two sizes larger than the width of the center hole of the anchor. The bit should sit perfectly outside of the edge of the hole, without slipping inside.

Once you begin drilling, the collar of the wall anchor should break free from the wall and automatically push itself out. Let it fall on the floor so that you are not tempted to grab it while the drill is rotating. Be careful not to let the bit push deep into the wall cavity, which can interrupt electrical wiring or plumbing pipes.

Push the residual drywall material back into the hole using your putty knife. You may have to fill this hole in stages for best results.

Now just sand, prime, and paint!

Does this project seem a little too challenging for your level of handyman experience? Contact Drywall by Renso at 317-269-7319 for professional drywall repair service in Indianapolis Indiana. We serve residential and commercial clients all throughout the central part of the state.

You Might Also Read:

How to Prep a Wall for a Heavy Mirror
How to Find Dry Wall Studs Without Stud Finder Tool
How to Get a Stripped Screw Out of the Wall

Call Drywall By Renso at 317-269-7319 Today!

How to Choose the Right Wallpaper Remover

Let’s face it; wallpaper is not really a modern design. Unless you’re going for a high-end, funky or retro interior feel, the wallpaper in your home or office likely bothers you. Fortunately, with the right wallpaper removal supplies and products, you can easily detach old wallpaper and renovate your walls with traditional drywall refinishing and painting service. Not sure which items to buy for wallpaper removal?

Continue reading to learn some tips on choosing the proper wallpaper removers for your intended project, as well as some additional information about removing wallpaper you’ll need to know.

Indianapolis Wallpaper Removal Services
Indianapolis Wallpaper Removal Services 317-269-7319

Common Types of Wallpaper

When you go shopping for wallpaper removal items, you will immediately take notice that there are hundreds of options to choose from. But each tool and product are specifically designed for certain type of wallpaper removal. So, get to know what type of wallpaper you’re removing first in order to choose the right supplies for your project. For instance, if you are removing temporary wallpaper, you might not need heavy-duty supplies. If you are removing strippable wallpaper, you might need some additional supplies to get the job done. And if you are working with vinyl or water resistant wallpaper, you can expect to use all the recommended supplies and some elbow grease.

What You Need to Remove Old Wallpaper

The level of complexity for your wallpaper removal job will depend on several variables, primarily how old wallpaper is, and the quality of the preparation job done prior to installing it. Basically, the newer the wallpaper and the better prepped wall it was applied on, the easier it will be to take off. If your wallpaper is 20 years old or more, you can expect it to be a little bit more work. Fortunately, with the right supplies you can remove old wallpaper with ease. The top items you will need include a scraper, scorer, steamer, and some solvent.

Solvent – All moderate to heavy-duty wallpaper removal projects will require the use of the wallpaper removal solvent. These solutions help break down the adhesive used to install the wallpaper, thus allowing easier peeling, scraping, and overall removal.

Scraper – Regardless of the type of wallpaper you are removing, you are going to need a scraper. There are many types of scrapers to choose from, all ranging in different sizes, designs, and quality. Simply choose a scraper that fits your hand well and is within your budget. If you plan to remove a lot of wallpaper, consider purchasing a scraper with a removable and replaceable blade so you always have a sharp tool to work with.

Scorer – For wallpaper that is well secured to the wall, a scorer tool will help the removal process. Scorer cut several tiny incisions into the wallpaper, which allow wallpaper removal solutions to penetrate faster and work better.

Steamer – A steamer is an excellent tool when wallpaper removal solvent is not enough to break down the adhesive between the wall and the wallpaper. A steamer will penetrate the old wallpaper, and generate hot steam between the layers, which makes peeling and scraping away the old material much easier. Keep in mind though, this is a pricier tool compared to the rest.

Are you having trouble with your wallpaper removal project? Contact Drywall by Renso at 317-269-7319 for professional drywall repair service in Indianapolis, Indiana. We serve both residential and commercial clients all throughout Central Indiana.

You Might Also Like:

Best Practices for Removing Painted Over Wallpaper
Best Removable Wall Adhesives on the Market
How to Prep a Wall for a Heavy Mirror

Call Drywall By Renso at 317-269-7319 Today!

The 3 Main Types of Drywall

Although there are various forms of drywall available on the market, all of which commonly used in various construction applications, there are 3 primary types to be familiar with. Continue reading to learn more about traditional drywall, gypsum board, and Chinese drywall, including which to choose for your intended project or remodel.

Indianapolis Indiana Drywall Contractors
Indianapolis Indiana Drywall Contractors 317-269-7319

Top 3 Most Common Drywall Options

Drywall

Drywall is a construction material made from thin panels of gypsum board. It is used to construct walls and ceilings in residential and commercial structures. Drywall is also called wallboard, gypsum board, and plasterboard. It is called “drywall” because water is not required to use it for wall and ceiling construction.

Gypsum Board

Gypsum board is a universal term used to describe a family of panel-type products that retain a non-combustible core. Gypsum comes from the Greek term, “gypsos”, meaning plaster. It is a naturally-occurring mineral found in sedimentary rock formations. To acquire it, gypsum must be mined. Millions of tons of gypsum are mined every year in North America, and most of it is to manufacture drywall products. Gypsum contains large amounts of water bound in crystalline form, making it less prone to combustion. These boards are layered with gypsum rock and specialty paper material.

Chinese Drywall

Chinese drywall is a term used to reference an environmental health situation involving defective drywall material manufactured in China and imported to the United States in 2001. Laboratory testing revealed that the defective drywall emitted sulfurous gasses, including carbon disulfide, carbonyl sulfide, and hydrogen sulfide.

The U.S. Consumer Product Safety Commission (CPSC) and the Environmental Protection Agency (EPA) began investigating the effects of Chinese drywall in 2009, and concluded that there are short-term health implications from exposure, including respiratory problems, asthma irritations, sore throats, chronic headaches, and more. Long-term exposure can have health implications like chronic fatigue, nausea, loss of appetite, dizziness, and more.

Do you need professional assistance or advice for your drywalling project? Contact Drywall by Renso at 317-269-7319 for professional drywall services and custom drywall texture in Indianapolis, Indiana.

You Should Also Read:

FAQS About Drywall Repair and Installation
Should I Install Basement Drywall On My Own?
How to Spot Improper Drywall Installation

Call Drywall By Renso at 317-269-7319 Today!

Basic Toolbox for Drywall Repair

Whether you are interested in entering the drywall industry professionally, or just have a few drywall projects to tackle at home, you will need to acquire the right tools and supplies to get the job done. Below you will find some of the most common tools and materials found in a basic, rudimentary drywall repair toolbox. Continue reading to learn about them, including what they are, what they do, and where to get them.

Indianapolis Indiana Drywall Contractors 317-269-7319

Put These Items in Your Drywall Repair Toolbox:

Drywall Saw

Saws for drywall come in various shapes, sizes, and serrations. They are used to cut board to size, so the type you need will vary depending on the particular needs of your project. You can choose among double-sided saws, hand saws, fine-finish saws, hacksaws, and more.

Drill

Drills come in several makes and models. You can choose between a cordless or corded drill. Both work well with drywall work. Many professionals prefer cordless for obvious reasons. Drills are used in the drywall industry for installation purposes. Installing gypsum board requires a power drill and screws.

Miter Box

A miter box is a terrific tool used to measure saw strokes and miter cuts. Not only do they provide smooth and even cutting motion, but they also provide safety for your hands and fingers.

Utility Knife

Utility knives are used for cutting, leveling, trimming, and scraping drywall board. They come in multiple fashions and multiple blade sizes. They are usually made of stainless steel, so they are durable and long-lasting.

Joint Knife

Also called a taping knife, a joint knife is the tool used to scoop, scrape, spread, and smooth out drywall mud. It has a wide blade that comes in various sizes, from 4 inches to 14 inches.

Drywall Tape

Drywall tape is an important tool because it creates a physical bond between adjacent sheets of drywall. It is the surface to which the plaster sticks to. It provides a seamless surface for drywall installation and repairs and more.

Mud Pans

A mud pan is the flat plate, usually paper or metal, that holds spackle and mud. They come in all different shapes and sizes. Some can hold up to ½ a gallon of drywall mud.

Drywall Screws

These are special screws used to hold up gypsum board. They have extra course threads that stay secure in drywall. There are several kinds, all with different sizes and applications, including fine-head, self-drilling, pan-head, and more.

Joint Compound

This is a white powder containing gypsum board dust that is combined with water to produce a mud. This mud is then used to seal joints between drywall sheets. This is also called mud, spackle, or plaster. It is used to create the smooth, level 5 drywall finishes you see in quality constructed buildings and homes.

Is your drywalling project proving to be more than you can handle on your own? Contact Drywall by Renso at 317-269-7319 for professional drywall services in Indianapolis, Indiana. We serve residential and commercial clients.

You Might Also Like:

How to Repair a Hole in the Wall From a Door Handle
Tips for Avoiding DIY Drywall Mistakes
What You Need to Cut Drywall in a Short Amount of Time

Call Drywall By Renso at 317-269-7319 Today!

Drywall Sealing Guide for Do It Yourself Homeowners

If you own a home, chances are you have drywall. Most homes and offices are constructed with sheetrock, gypsum board, or as we like to call it here in Indiana, drywall. The best way to ensure your drywall is protected and promote longevity is to seal it with a quality drywall sealer. If you are a hands-on, do-it-yourself (DIY) kind of person, you might be successful all on your own. Otherwise, please hire a professional drywall contractor for drywall sealing services.

For now, continue below for a guide to sealing drywall, including what you need and where to get professional assistance if you find the job too overwhelming after you begin.

Indianapolis Drywall Painting Contractors 317-269-7319

Use a Quality Primer Paint for Sealing Drywall

Because the different layers of drywall, such as the tape, seams, and joint compound, have different porosity levels, it is necessary to properly seal them with a drywall sealer, which is just a good quality primer paint. You must choose a kind that is specifically for drywall, which usually comes in white or similar flat-like colors. If you are painting a dark color on the wall, you will use a darker primer. Talk to your home improvement or paint store clerk for advice on which primer is best for your intended application, as outdoor, semi-outdoor, and indoor drywall may require different needs depending on the region you live and more.

What You Need:

˃ Latex Primer Paint for Drywall
˃ 3/8 in. Rolling Brush
˃ 3 in. Hand Brush
˃ Painters’ Tape
˃ Paint Tray
˃ Tarp
˃ Large Sponge
˃ Protective Gear

How to Prepare for Drywall Sealing:

Dampen your sponge with clean water and wipe down the drywall. Eliminate any residual sand or dust from the installation and finishing.

Locate any wall burrs or holes, and sand and refill them. Then repeat step one.

Protect all of your molding, woodwork, and ceiling areas by lining them with your painters’ tape. Be sure to get electrical outlets and wall fixtures.

Cover the surrounding area, including furniture, appliances, fireplace, cabinets, carpeting, flooring, windows, and more, using your tarp. Plastic or cloth will do.

How to Seal Drywall:

Using your latex primer paint, begin by painting the edges and corners of your surface area. Then paint around all wall fixtures and outlets.

Paint the remaining walls using your rolling brush. Begin with vertical and diagonal strokes, creating a “W” or “M”, and then work your way from top to bottom filling in the spaces.

Although one coat is usually enough to suffice, it is recommended by most professionals to apply two full coats of primer paint to your drywall for a proper seal.

Are you looking for some professional help with drywall work? Contact Drywall by Renso at 317-269-7319 for professional drywall services in Indianapolis, Indiana.

You Should Also Read:

How to Pick the Perfect Paint Color
5 Steps to Properly Painting Over New Plasterboard
What Do I Need to Repair a Hole in the Wall

Call Drywall By Renso at 317-269-7319 Today!

The Meaning Behind the Color of Mold on Your Walls

Mold is everywhere. It’s all around us. But there is a difference between safe mold exposure, like Bleu cheese, and dangerous mold exposure, like aspergillus. When you start to spot mold growing in your house, it is important to address the issue as soon as possible in order to prevent upper respiratory illness and other health implications. If you have mold growing on your drywall, it is an even more pressing matter, and should be inspected right away. To preface your appointment with a mold remediation company, it helps to find out which type of mold you might be dealing with. You can usually do this by simply pinpointing its color.

Continue reading to learn what the color of the mold on your wall is and what’s likely causing it, as well as how to repair moldy walls after remediation work.

Indianapolis Indiana Drywall Replacement
Indianapolis Indiana Drywall Replacement 317-269-7319

What Color of Mold Do You Have on Your Drywall?

Greenish-Black – Mold that appears greenish-black in color could be Stachbotrys genus, which is also known as “black mold.” Exposure to such mold has been linked to serious health conditions. It commonly grows on high-cellulose, low-nitrogen surfaces, such as drywall, gypsum board, paper, dust and lint that is constantly exposed to moisture.

Blue, Green, or White – Molds of these colors generally point to the Penicillium genus. Several years ago, this species of mold was used to make penicillin. Nowadays, it is usually found growing on food or on walls. It can cause allergic reactions, allergies, and other respiratory problems.

Olive Green, Gray, Brown, or Black – Molds that appear in these color formations likely belong to the Cladosporium genus. You can find this mold growing indoors and outdoors on things like plant leaves, soil, walls, insulation, and damp carpeting. According to the CDC, they are most commonly linked to minor health complications like skin, eye, and sinus infections; but they have also been known to brain infections like fungal meningitis.

Pink – Pink mold is often seen in the bathroom or kitchen, but it is not actually mold at all. It is a bacterium called Serratia marcescens. Although not a mold, it still presents hygiene and health issues, like urinary tract and respiratory infections.

Green – Green mold is very vague since it can be any kind of unpleasant fungus. There are literally thousands of species of green mold, so green mold doesn’t tell you much, expect that it needs to be removed.

Yellow, Green or Black – Mold that appears yellow, green, or black could possibly be Aspergillus mold. According to the CDC, we breathe these molds in almost every day without getting sick. However, concentrated exposure can be hazardous, especially for those with existing lung problems or suppressed immune systems. In individuals like these, it can cause aspergillosis, which presents itself as coughing, wheezing, and sinus inflammation.

Do you need drywall replacement after your mold remediation work is complete? Contact Drywall by Renso at 317-269-7319 for professional drywall services and custom drywall texture in Indianapolis, Indiana. We serve both residential and commercial clients.  Request a free estimate, today!

You Might Also Like:

What You Need to Know About Wet Walls and Mold Growth
Tips for Mildew and Mold Protection After Heavy Rains
How to Remove Water Damaged Drywall

Call Drywall By Renso at 317-269-7319 Today!