Look Up With Delight: Finding Expert Ceiling Repair in Indianapolis

Your ceiling is more than just a part of your home—it protects your space, provides insulation, and contributes to your property’s overall aesthetic. When problems like cracks, sagging, or water damage arise, acting quickly can save you from costly repairs down the line. But choosing the right ceiling repair service is critical. This guide will help homeowners and property managers understand how to identify problems, find expert drywall ceiling repair professionals, and ensure quality craftsmanship.

Call 317-269-7319 for Expert Ceiling Repair and Replacement in Indianapolis Indiana

Why Timely Ceiling Repairs Matter

Ceiling damage often starts off small—cracks, stains, or slight sagging. At first, these issues may seem like minor inconveniences. However, neglecting them can worsen the problem, leading to structural instability, increased repair costs, or even safety risks.

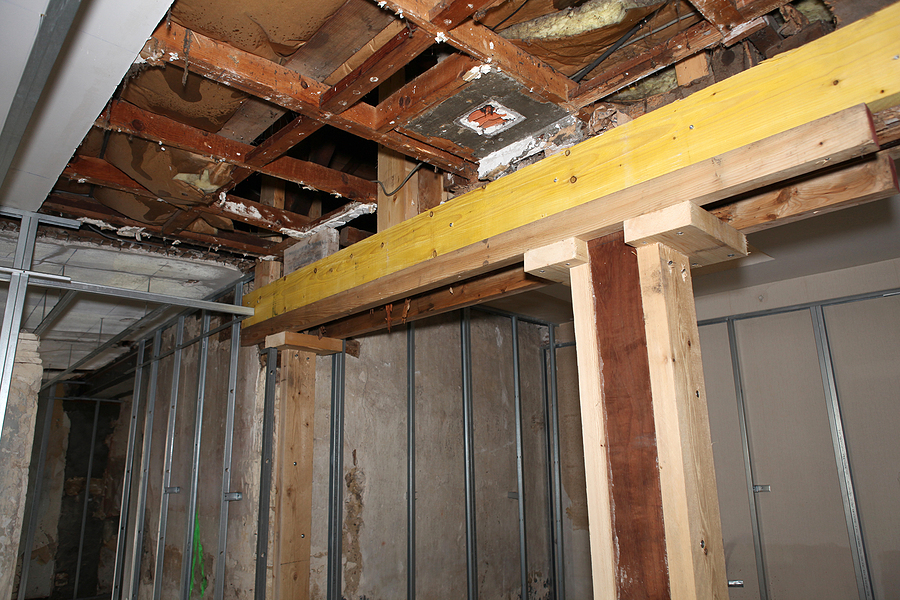
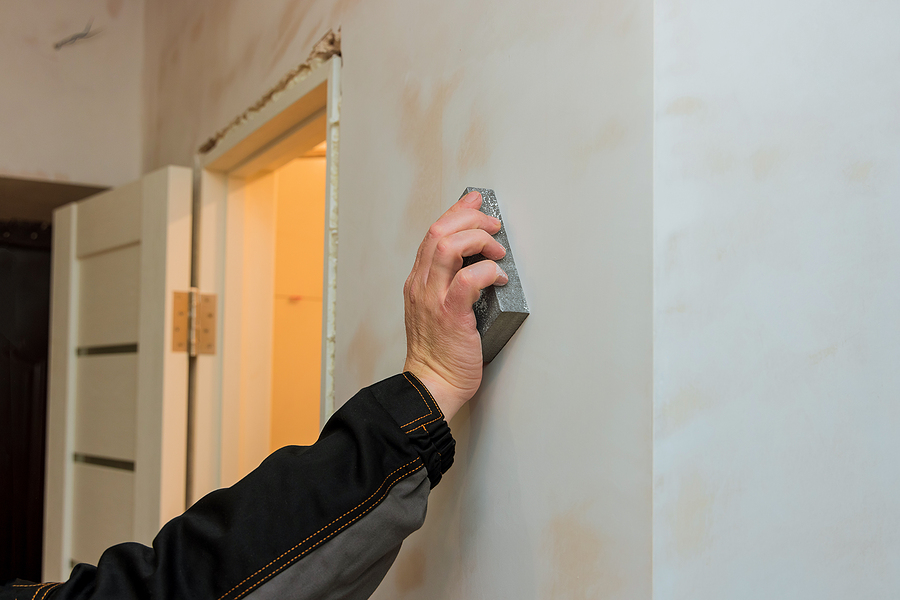
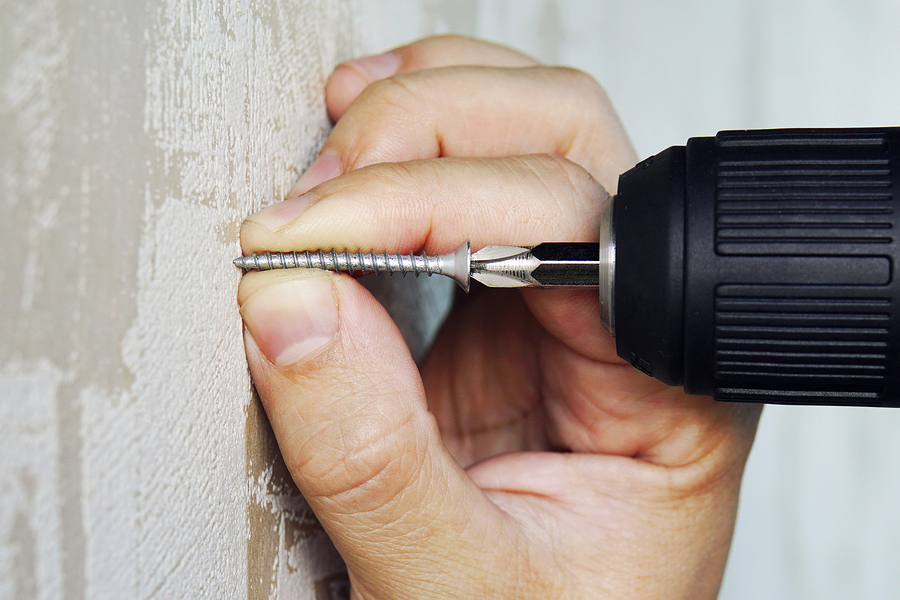
While you may be tempted to fix it yourself, ceiling repair often requires specialized skills. DIY fixes can fail to address the root of the issue, leading to recurring problems. That’s why working with professional drywall and ceiling repair experts is essential to getting the job done right.

Signs Your Ceiling Needs Repair

Not sure if your ceiling requires immediate attention? Here are the most common signs that indicate it’s time to call a ceiling repair service:

Visible Cracks

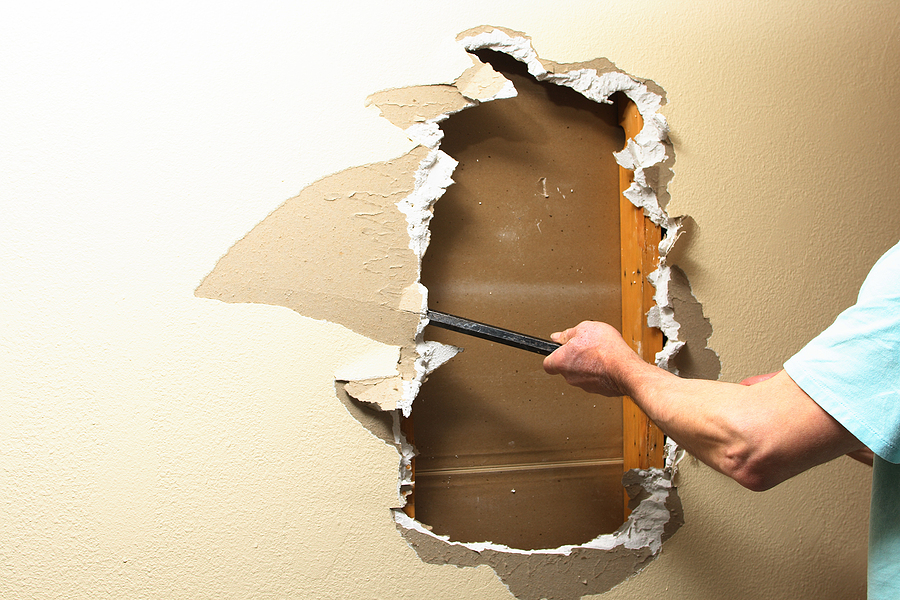
Small hairline cracks may seem harmless but can indicate foundation shifts or structural issues. Wider ceiling cracks might result from more severe problems, like excessive weight or improper installation.

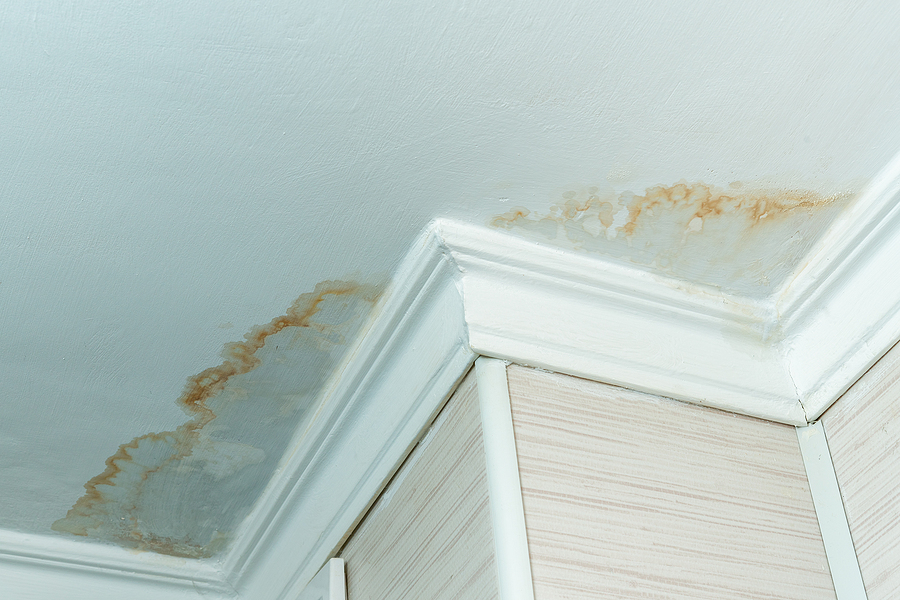
Water Stains and Damage

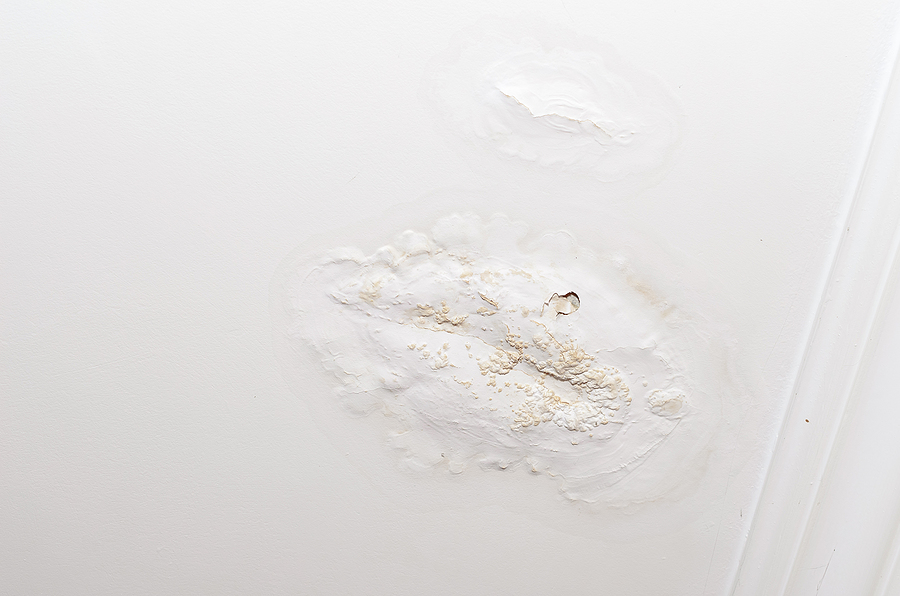
Water damage often appears as yellow or brown stains on your ceiling. These unsightly spots are usually caused by roof leaks or plumbing issues above the ceiling. Left unaddressed, a ceiling leak can lead to mold growth, which poses health risks.

Sagging Ceiling

A sagging ceiling is an urgent repair issue. It may result from water damage, improper installation, or even structural failure. If your ceiling seems to sag or dip lower than usual, it could potentially collapse without warning.

Peeling Paint or Plaster

Peeling paint or plaster is often a sign of excessive moisture or poor ventilation. It’s more than just an aesthetic issue—it could signal water damage or a developing ceiling leak.

Unusual Noises

Does your ceiling creak or groan? This could signal structural stresses, poorly installed drywall, or even pests hiding in your ceiling space.

Key Qualities to Look for in an Expert Ceiling Repair Service

When it comes to ceiling repairs, not all service providers are created equal. To ensure the best results, look for these key qualities in a ceiling repair professional:

Experience and Expertise

Choose a company with years of experience solving issues like sagging ceilings, water damage, and drywall repair. Knowledgeable contractors will quickly diagnose problems and recommend effective solutions.

Certifications and Insurance

Verify that the ceiling repair service is licensed and insured. This guarantees that the professionals working on your property have the necessary qualifications and that you’re protected if something goes wrong.

Positive Reviews and Reputation

Do some research by checking customer reviews on platforms like Google, Yelp, or Angi. Look for testimonials from people in your area who had similar ceiling damage.

Detailed Estimates

Top-notch companies provide clear, written estimates before starting any work. Transparency ensures there are no unexpected costs and that you understand exactly what you’re paying for.

Specialized Equipment

For issues like ceiling leaks or sagging, the right tools matter. Ensure the team you’re hiring has access to modern techniques and equipment to handle complex ceiling repairs efficiently.

How to Research and Shortlist Local Services

Finding the right ceiling repair service near you can seem overwhelming, but these steps make the process manageable:

1. Search for Local Services

Use search terms like “ceiling repair services in Indianapolis” or “local drywall repair in [your township]” to find companies nearby. Many professionals focus on serving local homeowners and property managers, giving them an edge in understanding common problems in your community.

2. Ask for Recommendations

Word-of-mouth referrals are invaluable. Ask friends, family, or neighbors about trusted ceiling repair professionals they’ve worked with.

3. Check Credentials

Visit the company’s website or social media profiles to confirm certifications, licenses, and positive reviews. The better the track record, the more likely you’ll receive quality results.

4. Compare Estimates

Once you’ve shortlisted a few options, request quotes from each service provider. Compare pricing but don’t choose based solely on the lowest bid—consider other factors like experience and customer reviews.

Questions to Ask Before Hiring a Ceiling Repair Professional

Before committing to a ceiling repair service, schedule a consultation and ask these critical questions:

What’s causing the ceiling damage?

Their ability to explain the issue in detail will reflect their expertise.

What is your experience with similar repairs?

This ensures they have successfully handled similar projects in the past.

How long will the repair take?

Understand the timeline upfront to minimize disruption.

Do you offer any warranties?

Reputable companies typically guarantee their workmanship for added peace of mind.

Can you provide references?

Speaking with past clients lets you gauge the quality of their service.

Why Hire Experts Instead of DIY?

While it might be tempting to tackle ceiling repairs yourself, hiring an expert ceiling repair service is almost always the better choice. Here’s why:

  • Safety First: Without proper tools or training, you risk injury while attempting ceiling repairs. Professionals follow safety protocols to eliminate hazards.
  • Long-Lasting Results: Experts address both the symptoms and the root cause of the damage, preventing recurring issues.
  • Saves Time and Money: DIY attempts can lead to further damage or failed fixes, costing more in the long run. Hiring professionals from the start ensures efficiency.
  • Aesthetic Appeal: Skilled professionals ensure your ceiling looks as good as new, preserving your property’s value.

Wrapping Up

Your ceiling is too important to leave to chance. Whether it’s water damage, a sagging ceiling, or unsightly cracks, addressing these issues with the help of qualified professionals will save you time, money, and stress.

If you’re located in Indianapolis or surrounding areas, consider connecting with trusted local drywall repair experts for a consultation. They can assess your ceiling damage and provide a tailored plan to restore your space. Schedule a free estimate today and enjoy worry-free living under a beautifully restored ceiling.

Are your ceilings suffering from some structural damage? Perhaps they’re a little outdated? We can help. Contact Drywall by AMFA at 317-269-7319 for expert ceiling repair in Indianapolis, Indiana. We serve both residential and commercial clients all throughout Central Indiana.

Related Posts:

Tips for Replacing Damaged Drywall After Plumbing Leaks
Replacing Drywall After a Pest Infestation: What You Need to Know
How to Find Reliable Drywall Contractors: A Comprehensive Guide

Why You Should Schedule a Drywall Inspection If You Suspect Structural Issues 

When it comes to the structural integrity of your home or property, drywall often plays a more crucial role than you might realize. While it may seem like just a layer of material covering the walls, drywall is a key component in maintaining your home’s safety and stability. However, visible issues in drywall are often symptoms of larger structural concerns lurking below the surface. 

If you’re noticing unusual cracks, water stains, or other irregularities, it might be time to schedule a drywall inspection. This blog will walk you through the signs to watch for, why these inspections are important, and what you can do to protect your property and your peace of mind. 

Call 317-269-7319 for Drywall Repair in Indianapolis
Call 317-269-7319 for Trusted Drywall Repair in Indianapolis

Signs of Structural Issues in Drywall 

Spotting potential structural issues early is essential. Your drywall can reveal a lot about the health of your home. Here are the most common signs to look for, along with what they could mean:

Cracks 

Cracks in your drywall, especially around windows and doors, often indicate settling of the foundation or even larger structural shifts. Small hairline cracks are common in aging houses, but wider or stair-step cracks signal something more serious. 

Bulges and Warping 

If sections of your drywall appear uneven, bulging, or warped, it may mean your home is dealing with moisture problems or even deeper foundational issues. Bulges often go hand-in-hand with water damage and can eventually lead to mold growth. 

Water Stains or Discoloration 

Nothing catches your eye faster than a brown water stain on a white wall. Water damage is often the first visible hint of leaking pipes, roof problems, or improper drainage. If left unaddressed, this can weaken structural materials and foster mold growth over time. 

Visible Mold 

Mold on drywall is a serious health risk and a glaring symptom of hidden moisture problems. This could mean anything from a small leak to widespread water damage compromising building materials and weakening its structure. 

Sagging Ceilings or Walls 

Drywall that appears to sag or pull away from its frame could indicate damage to the support structures, such as weakened studs or joists. Sagging typically suggests severe damage or long-term neglect. 

Why Early Detection Matters 

Structural issues, if not addressed promptly, can evolve into major safety hazards for you, your family, or your tenants. Beyond safety risks, the costs of ignoring drywall problems can skyrocket. Here’s why early detection is crucial:

Cost Savings 

A drywall inspection could save you thousands of dollars in repair costs. Small issues like minor cracks or leaks are much easier (and cheaper) to address than large-scale replacements once problems escalate. 

Preserves Home Value 

Homes with unresolved structural problems often lose value and become hard to sell. By addressing problems early, you protect your investment and maintain the property’s market value. 

Safety First 

Neglected structural issues can go on to compromise the safety of your home. Sagging walls and ceilings or unchecked water damage can lead to collapse, posing serious risks to occupants. 

What Happens During a Drywall Inspection? 

Curious about what to expect in a drywall inspection? Here’s how professionals examine and assess your walls and ceilings for structural issues:

Step 1. Initial Assessment 

A professional starts by asking you about signs you’ve noticed. They’ll look at problem areas, such as cracks or discoloration, and evaluate their severity. 

Step 2. Advanced Tools 

Modern drywall inspections often involve advanced tools like moisture meters, infrared cameras, and thermal imaging to detect hidden problems like water damage or airflow leaks. 

Step 3. Structural Analysis 

Inspectors often check beyond the drywall to evaluate the underlying structural components, such as beams, studs, or insulation. This ensures a thorough evaluation. 

Step 4. Detailed Report 

After the inspection, you’ll receive a detailed report with findings, along with recommendations for repairs, if needed. 

Choosing the Right Drywall Inspection Service 

When it comes to something as important as your home, choosing the right professional is key. Here’s how to select a reputable drywall service:

Experience Matters 

Look for inspectors with years of experience and certifications in structural analysis or home inspections. Their expertise ensures accurate assessments. 

Reviews and References 

Always check online reviews or ask for references to gauge their reputation. The more satisfied customers, the better. 

Specialized Tools 

Ensure the service uses advanced inspection technology like infrared cameras and moisture meters for precise results. 

Ask the Right Questions 

Before hiring, ask questions like:

  • What’s your experience with structural drywall inspections?
  • Do you provide a detailed report with findings and recommendations?
  • Can you walk me through the inspection process? 

What Happens After an Inspection? 

The results of a drywall inspection determine your next steps. Here’s how to approach common scenarios. 

If Issues Are Found 

  • Prioritize Repairs: Address safety concerns first, like compromised supports or extensive mold. 
  • Create a Budget: Consult multiple contractors to get cost estimates for needed repairs or replacements. 
  • Follow Up: Schedule a follow-up inspection after repairs are complete to ensure the issue is resolved. 

If No Issues Are Found 

  • Stay Vigilant: Just because everything looks good now doesn’t mean you shouldn’t remain attentive to future signs of damage. 
  • Routine Maintenance: Keep up with regular home maintenance and inspections to prevent future problems. 

Proactiveness is always the way forward when it comes to home safety. 

Conclusion

The structural integrity of your home or property begins with the strongest foundation—and drywall plays a vital role. By recognizing the signs of structural damage, taking advantage of early detection, and hiring a qualified inspector, you can ensure your home remains safe, strong, and valuable for years to come. 

Don’t wait for small cracks to turn into big problems. Schedule a drywall inspection today and safeguard your home’s future.  At Drywall By AMFA, we specialize in professional drywall repair services in Indianapolis, ensuring your walls and ceilings are as good as new. Contact us today at 317-269-7319  for a consultation and let our experts handle all your drywall repair needs.

Related Posts:

Tips for Replacing Damaged Drywall After Plumbing Leaks
Replacing Drywall After a Pest Infestation: What You Need to Know
Detecting Water Damage in the Home: Signs, Solutions, and Prevention

Replacing Drywall After a Pest Infestation: What You Need to Know

Pest infestations can wreak havoc in your home, and one of the most affected areas is often your drywall. From termites to rodents, many pests dig, chew, or burrow into walls, leaving your home structurally compromised and your family exposed to health hazards. 

If you’re dealing with pest-damaged walls, it’s essential to act quickly. Prompt and professional drywall replacement restores your home’s safety, functionality, and appearance while preventing further issues. But how do you know when it’s time to replace your drywall, and what should you expect from the process? This guide dives into everything you need to know, from identifying the signs of a pest problem to choosing the right drywall repair service. 

Call 317-269-7319 for Professional Drywall Replacement Service in Indianapolis

How to Identify a Pest Infestation Inside Your Walls 

Drywall damage isn’t always immediately obvious, especially if pests are hidden inside your walls. Knowing the signs of common pests and their impact on drywall is crucial to catching the problem early. 

Common Culprits That Damage Drywall 

  • Termites – These notorious pests eat through wood and drywall paper, leaving behind small, pencil-thin holes or sagging drywall. 
  • Rodents – Mice and rats chew drywall to create passages, often leaving gnaw marks and shredded materials around entry points. 
  • Carpenter Ants – Similar to termites, they excavate wood and drywall, leaving behind piles of fine, sawdust-like material. 
  • Cockroaches – Their presence is often noticeable due to grease trails, droppings, or odors in hidden areas, including walls. 
  • Bees and Wasps – Occasionally, these insects create nests or hives inside walls, leaving visible damage around the entrances. 
  • Squirrels and Bats – Even these critters can enter walls through small openings and create nests, often leaving behind feces and urine that damage drywall. 

How to Confirm Hidden Infestations 

While the physical signs of wall damage might be subtle, there are ways to confirm an infestation:

  • Sounds: Scratching, rustling, or chewing noises could indicate pests behind walls. 
  • Stains: Discolored patches on drywall could be from pest excretions or secretions. 
  • Smells: Musty or foul smells can signal a pest problem, especially with rodents. 
  • Professional Inspection: When in doubt, hiring a pest control expert can help pinpoint the issue. 

The Risks of Delaying Drywall Replacement 

Ignoring pest-damaged drywall isn’t just an aesthetic issue—it can have serious consequences for your home and health. 

Health Hazards of Compromised Drywall 

  • Mold Growth: Damaged drywall is prone to moisture absorption, creating a breeding ground for mold that can harm respiratory health. 
  • Allergens: Pest droppings, fur, and remains trapped in the walls introduce allergens, aggravating conditions like asthma. 

Structural and Financial Impact 

  • Weakened Walls: Severe pest infestations can erode the integrity of your walls, posing risks of collapse or further damage. 
  • Decreased Property Value: Visible wall damage reduces your home’s market value, meaning lost money down the line. 
  • Expensive Repairs: The longer you wait, the worse the damage becomes—leading to costlier and more complex repairs. 

The Drywall Replacement Process

Replacing drywall after a pest infestation involves more than patching up cracks. Here’s a step-by-step guide to what you can expect. 

Step 1: Eliminate the Source of the Infestation 

Before starting drywall repairs, enlist pest control professionals to completely eliminate the pests. This prevents re-infestation after the replacement.

Step 2: Assess the Damage 

A skilled drywall service will inspect the area to determine how extensive the damage is and whether only certain sections or the entire wall requires replacing. 

Step 3: Remove Damaged Drywall 

Damaged panels are carefully removed, along with any affected insulation or surrounding materials.

Step 4: Install New Drywall 

Professionals will cut and place new drywall panels that seamlessly fit into the damaged area. 

Step 5: Finishing Touches 

Once installed, the new drywall is taped, mudded, and sanded to achieve a smooth finish before priming and painting

Step 6: Use Eco-Friendly and Pest-Resistant Materials 

Some professionals offer pest-resistant drywall and Eco-friendly materials to minimize future risks. Ask your contractor about these options for added peace of mind. 

Finding the Best Drywall Replacement Service 

Not all drywall services are created equal, and finding the right one ensures the job is done safely and efficiently. 

What to Look For in a Professional Service 

  • Experience: Choose companies with extensive experience in drywall replacement, particularly after pest damage. 
  • Reputation: Research reviews and testimonials to evaluate their reliability and quality of work. 
  • Warranties: Look for services that offer guaranteed satisfaction or warranties on their work. 
  • Material Options: Ask if they offer pest-resistant drywall and quality paints that last. 

Questions to Ask Before Hiring 

  • Can you provide a detailed estimate? 
  • How long will the replacement process take? 
  • Do you have experience with pest-damaged walls? 
  • What precautions do you take to prevent future infestations? 

Preventive Steps to Avoid Future Wall Damage 

Once your drywall is replaced, keeping pests at bay is vital to maintaining structural integrity and preserving your home. 

Tips for Preventing Infestations 

  • Seal Entry Points: Examine your walls, floors, and ceilings for cracks or gaps where pests can enter and seal them with caulk or other durable materials. 
  • Maintain Cleanliness: Regularly clean basements, attics, and other areas prone to pests to eliminate food sources. 
  • Trim Surrounding Vegetation: Overhanging branches or shrubs can create a bridge for pests to access your home. 
  • Regular Inspections and Maintenance: Schedule annual pest inspections and check your walls for signs of new damage. Address small issues early to avoid more significant problems down the line. 

Conclusion

Pest infestations can feel overwhelming, but the solution doesn’t have to be. Promptly replacing damaged drywall restores your home’s structural health and ensures it remains a safe place for your family to live. 

If your walls have suffered pest damage, trust the experts to handle the job. Don’t wait—start your drywall replacement with a professional service today to avoid further risks and regain peace of mind. Know someone dealing with pest-damaged walls? Share this drywall blog to help them take action! 

For your drywall needs, consider reaching out to a trusted drywall contractor. Your home deserves the expertise and attention to detail that only a professional can provide. Contact Drywall By AMFA at 317-269-7319 to learn more about our expert drywall services in Indianapolis, Indiana. We serve residential and commercial clients throughout the Greater Indy areas. Request an estimate, today!

Related Posts:

Safeguard Your Space: Simple Tips to Prevent Wall Damage
Detecting Water Damage in the Home: Signs, Solutions, and Prevention
Drywall Problems Decoded: A Guide to Drywall Repair and Maintenance

Sagging or Bulging Walls: Causes, Fixes, and Prevention

In the world of home maintenance, a key aspect that often gets overlooked is something quite literally right under our noses — our walls. For homeowners, sagging or bulging drywall can be an unsettling sight. Not only can it mar the beauty of your home, but it can also indicate underlying issues that may need immediate attention. This blog post will guide you through understanding the causes of drywall imperfections and what you can do about them.

Call 317-269-7319 for Professional Drywall Damage Repair in Indianapolis Indiana
Call 317-269-7319 for Professional Drywall Water Damage Repair in Indianapolis Indiana

The Problem With Sagging or Bulging Walls

Sagging or bulging drywall is more common than you might think. For many homeowners, the first sign is a slight dip or protrusion in the wall. Left unchecked, these issues can lead to significant problems down the line. Drywall issues are not just cosmetic; they can be a sign of moisture intrusion, structural inadequacies, or even poor installation practices. Knowing how to spot these signs early can save you time, effort, and money.

Sagging vs. Bulging

At first glance, sagging and bulging might seem identical, but they arise from different sources. Sagging drywall typically hangs downwards, indicating a loss of support or integrity in the ceiling or wall. Bulging, on the other hand, pushes outward, suggesting pressure from behind the drywall. Identifying which issue you’re dealing with is crucial for determining the right fix. Recognizing these differences can help you address the root cause more effectively.

Top Causes of Sagging Drywall

Water Damage

One of the most common culprits behind sagging drywall is water damage. Whether from a leaky roof, plumbing issues, or poor ventilation, water that seeps into drywall causes it to weaken and sag. Homeowners should watch for water stains, soft spots, or a musty odor—all indicators of moisture issues. Addressing water damage swiftly is essential to prevent further deterioration.

Structural Issues

Structural inadequacies, such as insufficient support beams or shifting foundations, can lead to sagging drywall. If your home is settling unevenly, it can create stress points that cause walls to sag. In such cases, the drywall is merely a symptom of a larger problem. It’s important to consult a structural engineer to assess and resolve these foundational issues before they worsen.

Poor Installation

Drywall installation might seem straightforward, but improper techniques can lead to sagging over time. Using incorrect fasteners, failing to secure joints properly, or inadequate spacing can all result in sagging. Homeowners planning DIY projects should pay close attention to installation guidelines or hire a professional to ensure a proper job.

Top Causes of Bulging Walls

Pressure Buildup Behind the Wall

Bulging walls often occur when there is pressure building up behind the drywall. This can be due to plumbing leaks, pest infestations, or even insulation issues. These pressures push the drywall outward, creating a bulge. Investigating the source of pressure is key to preventing further damage and ensuring your home’s structural integrity.

Humidity and Temperature Changes

Fluctuations in humidity and temperature can cause drywall to expand and contract, leading to bulging. This is particularly common in regions with extreme weather changes. Installing a dehumidifier or maintaining a consistent temperature in your home can mitigate these effects. Keeping an eye on climate control can protect your walls and preserve their smooth appearance.

Anchoring and Fastening Mistakes

Sometimes, bulging can result from improper anchoring during the drywall installation process. If nails or screws are driven too deeply or spaced incorrectly, the drywall may not hold up under pressure. Ensuring correct fastening techniques can prevent these issues. Checking installation work or consulting a professional can safeguard against future bulging problems.

How to Prevent These Wall Damages

Regular Maintenance Goes a Long Way

Regular inspections can help catch potential issues before they become major problems. Look for signs like cracks, discoloration, or soft spots. Developing a maintenance routine can keep your walls in tip-top shape. Regular check-ins with a professional can provide an expert eye to catch things you might have missed.

Prompt Attention to Current Problems

If you notice sagging or bulging, prompt action is crucial. Ignoring these signs can lead to more extensive damage. Address issues like water leaks or structural inadequacies immediately to avoid the problem from escalating. Quick responses can save money and stress in the long run.

Hiring Professionals for an Expert Touch

While some fixes can be DIY, others require professional expertise. When in doubt, consult a drywall repair expert. Professionals can provide thorough inspections, identify underlying causes, and offer long-term solutions. Investing in professional services ensures quality and peace of mind.

DIY vs. Professional Wall Repair

Simple DIY Fixes You Can Try

For minor issues, such as small cracks or localized sags, DIY repairs can be effective. Patch kits and spackle are handy tools for small jobs. However, it’s important to follow instructions carefully and ensure all materials are secure. Practicing caution and patience can yield rewarding results.

When to Call the Pros

If the damage is extensive or linked to structural issues, it’s best to call in professionals. Attempting major repairs without the right skills can exacerbate the problem. Professionals have the tools and experience necessary to handle complex situations. Relying on expert intervention can prevent costly mistakes and ensure lasting repairs.

Balancing Cost and Quality

Consider the balance between cost and quality when deciding on DIY vs. professional repair. While DIY might save money initially, professional services offer expertise that ensures a longer-lasting fix. Evaluating the severity of the issue and your own capabilities can guide your decision. A thoughtful approach can protect your home and your budget.

Conclusion

Sagging or bulging drywall is more than just an eyesore—it’s a warning sign of potential underlying issues. Addressing these problems promptly can maintain your home’s beauty and safety. Regular maintenance, early detection, and professional guidance are key to preventing drywall issues. For homeowners seeking peace of mind, taking proactive steps today can safeguard their future.

If you’re dealing with drywall issues or want to ensure your home stays in great shape, reach out to a local and trusted drywall repair service. They offer comprehensive solutions to help you maintain a safe and beautiful home environment. Request a consultation and take the first step towards protecting your investment.

Are your walls showing signs of water damage or structural issues like sagging and bulging? Let us check it out for you. Contact Drywall By AMFA at 317-269-7319 to learn more about our expert drywall services in Indianapolis, Indiana. We serve residential and commercial clients throughout the Greater Indy areas. Request an estimate, today!

Related Posts:

Fundamental Information About Installing Water-Proof Drywall
Detecting Water Damage in the Home: Signs, Solutions, and Prevention
Tips for Drywall Water Damage Clean Up

The Perfect Finish: Mastering Drywall Sanding for DIY Enthusiasts

Are you a DIY enthusiast, home renovator, or Dad trying to fix a hole in the wall? Achieving a flawless drywall finish can be the key to transforming any space. Proper drywall preparation is crucial in the renovation process, ensuring that your walls look smooth and professional. In this comprehensive guide, we’ll explore the ins and outs of sanding drywall, offering valuable tips, techniques, and step-by-step instructions to help you achieve the perfect finish.

Call 317-269-7319 for Professional Drywall Repair and Installation in Indianapolis Indiana

A Preview to the Drywall Sanding Process

Before we jump into the how-to, let’s familiarize ourselves with the basics of sanding drywall. The sanding process involves using various types of sandpaper and sanding tools to smooth out the surface of drywall joints, corners, and imperfections. The goal is to create a seamless and even surface that blends perfectly with the surrounding wall.

Types of Sandpapers

The key to a successful sanding job lies in choosing the right type of sandpaper. Generally, sandpapers com e in different grits, ranging from coarse to fine. Coarse grits (40-80) are ideal for initial sanding to remove excess joint compound quickly. Medium grits (100-150) are used for smoothing out the surface, while fine grits (180-220) provide that final polished finish.

Essential Sanding Tools

To achieve professional results, it’s essential to have the right tools on hand. Here are some must-have sanding tools for drywall:

  • Sanding Block: A simple yet effective tool for manual sanding, providing better control over pressure.
  • Pole Sander: Ideal for reaching high or extended areas, ensuring even sanding across large surfaces.
  • Orbital Sander: A power tool that makes quick work of extensive sanding tasks, delivering consistent results.
  • Sanding Sponge: Perfect for detailed work and corners, offering flexibility and precision.

Step-by-Step Guide to Sanding Drywall

Mastering drywall sanding requires a systematic approach. Follow these steps to achieve a smooth and professional finish:

Initial Preparation

Preparation is the key to success in any renovation project. Start by ensuring the drywall surface is clean and free of any debris. Cover the floors and furniture with drop cloths to protect them from dust. Wear protective gear, including a mask, goggles, and gloves, to safeguard yourself from dust particles.

Applying Joint Compound

Before sanding, apply a thin layer of joint compound to the seams and screw holes. Use a taping knife to feather the edges, creating a smooth transition between the drywall and compound. Allow the joint compound to dry completely before proceeding to the next step.

Sanding the Surface

Begin sanding the dried joint compound using coarse grit sandpaper. Hold the sanding block or pole sander at a slight angle and use light pressure. Move in circular motions to avoid creating grooves or uneven surfaces. Once the majority of the compound is smoothed out, switch to medium grit sandpaper for further refinement.

Blending and Feathering

To achieve a seamless finish, focus on blending and feathering the edges of the joint compound. Use fine grit sandpaper to gently sand the edges, ensuring they blend smoothly with the surrounding drywall. This step is crucial to creating an even surface that hides the seams and imperfections.

Tips and Techniques for a Professional Finish

Achieving a flawless drywall finish takes practice and attention to detail. Here are some tips and techniques to help you along the way:

Avoiding Common Mistakes

One common mistake is applying too much pressure while sanding, leading to uneven surfaces. Instead, use light, consistent pressure to avoid creating indentations. Additionally, be cautious not to over-sand the joint compound, which can result in exposed seams.

Checking for Smoothness

Periodically check the smoothness of the surface by running your hand over it. If you feel any rough spots or ridges, continue sanding until the surface feels even and polished. Using a bright light source can also help highlight any imperfections that need further attention.

Sanding the Corners

Sanding corners can be challenging, but using a sanding sponge can make the task easier. Fold the sponge to create a sharp edge and gently sand the corners in a back-and-forth motion. This will help achieve a clean and sharp corner finish.

Importance of Dust Control and Safety Measures

Sanding drywall generates a significant amount of dust, which can be harmful if not properly managed. Implementing dust control measures is essential to ensure a safe and clean working environment.

Using a Dust Extractor

Investing in a dust extractor or vacuum with a HEPA filter can significantly reduce dust levels. Attach the extractor to your sanding tools to capture dust particles at the source, preventing them from spreading throughout the room.

Sealing Off the Work Area

Seal off the work area using plastic sheeting and painter’s tape to contain the dust. Close doors and windows to prevent dust from circulating into other parts of your home. After sanding, use a damp cloth to wipe down surfaces and remove any remaining dust.

Personal Protective Equipment (PPE)

Always wear appropriate PPE, including a dust mask, safety goggles, and gloves. This protective gear will shield you from inhaling dust particles and protect your eyes and hands from irritation.

Conclusion

Mastering the art of drywall sanding is a valuable skill for any DIY enthusiast, home renovator, or interior designer. By following the step-by-step guide and implementing the tips and techniques outlined in this post, you can achieve a smooth and professional finish that enhances the overall look of your space.

If you’re ready to take your sanding skills to the next level, don’t hesitate to reach out to our expert team for personalized advice and assistance. Contact Drywall by AMFA at 317-269-7319 for professional drywall services in Indianapolis, Indiana. Whether you’re tackling a small repair or a large-scale renovation, we’re here to help you achieve the perfect finish.

Related Posts:

Avoid Drywall Dust With Wet Sanding
Tips for Avoiding DIY Drywall Mistakes
How to Cut Drywall With Just Two Simple Tools

Detecting Water Damage in the Home: Signs, Solutions, and Prevention

Water damage in your home’s walls and ceilings can be a nightmare. However, identifying the signs early can save you from costly repairs and potential health hazards. This blog post will walk you through the most common signs of water damage, its causes, and how to prevent it. By the end, you’ll be equipped to tackle water damage head-on, ensuring your home remains safe and sound.

Call 317-269-7319 for Professional Water Damage Drywall Replacement in Indianapolis

The Importance of Early Water Damage Detection

Water damage doesn’t just ruin your walls and ceilings; it can lead to severe structural and health issues if left untreated. For homeowners and property managers, knowing what to look for is crucial. Early detection allows for prompt repair, preventing minor issues from escalating into major problems.

Common Signs of Water Damage in Walls and Ceilings

Discoloration and Water Stains

One of the first indicators of water damage is discoloration. Look for brownish or yellowish stains on your walls and ceilings. Water stains often indicate that water has seeped through the layers of your drywall or ceiling material. Discoloration can appear in various patterns, from small spots to large patches. Pay attention to areas around windows, doors, and roof lines, as these are common entry points for water.

Peeling or Bubbling Paint

If you notice paint peeling or bubbling on your walls or ceilings, it’s a strong sign of water damage. When water seeps into the walls, it disrupts the adhesion between the paint and the surface, causing it to peel or bubble. This is not just an aesthetic issue. It indicates underlying moisture problems that need addressing. Ignoring peeling or bubbling paint can lead to more extensive damage over time.

Sagging or Bulging Areas

Sagging or bulging in the walls or ceilings is a clear sign of water accumulation. This occurs when water saturates the material, making it heavy and weak. If you see areas that appear to be drooping or bulging out, it’s essential to investigate immediately. These spots are at risk of collapsing, posing a danger to anyone in the vicinity.

Musty Odors

A musty smell is often a hidden sign of water damage. This odor usually indicates mold or mildew growth due to prolonged moisture exposure. Musty odors are commonly found in basements, attics, and other areas with poor ventilation. If you detect a persistent musty smell, it’s time to inspect your home for water damage.

Top Causes of Residential Water Damage

Leaking Pipes

Leaking pipes are one of the most widespread sources of water damage. Pipes can leak due to age, corrosion, or high water pressure. Regularly inspect your plumbing for signs of leaks, such as pooling water, corrosion, or unusual dampness. Promptly fixing leaks can prevent significant water damage.

Roof Leaks

Roof leaks are another major cause of water damage in ceilings. Damaged shingles, cracked flashings, or clogged gutters can allow water to seep into your home. Regular roof inspections, especially after storms, can help identify and fix leaks before they cause extensive damage.

Poor Ventilation

Poor ventilation can trap moisture inside your home, leading to water damage. Bathrooms, kitchens, and basements are particularly susceptible to this issue. Ensure proper ventilation by using exhaust fans, opening windows, and installing dehumidifiers in areas prone to moisture buildup.

Flood Damage

Flooding can cause severe water damage to your home. Whether it’s from a natural disaster or a plumbing issue, floods can saturate walls, ceilings, and floors. It’s crucial to address flood damage immediately to mitigate its effects. Professional water damage restoration services can help dry and repair affected areas.

The Dangers of Ignoring Water Damage

Mold Growth

Mold thrives in damp environments, making water-damaged areas a perfect breeding ground. Mold can cause respiratory issues, allergies, and other health problems. Ignoring water damage can exacerbate mold growth, making it harder and more expensive to remove. Early detection and prompt action are key to preventing mold infestations.

Structural Damage

Prolonged water exposure can weaken the structural integrity of your home. Water can rot wood, corrode metal, and compromise the stability of walls and ceilings. If left unchecked, structural damage can lead to costly repairs and even pose a safety risk to occupants. It’s essential to address water damage promptly to maintain your home’s stability.

Health Risks

Water damage can create an unhealthy living environment. Mold, mildew, and bacteria can thrive in damp conditions, leading to various health issues. Respiratory problems, skin irritation, and allergic reactions are common in homes with untreated water damage. Protect your health by addressing water damage as soon as it’s detected.

How to Detect and Confirm Water Damage

Using Moisture Meters

Moisture meters are handy tools for detecting water damage. These devices measure the moisture content in walls and ceilings, helping you identify hidden water issues. Regularly using a moisture meter can help you catch water damage early, even before it becomes visible. Consider investing in one for routine home maintenance.

Inspecting for Visible Signs

Conduct regular visual inspections of your home, looking for the common signs of water damage mentioned earlier. Pay special attention to areas prone to moisture, such as basements, bathrooms, and attics. Keep an eye out for discoloration, peeling paint, sagging areas, and musty odors. Early detection can save you from more extensive repairs down the line.

Seeking Professional Help

If you’re unsure about the extent of water damage or how to address it, seek professional help. Plumbing experts can assess the situation and recommend the best course of action for repairing the source of the water damage. Drywall contractors can remove and replace damaged drywall and ceilings, plus provide painting and texturing services. Professionals have the tools and expertise to thoroughly inspect and repair water damage, ensuring your home remains safe and dry.

Preventive Measures to Protect Against Water Damage

Regular Maintenance Checks

Regular maintenance checks are crucial in preventing water damage. Inspect your home’s plumbing, roof, and gutters regularly for signs of wear and tear. Promptly addressing minor issues can prevent them from escalating into major problems. Schedule routine inspections to keep your home in top condition.

Prompt Repairs of Leaks

Don’t delay in fixing leaks, no matter how minor they seem. Even small leaks can lead to significant water damage over time. Repairing leaks promptly can prevent water from seeping into walls and ceilings, reducing the risk of mold growth and structural damage.

Improving Home Ventilation

Improving ventilation can help prevent moisture buildup in your home. Use exhaust fans in bathrooms and kitchens, open windows to allow fresh air in, and install dehumidifiers in damp areas. Proper ventilation reduces the risk of water damage and creates a healthier living environment.

Waterproofing Strategies

Consider implementing waterproofing strategies to protect your home from water damage. Apply sealants to vulnerable areas, install sump pumps in basements, and ensure your home’s foundation is well-maintained. Waterproofing your home can provide an extra layer of protection against water damage, keeping your walls and ceilings dry and intact.

Taking Action to Safeguard Your Home

Water damage can be a homeowner’s worst nightmare, but early detection and prompt action can mitigate its effects. By understanding the common signs of water damage, its causes, and preventive measures, you can protect your home from costly repairs and health risks.

Don’t wait until it’s too late. Regular maintenance, prompt repairs, and proper ventilation are key to preventing water damage. If you suspect water damage in your home, seek professional help to assess and address the issue.

Did you find some water-damaged walls or ceilings in your home? Contact Drywall By AMFA at 317-269-7319 for expert drywall replacement services in Indianapolis, Indiana. We serve residential and commercial clients throughout the Greater Indy areas. Protect your home and enjoy peace of mind knowing your walls and ceilings are in good hands. Request an estimate, today.

Related Posts:

Tips for Drywall Water Damage Clean Up
How to Remove Water Damaged Drywall
The Meaning Behind the Color of Mold on Your Walls

The Meaning Behind the Color of Mold on Your Walls

Mold is everywhere. It’s all around us. But there is a difference between safe mold exposure, like Bleu cheese, and dangerous mold exposure, like aspergillus. When you start to spot mold growing in your house, it is important to address the issue as soon as possible in order to prevent upper respiratory illness and other health implications. If you have mold growing on your drywall, it is an even more pressing matter, and should be inspected right away. To preface your appointment with a mold remediation company, it helps to find out which type of mold you might be dealing with. You can usually do this by simply pinpointing its color.

Continue reading to learn what the color of the mold on your wall is and what’s likely causing it, as well as how to repair moldy walls after remediation work.

Indianapolis Indiana Drywall Replacement
Indianapolis Indiana Drywall Replacement 317-269-7319

What Color of Mold Do You Have on Your Drywall?

Greenish-Black – Mold that appears greenish-black in color could be Stachbotrys genus, which is also known as “black mold.” Exposure to such mold has been linked to serious health conditions. It commonly grows on high-cellulose, low-nitrogen surfaces, such as drywall, gypsum board, paper, dust and lint that is constantly exposed to moisture.

Blue, Green, or White – Molds of these colors generally point to the Penicillium genus. Several years ago, this species of mold was used to make penicillin. Nowadays, it is usually found growing on food or on walls. It can cause allergic reactions, allergies, and other respiratory problems.

Olive Green, Gray, Brown, or Black – Molds that appear in these color formations likely belong to the Cladosporium genus. You can find this mold growing indoors and outdoors on things like plant leaves, soil, walls, insulation, and damp carpeting. According to the CDC, they are most commonly linked to minor health complications like skin, eye, and sinus infections; but they have also been known to brain infections like fungal meningitis.

Pink – Pink mold is often seen in the bathroom or kitchen, but it is not actually mold at all. It is a bacterium called Serratia marcescens. Although not a mold, it still presents hygiene and health issues, like urinary tract and respiratory infections.

Green – Green mold is very vague since it can be any kind of unpleasant fungus. There are literally thousands of species of green mold, so green mold doesn’t tell you much, expect that it needs to be removed.

Yellow, Green or Black – Mold that appears yellow, green, or black could possibly be Aspergillus mold. According to the CDC, we breathe these molds in almost every day without getting sick. However, concentrated exposure can be hazardous, especially for those with existing lung problems or suppressed immune systems. In individuals like these, it can cause aspergillosis, which presents itself as coughing, wheezing, and sinus inflammation.

Do you need drywall replacement after your mold remediation work is complete? Contact Drywall by AMFA at 317-269-7319 for professional drywall services and custom drywall texture in Indianapolis, Indiana. We serve both residential and commercial clients.  Request a free estimate, today!

You Might Also Like:

What You Need to Know About Wet Walls and Mold Growth
Tips for Mildew and Mold Protection After Heavy Rains
How to Remove Water Damaged Drywall

Call Drywall By AMFA at 317-269-7319 Today!

How to Prep a Wall for a Heavy Mirror

If you have a heavy mirror to hang, do a good job, because you don’t want it to fall and break. After all, that could be consider bad luck! To avoid this catastrophe, be sure you prepare the wall before you begin. Not only should you choose a sturdy wall with discernible studs for hanging, but you also want to make sure you are equipped with all the proper hardware for both your mirror and the wall. All of this preparation and more makes hanging a heavy mirror easy, and a surefire success!

Continue reading to learn the step-by-step guide to prepping a wall for hanging a heavy mirror.

Indianapolis Indiana Drywall Contractors 317-269-7319

What You Will Need for the Job:

You can get all the tools and supplies you need for this job at any local hardware or home improvement store. You can also find them online through similar retailers. Now remember, these tools and instructions for simply prepping your wall for hanging a mirror. The actual hanging part will simply require you to have patience and precision!

► Stud Finder
► Pencil
► Weight Scale
► Thumb Tack
► Angle Brackets
► Wall Anchors

With these supplies, you are fully-equipped to prepare your wall for hanging a heavy mirror. Here is how to get started:

Step 1

Identify the type of wall you are hanging your mirror on. This is an important step because it determines whether or not your mirror hanging hardware is compatible for the job or not. Use a thumbtack to penetrate the wall. If it goes in easily, you are dealing with drywall. However, if it resists, you might have a plaster wall or a wall made from masonry.

Step 2

Continue your handyman project by using your stud finder to locate the necessary wall studs for hanging your mirror. Remember that studs might be connected to nearby outlets, faucets, and other utilities, so be careful making your selection. Always use a pencil to mark the center of the wall stud once you are set.

Step 3

Your next step is to examine your mirror for the proper hardware. New mirrors often come fitted with angle brackets, which are the pieces of hardware that go in the corners for hanging. Sometimes, the hardware will come with the mirror, but you have to attach it yourself. If you are hanging an antique mirror, it might not have any brackets at all. If this is the case, reinforce your mirror with your own angle brackets.

Step 4

Before you actually place the mirror on the wall, weight it first. Although the weight limits to hardware like angle brackets are listed on the package by the manufacturer, you cannot always trust them to be accurate. So, just hold it in your hands and step on a weight scale, like the one in your bathroom, to see just how much it really weighs. Be sure you remember to subtract your own weight from the number on the scale! Then double check to see that your hardware can oblige.

Indianapolis Drywall Repair and Installation at Your Service

Call Drywall by AMFA at 317-269-7319 for licensed Indianapolis drywall repair and installation you can afford. We are experienced drywall contractors who offer a wide range of residential and commercial drywall service, including hole in the wall repairs, replacement, installation, new home construction, metal stud framing, custom drywall texture, grid ceilings, and much more. Contact us to request a free estimate, today.

Call Drywall By AMFA for Drywall Installation and Repair in Indianapolis

When you need trusted customer service, competitive pricing, and outstanding results that last, you need the licensed and qualified experts at Drywall By AMFA! Whether commercial or residential, we have what it takes to deliver this promise!

Call Drywall By AMFA at 317-269-7319 Today!

A Professional Indianapolis Drywall Repair Company

Here at Drywall by AMFA, we are a licensed, bonded, and insured drywall construction company in Indianapolis, Indiana. We provide professional drywall repair, replacement, installation, and finishing for both residential and commercial properties in Indianapolis and throughout Central Indiana. Our general contractors have more than 10 years of experience in the building and construction industry, and provide a wide range of drywall and painting services for properties and complexes of all sizes.

Our experienced drywall contractors offer both residential and commercial drywall service, including repair, replacement, installation, level 5 finishes, new home construction, metal stud framing, custom drywall texture, grid ceilings, and much more. Whether you need acoustic drywall service, new home construction drywall, or something in between, we are the highly-skilled Indianapolis drywall contractors to trust for the results you expect.

We Can Conquer Any Job, Large or Small

Drywall by AMFA is always fully-equipped to manage any project, regardless of size and scope. We get the job done right the first time, and offer convenient schedule flexibility to accommodate your personal agenda. Our strong dedication to old fashioned values of honesty, integrity, and quality set us apart from our competition. And our “Satisfaction Guarantee” lets you know you can trust our work and be happy with the results for many years. When you enlist our professional Indianapolis drywall crew for drywall service and repair, you are making a safe and educated investment for your property!

How to Get in Touch for a Free Estimate

Getting in touch with one of our licensed Indianapolis drywall contractors is easy. Just contact our office at 317-269-7319 to learn more about our drywall services, or to schedule an estimate today. We also offer free estimates, in-home consultations, and complimentary advice about drywall replacement.

How to Get a Stripped Screw Out of the Wall

Whether you forgot to drill a pilot hole or drove a screw too quickly, nothing puts a stop to your project faster than a screw with stripped head. Fortunately, there’s a smooth and efficient way to deal with this frustrating problem. All you need are a few tools and supplies, all of which are reasonably-priced and sold at any local home improvement or hardware store in your neighborhood.

Continue reading to review a basic guide to removing stripped screws from drywall.

Indianapolis Drywall Contractors 317-269-7319

What You Will Need

☑ Drill
☑ Screw Extractor Set
☑ Long-Nose Locking Pliers

For Screw Heads Above the Wall:

Clamp your locking pliers onto the screw, positioning them as close to the wood as possible.

Once you have a solid grip, use the pliers to gently turn the screw counterclockwise. Be gentle to avoid snapping off the screw head.

You can use a piece of cardboard to place around screw to prevent any accidental scratching.

For Screw Heads At or Under the Wall:

For screw heads that are flush with the wood surface or slightly below, you will need to use your screw extractor set.

Using your drill, make a 1/8 inch deep hole in the top of the screw head. It should be large enough to accept the largest screw extractor that will fit the head.

Position the extractor into the hole you drilled, and then slowly turn it counterclockwise and press down until you feel the extractor threads catch.

Slowly turn the extractor to wind the screw out just enough to where you can grab it with your gripping pliers.

Tips for Preventing Stripped Screw Heads

☑ For screws 2 1/2 inches or longer, rub the heads with candle wax or beeswax to reduce friction.

☑ Do not forget to drill pilot holes for your screws.

☑ Choose a drill set that lets you drill pilot holes in multiple sizes to match your screws.

☑ Drill larger pilot holes for hardwoods to avoid splitting.

☑ Always choose the proper screws for your project.

If you have a home improvement project you’ve been waiting to get done, consider professional home remodeling services for outstanding results in a convenient time frame. Need a deck built? Or perhaps some drywall installed? These are the types of services that are better performed by a licensed contractor who retains the proper tools, training, and skills to deliver responsible work and professional results.

Did You Do a Little Damage to Your Drywall? No Problem!

Call Drywall by AMFA at 317-269-7319 when you need professional drywall services in Indianapolis, Indiana. We are a licensed, bonded, and insured drywall company that provides residential and commercial drywall work at competitive prices. Call 317-269-7319 to request a free estimate, today. Call 317-269-7319 to request a free estimate, today.