Drywall Challenges: Uncovering the Hidden Effects of Humidity

Drywall is a staple in modern home construction and renovation. Known for its versatility and ease of installation, it’s used in everything from creating walls and ceilings to providing a base for paint and wallpaper. Its ability to quickly transform a space makes it a favorite among homeowners and DIY enthusiasts alike. However, like many materials, drywall’s performance can be significantly affected by environmental factors, with humidity being a major player.

Despite its sturdy appearance, drywall is sensitive to moisture in the air. If you’ve been puzzled by wall issues like cracking or mold despite your best efforts, humidity might just be the unseen culprit. This blog dives into the intricate dance between drywall and humidity, offering insights and solutions for your next home project. Let’s get started!

Call 317-269-7319 for Professional Wet Drywall Repair in Indianapolis Indiana

What is Humidity and How is it Measured?

Humidity refers to the amount of water vapor in the air. It’s a crucial element in our environment, often dictating comfort levels within a living space. But to truly grasp its impact on drywall, we need to understand how it’s measured.

Measuring Moisture in the Air

There are two main types of humidity measurements that you need to know about—absolute and relative humidity. Absolute humidity is the total mass of water vapor present in a given volume of air. However, in practical terms, we often use relative humidity, which measures the current amount of moisture in the air compared to the maximum it can hold at that temperature.

The Effects of Humidity Levels

High humidity can make a room feel stuffy, while low humidity can lead to dry air and discomfort. Both extremes can affect more than just personal comfort—they can wreak havoc on building materials, especially drywall. The challenge lies in maintaining an optimal balance to prevent potential damage.

How Humidity Affects Drywall Performance

Humidity affects drywall in several ways, potentially complicating your drywall work. Understanding this connection is crucial for homeowners looking to maintain the longevity and appearance of their walls.

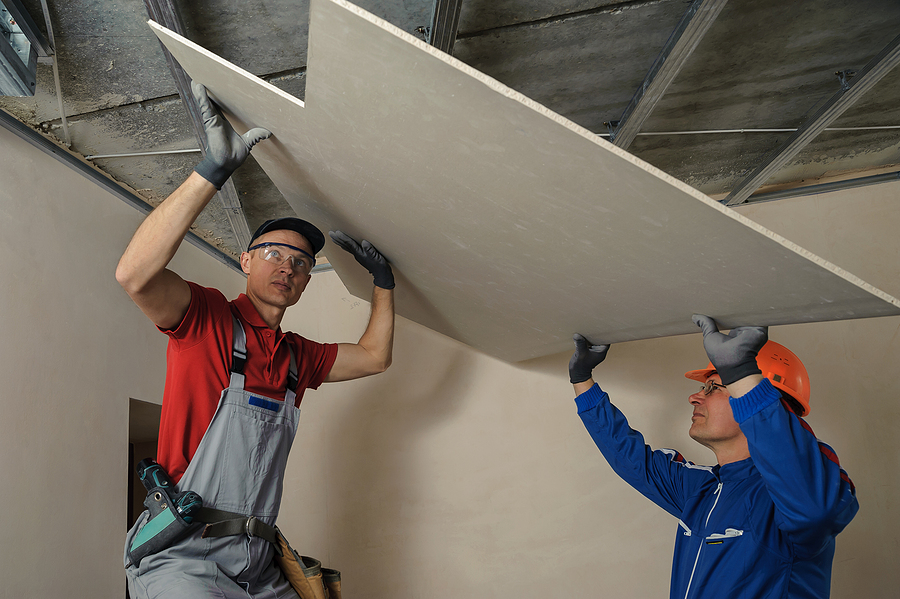
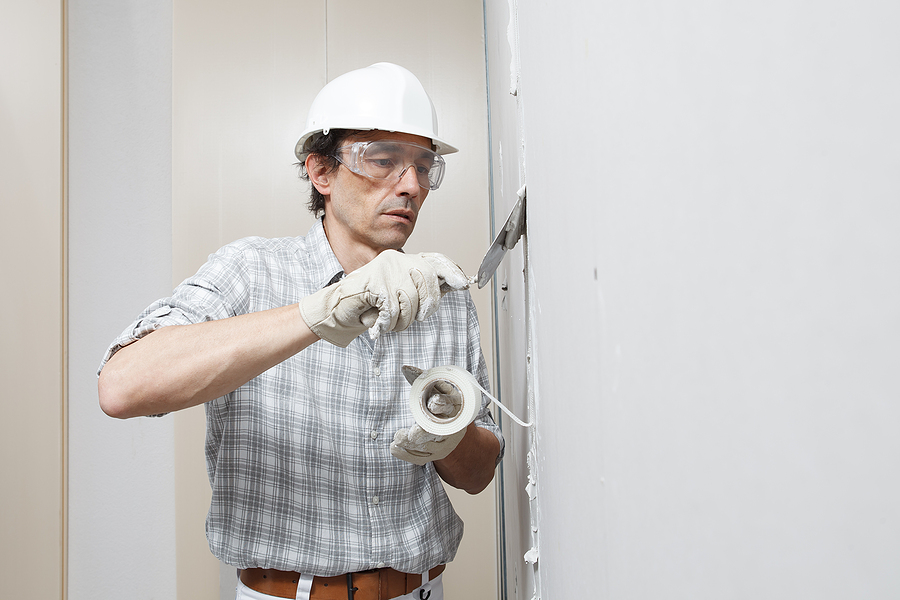
Moisture’s Influence on Drywall Installation

During drywall installation, the presence of excess moisture can cause the material to become heavy and unwieldy. This not only makes installation difficult but also increases the risk of sagging or buckling once installed. On the flip side, too little humidity can leave the drywall brittle, leading to cracking during handling.

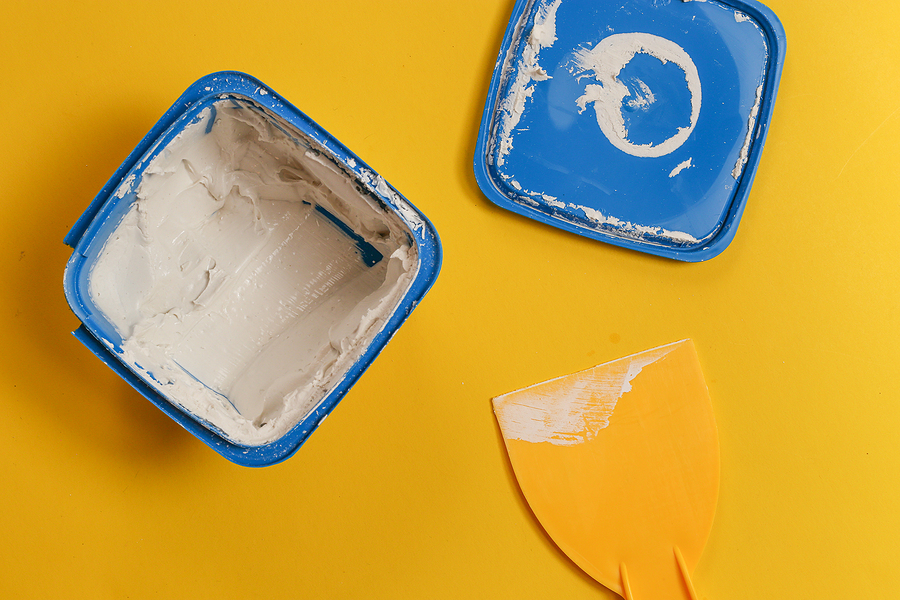
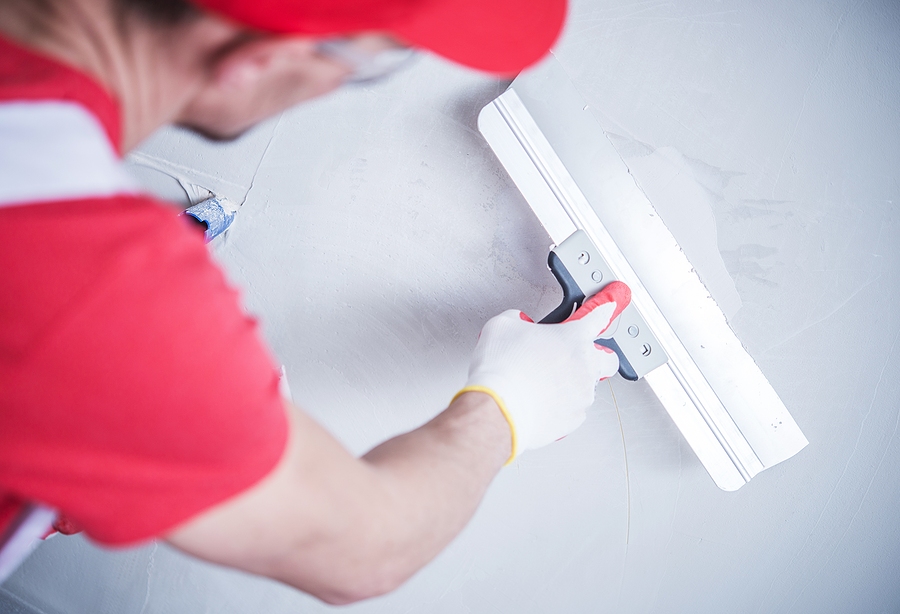
Finishing and Repair Challenges

Humidity also plays a significant role during the finishing stages of drywall work. Joint compounds used to fill seams and cover screws can behave unpredictably. High humidity can cause these compounds to dry too slowly, leading to longer project times and potential for mold growth. Low humidity, conversely, may cause the compound to dry out too quickly, resulting in shrinkage and the need for additional coats.

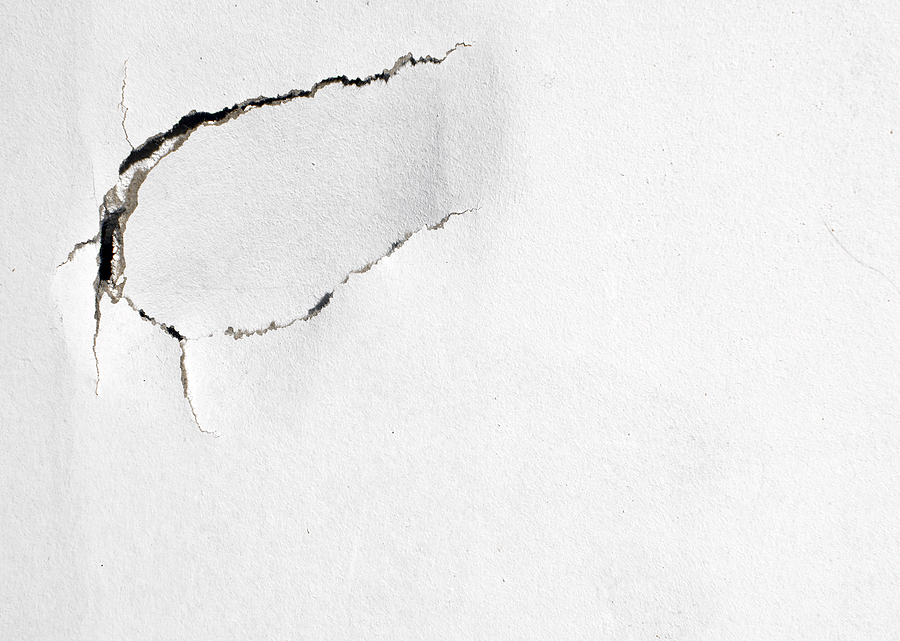
Common Humidity-Induced Problems

One common issue arising from improper humidity management is mold growth. When moisture gets trapped behind the drywall, it creates a perfect breeding ground for mold, which not only damages your walls but also poses health risks. Additionally, fluctuating humidity levels can lead to warping and cracking in the drywall, compromising its structural integrity and aesthetic value.

Navigating Drywall Work in Varied Humidity

To achieve successful drywall installation and maintenance, it’s essential to adapt your approach based on the prevailing humidity conditions. Here are some actionable tips to guide you through:

Preparing for High Humidity

In high-humidity environments, it’s vital to ensure proper ventilation both during and after installation. Use fans or dehumidifiers to help control moisture levels. Opt for moisture-resistant drywall, which is specially designed to withstand damp conditions. This type of drywall is ideal for bathrooms, kitchens, and basements.

Tackling Low Humidity Conditions

In contrast, low humidity can be just as challenging. To combat dryness, consider using humidifiers to introduce moisture into the air during the drywalling process. This helps prevent the drywall from drying out too quickly and cracking. It’s also beneficial to use joint compounds formulated to perform well in low-humidity environments.

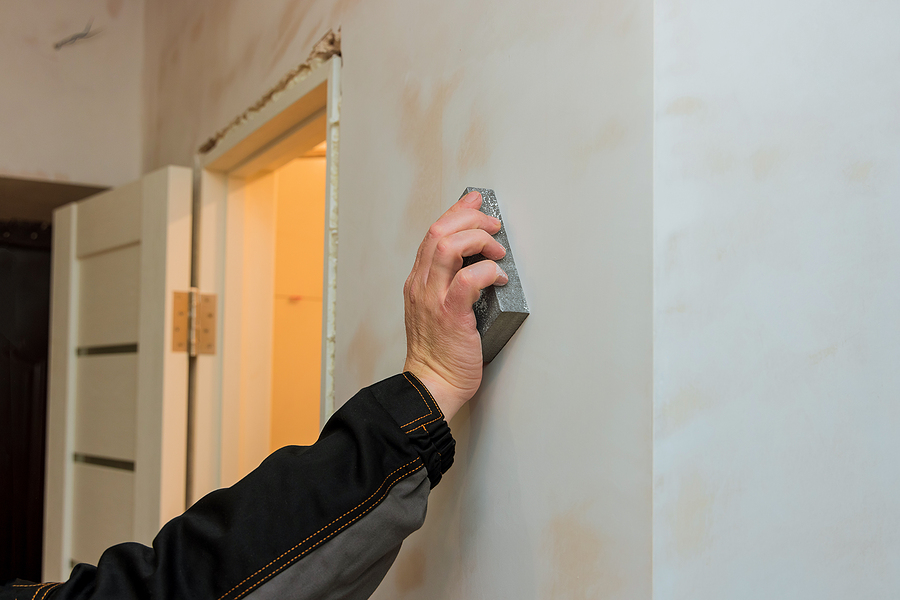
Essential Tools and Techniques

Selecting the right materials and tools is crucial for drywall work in any humidity level. Invest in quality joint compounds and primers that cater to your specific climate conditions. Maintaining a consistent temperature and humidity level during the drying and curing stages will also ensure a smooth, long-lasting finish.

Ventilation and Moisture Control

Proper ventilation is key to preventing future problems. Ensure that rooms have adequate airflow even after the drywall work is completed. Installing exhaust fans in areas prone to moisture buildup, such as bathrooms and kitchens, can be especially effective in keeping humidity levels in check.

Understanding Water Damage in Drywall

Water damage is a common issue that arises from humidity fluctuations. Whether it’s due to high levels of moisture or direct contact with water, drywall is susceptible to warping, swelling, and other forms of damage. Promptly addressing any signs of water damage can help prevent costly repairs down the line.

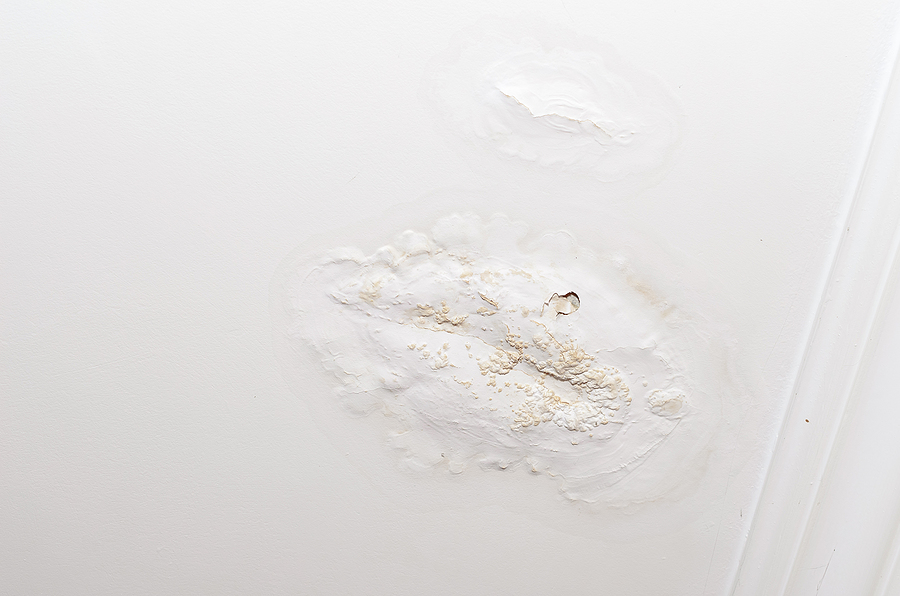
Signs of Water Damage

Some visible indicators of water damage in drywall include discoloration, peeling paint or wallpaper, and soft spots on walls. You may also notice an unpleasant musty odor. If left unaddressed, these issues will only worsen over time and may require professional

Wrapping Up

Understanding the impact of humidity on drywall work is essential for any homeowner or DIY enthusiast aiming for professional results. With the right knowledge and preparation, you can mitigate the challenges posed by varying humidity levels and achieve a durable, aesthetically pleasing finish.

If you’ve tackled drywall projects before, consider sharing your experiences and insights with fellow readers. Remember, when in doubt, seeking the expertise of a professional can save you time and potential frustration.

For those ready to take on their next drywall project, our expert team is here to assist. Contact Drywall by Renso at 317-269-7319 for professional drywall services in Indianapolis, Indiana, today. Whether you need advice on materials or a comprehensive wall repair service, we’re just a call away, ensuring your home’s walls remain as sturdy and beautiful as intended.

Related Posts:

Detecting Water Damage in the Home: Signs, Solutions, and Prevention
Tips for Drywall Water Damage Clean Up
The Meaning Behind the Color of Mold on Your Walls

How to Find Reliable Drywall Contractors: A Comprehensive Guide

Whether you’re a homeowner planning a renovation or a property manager overseeing multiple units, finding reliable drywall contractors is crucial. Quality drywalling can elevate the aesthetics and durability of your space, while subpar work can lead to costly repairs down the line. In this guide, we’ll explore how to identify trustworthy service providers, ensuring your drywall installation meets the highest standards.

Drywall serves as the canvas of your home or business, providing not only structure but also style. From new construction to renovations, hiring a reputable drywall company is essential for a successful project. This post will guide you through the process of finding and vetting companies, obtaining accurate cost estimates, and managing your project effectively.

By the end of this guide, you’ll be equipped with the knowledge to make informed decisions, ensuring your renovation or construction projects are executed flawlessly. Let’s get started!

Call 317-269-7319 to Speak With Our Professional Drywall Contractors in Indianapolis Indiana

Signs of Reliable Drywall Contractors

To find the right contractor, you need to know what to look for. Reputable drywall contractors exhibit professionalism in every aspect of their work. One of the first indicators is licensing. A licensed contractor has met state or local requirements, demonstrating their expertise in drywall installation.

Insurance is another crucial factor. It protects both you and the contractor in case of accidents or damages during the project. Ensure your contractor has adequate liability and worker’s compensation insurance before signing any contracts.

Experience matters too. Look for companies with a solid track record of successful drywall work. Experienced professionals bring a wealth of knowledge to the table, handling any challenges that arise with ease. Don’t hesitate to ask for examples of previous projects to gauge their expertise.

Finding Drywall Companies

Now that you know what to look for, it’s time to find some potential candidates. Start by asking friends, family, or colleagues for referrals. Personal recommendations often point you toward drywall repair and service companies with proven reliability.

Online platforms are another valuable resource. Websites like Angie’s List, Yelp, and Houzz offer reviews and ratings from previous clients, helping you gauge a contractor’s reputation. Pay attention to both positive and negative feedback to get a well-rounded view.

Local business directories provide a list of contractors operating in your area. These directories often include contact information and a brief overview of services, making it easier to compile a shortlist of potential drywall companies.

Talking to Potential Drywall Service Providers

Once you have a list of potential drywall service providers, it’s time to vet them thoroughly. Conduct interviews to assess their professionalism and communication skills. Ask about their experience with similar projects and how they handle unforeseen challenges.

Checking references is a must. Contact past clients to inquire about their experience with the contractor. Were they satisfied with the quality of work? Was the project completed on time and within budget? These insights can help you make an informed decision.

Verifying credentials is equally important. Ensure the contractor holds the necessary licenses and insurance. Some states have online databases where you can confirm a contractor’s licensing status, providing peace of mind before proceeding further.

Drywall Cost Estimates and Contracts

Getting accurate cost estimates is a crucial step in the selection process. Request quotes from multiple contractors, ensuring each includes a detailed breakdown of materials, labor, and additional costs. Compare these estimates to understand the market rate for your project.

Understanding the scope of work is essential. Make sure the contractor provides a comprehensive outline of the tasks involved, including timelines and specific deliverables. This clarity helps prevent misunderstandings later on.

Once you’ve selected a contractor, it’s time to sign a contract. A well-drafted contract protects both parties, outlining the project’s scope, timeline, payment schedule, and contingency plans. Review it thoroughly and clarify any ambiguities before signing.

Project Management

Effective project management is key to a successful drywall installation. Maintain open lines of communication with your contractor, discussing expectations and potential changes as the project progresses. Regular updates keep everyone on the same page.

Setting realistic expectations is crucial. Understand that delays can happen, but having a clear timeline helps minimize disruptions. Work with your contractor to adjust schedules and priorities if necessary, ensuring timely completion.

Managing the project timeline involves coordinating tasks and resources efficiently. Stay involved without micromanaging, trusting your contractor’s expertise while providing guidance when needed. A collaborative approach fosters a smooth workflow.

Red Flags and How to Avoid Them

Identifying red flags early can save you from potential headaches. Unreliable contractors may exhibit behaviors such as inconsistent communication, vague estimates, or reluctance to provide references. These warning signs should not be ignored.

Avoiding scams requires vigilance. Be wary of service providers who request large upfront payments or pressure you into quick decisions. Legitimate companies operate transparently, providing clear terms and conditions without hidden fees.

Protecting yourself involves taking proactive measures. Conduct thorough research, vet multiple contractors, and trust your instincts. If something feels off, explore other options until you find a contractor who aligns with your expectations and values.

Conclusion

In summary, finding reliable drywall service providers is essential for successful property maintenance and improvement projects. By recognizing signs of professionalism, sourcing potential businesses, and conducting thorough vetting, you can ensure your construction project or renovation meets the highest standards.

Remember, accurate cost estimates and clear contracts set the foundation for a smooth project. Effective communication and project management further enhance the experience, minimizing disruptions and ensuring timely completion. Stay vigilant for red flags, protecting yourself from unreliable drywall service providers and potential scams.

Ready to get started on your drywall project? Contact Drywall by Renso at 317-269-7319 today for expert advice and assistance. Whether it’s new construction or renovations, our Indianapolis drywall contractors make all the difference. Let’s bring your vision to life!

Related Posts:

FAQS About Drywall Repair and Installation
Should I Install Basement Drywall On My Own?
How to Spot Improper Drywall Installation

Safeguard Your Space: Simple Tips to Prevent Wall Damage

Walls are more than just structural elements; they define the space, create a sense of security, and contribute to the aesthetic appeal of homes and offices. But what happens when these essential structures suffer damage? This is a concern every homeowner and office manager should address proactively. From minor scratches to significant water damage, walls can suffer from various types of wear and tear if not properly maintained. This blog provides practical insights into preventing wall damage in residential and commercial settings, offering valuable tips and solutions for maintaining the integrity of your walls.

Call 317-269-7319 for Finished Wall Repair in Indianapolis Indiana
Call 317-269-7319 for Professional Finished Wall Repair in Indianapolis Indiana

The Silent Wear and Tear on Finished Walls

Daily activities, no matter how mundane, can cause gradual wear and tear on walls. Foot traffic, moving furniture, and even opening doors can lead to scrapes and dents. For homeowners, children playing indoors can be particularly tough on walls. In an office environment, frequent rearrangement of office equipment or furniture can lead to similar issues. Regularly assessing high-traffic areas can help identify potential problem spots before they escalate into significant damage.

While wear and tear might seem unavoidable, preventive measures can minimize the impact. Using corner guards and door stoppers is a simple yet effective way to protect high-risk areas from damage. Additionally, rearranging furniture thoughtfully to avoid direct contact with walls can significantly reduce the likelihood of scratches and dents.

Consistent maintenance routines are crucial in managing wear and tear. Regularly clean walls with appropriate cleaning solutions to remove dust and dirt buildup. This not only preserves the appearance but also prevents long-term deterioration. Maintenance efforts should focus on areas prone to daily contact and ensure they remain in good condition.

Preventing Moisture Damage in Drywall

Moisture is a formidable enemy to walls, leading to water damaged walls that can compromise structural integrity. This is often caused by leaks in plumbing, improper ventilation, or exposure to humid conditions. Mold growth and paint peeling are common indicators of moisture damage, requiring immediate attention.

To prevent moisture-related issues, ensure your home or office has adequate ventilation, especially in areas like kitchens and bathrooms. Regularly check for leaks in plumbing fixtures and address them promptly. Installing exhaust fans in high-moisture areas can also help maintain a dry environment.

Water-resistant paint and sealants are effective preventive measures against moisture damage. These products provide an additional layer of protection, keeping your walls safe from excessive moisture. Regular inspections and timely interventions are vital to preserving wall health and avoiding costly repairs.

Protection from Furniture and Equipment

Furniture and equipment can inadvertently cause impact damage to walls, resulting in unsightly wall dents or holes. This is especially common in offices where bulky furniture is moved frequently. Homeowners may also experience similar issues during renovations or when rearranging living spaces.

Preventing impact damage involves careful planning and strategic placement of furniture. Use felt pads under furniture legs to minimize friction and prevent scratches. In offices, encourage employees to use caution when moving office equipment to avoid accidental collisions with walls.

For added protection, consider installing wall guards or bumpers in high-risk areas. These products absorb impact and prevent direct contact between furniture and the wall surface. By taking preventive steps, you can maintain the pristine condition of your walls and avoid unnecessary repairs.

Identifying and Addressing Underlying Problems

Structural issues can manifest as wall cracks or bulges, often indicating deeper problems with the building’s foundation. These issues require immediate attention to prevent further damage and ensure the safety of occupants. Ignoring structural problems can lead to costly repairs and compromise the stability of the entire structure.

Conduct regular inspections of your property to identify any signs of structural damage. If you notice cracks in the walls or floors, consult a general contractor or structural engineer to assess the severity of the issue. Promptly addressing structural problems can prevent them from escalating into larger, more expensive repairs.

Reinforcing structural integrity may involve foundation repairs or other professional interventions. It’s important to rely on qualified professionals to address these issues adequately. Regular maintenance and early detection play a crucial role in preserving the long-term health of your property.

Wall Care Tips for Homeowners and Office Managers

Regular maintenance is essential to prevent wall damage and preserve the longevity of your walls. For homeowners, incorporate wall cleaning tips into your routine to keep surfaces free from dust and grime. Use gentle cleaning solutions to avoid damaging paint or wallpaper.

Office managers should implement a maintenance schedule that includes regular wall inspections and cleaning. Encourage employees to report any signs of damage immediately, allowing for prompt repairs. Establishing guidelines for wall care can promote a sense of responsibility among staff members.

Educate both homeowners and office occupants on the importance of maintaining wall integrity. Simple actions, such as using protective materials and handling furniture carefully, can go a long way in preserving the condition of walls. Consistent maintenance efforts can save time, money, and frustration in the long run.

Choosing the Right Wall Protection Products

Investing in wall protection products is a proactive step in preventing damage. Consider using corner guards, wall bumpers, and chair rails in high-traffic areas to protect vulnerable spots. These products are available in various materials and styles to suit different aesthetic preferences.

In an office environment, consider installing kick plates on doors to prevent scuff marks. These small additions can significantly extend the lifespan of walls and maintain a professional appearance. By choosing the right wall protection products, you can enhance both functionality and aesthetics.

Explore different options for wall protection to find the best fit for your needs. Whether it’s adding a decorative wainscoting or using clear protective films, there’s a solution for every space. Investing in these products can prevent costly repairs and maintain the pristine condition of your walls.

Implementing Wall Care Policies in the Workplace

Creating a culture of wall care in the workplace involves establishing clear policies and guidelines. Encourage employees to handle office equipment with care and be mindful of their surroundings. Regular training sessions can reinforce the importance of maintaining wall integrity.

Designate specific individuals or teams responsible for monitoring wall conditions and reporting any issues. This ensures that any damage is addressed promptly and doesn’t go unnoticed. By involving employees in wall care efforts, you can foster a sense of ownership and accountability.

Regularly communicate the importance of wall maintenance to all staff members. Remind them that preserving the appearance of the office contributes to a positive work environment. Implementing wall care policies can prevent damage and create a more pleasant workplace for everyone.

Financial Implications of Neglecting Wall Maintenance

Neglecting wall maintenance can lead to significant financial implications. Small issues, such as minor wall dents or cracks, can quickly escalate into costly repairs if left unattended. The cost of repairing extensive damage far outweighs the investment in regular maintenance.

In addition to repair costs, neglecting wall maintenance can impact the overall value of a property. Aesthetically unappealing walls can deter potential buyers or tenants, reducing the property’s marketability. Maintaining well-kept walls is essential for preserving property value.

Consider the long-term financial benefits of proactive wall maintenance. By investing in regular inspections and preventive measures, you can avoid expensive repairs and protect your property’s overall value. Prioritizing wall care is a wise investment in the longevity of your space.

Health and Safety Concerns with Damaged Walls

Damaged walls pose health and safety risks to occupants. Crumbling walls or structural issues can compromise the integrity of a building, potentially leading to accidents or injuries. Ensuring the safety of occupants should always be a top priority.

Addressing health and safety concerns involves promptly repairing any visible damage and addressing underlying structural issues. Regular inspections can help identify potential hazards and allow for timely interventions. Prioritizing safety ensures a secure environment for residents and employees.

Consider the impact of neglected walls on indoor air quality. Damaged walls may harbor mold or mildew, which can negatively affect the health of occupants. Maintaining walls in good condition contributes to a healthier living and working environment.

Step-by-Step Guide to Repairing a Hole in the Wall

Repairing a hole in the wall is a manageable task for homeowners and office managers. Gather the necessary tools and supplies, such as a patch kit, sandpaper, joint compound, putty knife, and paint. Having these items on hand ensures a smooth repair process.

Begin by cleaning the area around the hole and removing any loose debris. Apply the patch over the hole, ensuring it adheres securely. Use a putty knife to apply joint compound over the patch, feathering the edges for a seamless finish.

Once the compound is dry, sand the surface until smooth and paint over it to match the surrounding wall. This step-by-step process ensures a professional-looking repair and helps restore the appearance of your walls.

When to Call a Professional for Drywall Repair

While minor repairs can be tackled independently, certain situations require professional expertise. Extensive damage, such as large holes or structural issues, may necessitate the skills of a qualified drywall repair service. Professionals can assess the damage and recommend appropriate solutions.

Consulting a professional is advisable when dealing with moisture damage or complex repairs. These issues often require specialized equipment and techniques to address effectively. By relying on experts, you can ensure the longevity of your walls and avoid further complications.

Consider the value of professional assistance in maintaining wall integrity. A skilled technician can provide valuable insights and recommendations for preventing future damage. Partnering with professionals enhances the overall quality of your wall care efforts.

Conclusion

Protecting and maintaining your walls is essential for preserving the beauty and functionality of your home or office. By implementing preventive measures, conducting regular maintenance, and addressing repairs promptly, you can avoid costly damages and create a safe, inviting environment for all.

Take the time to assess your current wall care practices and make necessary changes to enhance their longevity. Whether you’re a homeowner or office manager, prioritizing wall maintenance is an investment in the value and safety of your space.

For further resources and expert advice on wall care, consider consulting professionals who specialize in wall maintenance and repair. Their expertise can help you take proactive steps to protect your walls and enhance the overall quality of your living or working environment.

Are you looking for some professional help with drywall work? Contact Drywall by Renso at 317-269-7319 for professional drywall repair in Indianapolis, Indiana. Your satisfaction is our top priority, and we’re here to help you maintain a beautiful and functional space. Request a free estimate, today!

Related Posts:

Avoid DIY Disasters: The Importance of Professional Drywall Installation
Tips for Avoiding DIY Drywall Mistakes
Fundamental Information About Installing Water-Proof Drywall

Sagging or Bulging Walls: Causes, Fixes, and Prevention

In the world of home maintenance, a key aspect that often gets overlooked is something quite literally right under our noses — our walls. For homeowners, sagging or bulging drywall can be an unsettling sight. Not only can it mar the beauty of your home, but it can also indicate underlying issues that may need immediate attention. This blog post will guide you through understanding the causes of drywall imperfections and what you can do about them.

Call 317-269-7319 for Professional Drywall Damage Repair in Indianapolis Indiana
Call 317-269-7319 for Professional Drywall Water Damage Repair in Indianapolis Indiana

The Problem With Sagging or Bulging Walls

Sagging or bulging drywall is more common than you might think. For many homeowners, the first sign is a slight dip or protrusion in the wall. Left unchecked, these issues can lead to significant problems down the line. Drywall issues are not just cosmetic; they can be a sign of moisture intrusion, structural inadequacies, or even poor installation practices. Knowing how to spot these signs early can save you time, effort, and money.

Sagging vs. Bulging

At first glance, sagging and bulging might seem identical, but they arise from different sources. Sagging drywall typically hangs downwards, indicating a loss of support or integrity in the ceiling or wall. Bulging, on the other hand, pushes outward, suggesting pressure from behind the drywall. Identifying which issue you’re dealing with is crucial for determining the right fix. Recognizing these differences can help you address the root cause more effectively.

Top Causes of Sagging Drywall

Water Damage

One of the most common culprits behind sagging drywall is water damage. Whether from a leaky roof, plumbing issues, or poor ventilation, water that seeps into drywall causes it to weaken and sag. Homeowners should watch for water stains, soft spots, or a musty odor—all indicators of moisture issues. Addressing water damage swiftly is essential to prevent further deterioration.

Structural Issues

Structural inadequacies, such as insufficient support beams or shifting foundations, can lead to sagging drywall. If your home is settling unevenly, it can create stress points that cause walls to sag. In such cases, the drywall is merely a symptom of a larger problem. It’s important to consult a structural engineer to assess and resolve these foundational issues before they worsen.

Poor Installation

Drywall installation might seem straightforward, but improper techniques can lead to sagging over time. Using incorrect fasteners, failing to secure joints properly, or inadequate spacing can all result in sagging. Homeowners planning DIY projects should pay close attention to installation guidelines or hire a professional to ensure a proper job.

Top Causes of Bulging Walls

Pressure Buildup Behind the Wall

Bulging walls often occur when there is pressure building up behind the drywall. This can be due to plumbing leaks, pest infestations, or even insulation issues. These pressures push the drywall outward, creating a bulge. Investigating the source of pressure is key to preventing further damage and ensuring your home’s structural integrity.

Humidity and Temperature Changes

Fluctuations in humidity and temperature can cause drywall to expand and contract, leading to bulging. This is particularly common in regions with extreme weather changes. Installing a dehumidifier or maintaining a consistent temperature in your home can mitigate these effects. Keeping an eye on climate control can protect your walls and preserve their smooth appearance.

Anchoring and Fastening Mistakes

Sometimes, bulging can result from improper anchoring during the drywall installation process. If nails or screws are driven too deeply or spaced incorrectly, the drywall may not hold up under pressure. Ensuring correct fastening techniques can prevent these issues. Checking installation work or consulting a professional can safeguard against future bulging problems.

How to Prevent These Wall Damages

Regular Maintenance Goes a Long Way

Regular inspections can help catch potential issues before they become major problems. Look for signs like cracks, discoloration, or soft spots. Developing a maintenance routine can keep your walls in tip-top shape. Regular check-ins with a professional can provide an expert eye to catch things you might have missed.

Prompt Attention to Current Problems

If you notice sagging or bulging, prompt action is crucial. Ignoring these signs can lead to more extensive damage. Address issues like water leaks or structural inadequacies immediately to avoid the problem from escalating. Quick responses can save money and stress in the long run.

Hiring Professionals for an Expert Touch

While some fixes can be DIY, others require professional expertise. When in doubt, consult a drywall repair expert. Professionals can provide thorough inspections, identify underlying causes, and offer long-term solutions. Investing in professional services ensures quality and peace of mind.

DIY vs. Professional Wall Repair

Simple DIY Fixes You Can Try

For minor issues, such as small cracks or localized sags, DIY repairs can be effective. Patch kits and spackle are handy tools for small jobs. However, it’s important to follow instructions carefully and ensure all materials are secure. Practicing caution and patience can yield rewarding results.

When to Call the Pros

If the damage is extensive or linked to structural issues, it’s best to call in professionals. Attempting major repairs without the right skills can exacerbate the problem. Professionals have the tools and experience necessary to handle complex situations. Relying on expert intervention can prevent costly mistakes and ensure lasting repairs.

Balancing Cost and Quality

Consider the balance between cost and quality when deciding on DIY vs. professional repair. While DIY might save money initially, professional services offer expertise that ensures a longer-lasting fix. Evaluating the severity of the issue and your own capabilities can guide your decision. A thoughtful approach can protect your home and your budget.

Conclusion

Sagging or bulging drywall is more than just an eyesore—it’s a warning sign of potential underlying issues. Addressing these problems promptly can maintain your home’s beauty and safety. Regular maintenance, early detection, and professional guidance are key to preventing drywall issues. For homeowners seeking peace of mind, taking proactive steps today can safeguard their future.

If you’re dealing with drywall issues or want to ensure your home stays in great shape, reach out to a local and trusted drywall repair service. They offer comprehensive solutions to help you maintain a safe and beautiful home environment. Request a consultation and take the first step towards protecting your investment.

Are your walls showing signs of water damage or structural issues like sagging and bulging? Let us check it out for you. Contact Drywall By Renso at 317-269-7319 to learn more about our expert drywall services in Indianapolis, Indiana. We serve residential and commercial clients throughout the Greater Indy areas. Request an estimate, today!

Related Posts:

Fundamental Information About Installing Water-Proof Drywall
Detecting Water Damage in the Home: Signs, Solutions, and Prevention
Tips for Drywall Water Damage Clean Up

Smooth Walls Ahead: Mastering the Drywall Repair Process

In the world of home improvement, few tasks offer as much satisfaction as a perfectly smooth and freshly painted wall. Drywall, the unsung hero of modern interiors, provides the canvas upon which our homes and commercial spaces are built. However, like any other element of construction, drywall is not immune to wear and tear.

Whether you’re dealing with minor dents or major holes, understanding the drywall repair process can save you both time and money. This blog post is your ultimate guide to navigating the world of drywall repair, offering insights and practical steps for homeowners, property managers, and DIY enthusiasts alike.

Call 317-269-7319 for Professional Indianapolis Drywall Repair Service

Why Drywall is the Backbone of Modern Interiors

Drywall, also known as gypsum board or plasterboard, is a staple in modern construction due to its affordability, ease of installation, and versatility. It forms the walls and ceilings of our homes, providing a smooth surface for painting and decorating. Its importance cannot be overstated, as it contributes significantly to the aesthetic and functional aspects of any interior space.

Homes and commercial properties rely heavily on drywall to create partitions, cover structural elements, and improve acoustics. Without it, our living and working spaces would lack the polish and refinement we’ve come to expect. Yet, despite its strengths, drywall is susceptible to damage. Everyday activities, moisture exposure, and structural settling can all lead to dents, cracks, and holes. Understanding the causes of such damage is crucial for effective drywall maintenance and repair.

Common Culprits Behind Drywall Damage

Before embarking on the drywall repair process, it’s essential to identify the common causes of damage. Understanding these factors can help you prevent future issues and protect your walls from unnecessary wear and tear. One prevalent cause of drywall damage is accidental impact. Moving furniture, opening doors too forcefully, or even an energetic pet can result in dents and holes. These seemingly minor incidents can accumulate over time, leaving your walls less than pristine.

Moisture is another major enemy of drywall. Leaks, high humidity, and poor ventilation can lead to mold growth, warping, and deterioration of the material. Addressing the root cause of moisture issues is crucial to preventing further damage. Additionally, settling and structural shifts can cause cracks in drywall. This is especially common in new constructions as the building shifts and settles over time. Understanding these common culprits can guide your repair efforts and prevent future occurrences.

Your Step-by-Step Guide to Drywall Repair

Repairing drywall might seem daunting, but with the right approach and a bit of patience, it can become a manageable task. Here’s a comprehensive step-by-step guide to help you through the drywall repair process.

Assessing the Damage

Begin by thoroughly assessing the extent of the damage. Identify whether you’re dealing with a small dent, a medium-sized hole, or a large section that requires replacement. This assessment will determine the tools and materials you’ll need for the job. Small dents and wall holes can often be fixed with patching, while larger damages might require cutting out and replacing sections of drywall. Take note of any underlying issues, such as moisture or structural problems, that need addressing before proceeding.

Gathering the Necessary Tools and Materials

Once you’ve assessed the damage, gather the necessary tools and materials. For minor repairs, you’ll need patching compound, sandpaper, a putty knife, and paint that matches your wall color. For larger repairs, you’ll need a drywall saw, replacement drywall panels, joint tape, and screws. Having everything ready before you start will make the process smoother and more efficient.

Preparing the Area

Before you begin repairing, prepare the area by clearing the surrounding space and laying down protective coverings. Dust and debris can spread easily during the repair, so safeguarding your furniture and flooring is essential. If you’re repairing a wall near electrical outlets or switches, ensure that the power is turned off for safety.

Repairing Small and Large Holes

For small dents and holes, start by applying a thin layer of patching compound using a putty knife. Smooth it out and allow it to dry before sanding it down to create a seamless finish. For larger holes, cut out the damaged section and replace it with a new piece of drywall. Secure it with screws, apply joint tape, and use compound to blend the edges. Sand the area once the compound is dry for a uniform surface.

Sanding and Finishing

Sanding is a critical step in achieving a polished look. Use fine-grit sandpaper to gently smooth the patched area, ensuring that it’s flush with the surrounding wall. Be cautious not to over-sand, as this can damage the drywall surface further.

Painting and Final Touches

Once the repair is complete and the surface is smooth, it’s time to paint. Use a primer to ensure even paint application, then apply a coat of paint that matches your existing wall color. Feather the edges to blend the new paint seamlessly into the old. Stand back and admire your handiwork—a wall restored to its former glory.

Tips for DIY Drywall Repairs

While the drywall repair process can be tackled by anyone, a few tips can enhance your success. First, take your time. Rushing through the repair can lead to mistakes and a less-than-perfect finish. Patience is key to achieving a professional-looking result. Practice makes perfect. If you’re new to drywall repair, consider practicing on a scrap piece of drywall before tackling visible sections. This will help you refine your technique and build confidence.

Don’t hesitate to seek guidance. Online tutorials and home improvement resources can provide valuable insights and tips from experienced DIYers. Learning from others’ experiences can save you time and frustration.

Knowing When to Call a Professional

While many drywall repairs can be handled independently, there are situations where calling a professional is the best choice. Extensive damage, underlying issues like mold, or lack of experience can lead to more significant problems if not addressed correctly. Professionals bring expertise and specialized tools to the table, ensuring a smooth and long-lasting repair. If you’re unsure about tackling a particular repair, reaching out to a professional can save you time and headaches.

Wrapping Up

In conclusion, understanding and mastering the drywall repair process is a valuable skill for homeowners, property managers, and DIY enthusiasts. Regular maintenance and timely repairs not only enhance the aesthetic appeal of your spaces but also contribute to the overall integrity of your property. By addressing common causes of damage and following a systematic repair process, you can keep your walls looking pristine and well-maintained.

Maintaining your drywall is a proactive step in preserving the beauty and value of your home. Don’t hesitate to take action when damage occurs, and remember that seeking professional help is always an option.

If you’re ready to tackle your next drywall repair project or need assistance with more extensive repairs, our team of experts is here to help. Contact Drywall by Renso at 317-269-7319 for professional drywall repair service in Indianapolis Indiana. We serve residential and commercial clients all throughout the central part of the state.

Related Posts:

The Real Cost of Drywall Repair: Insights for Every Budget
Drywall Problems Decoded: A Guide to Drywall Repair and Maintenance
Basic Toolbox for Drywall Repair

Bubbling and Peeling Paint: A Homeowner’s Guide to Restoration

Have you noticed your ceiling or walls aren’t looking as smooth as they once were? Bubbling and peeling paint can be unsightly, and as a homeowner, it’s a problem you can’t ignore. It’s important to understand why paint bubbles and peels, as it can help prevent further damage and maintain the aesthetic appeal of your home.

In the following sections, we’ll explore the common causes of paint bubbling and peeling, how to evaluate the severity of the issue, and steps to repair and prevent future occurrences. Whether you’re a DIY enthusiast or considering professional help, this guide is for you.

Call 317-269-7319 for Professional Drywall Painting and Repair in Indianapolis

Identifying the Causes of Bubbling and Peeling Paint

Paint bubbling occurs when the paint film lifts from the underlying surface, forming blisters or bubbles. This often leads to wall peeling, where sections of paint come away from the wall. It’s not only an eyesore but also an indication of underlying problems that need addressing.

One of the primary reasons for paint bubbling and wall peeling is moisture. Humidity or leaks can seep into walls, causing the paint to lose its adhesion. This is especially common in bathrooms, kitchens, and basements where moisture levels are higher. Inspecting for leaks or condensation is vital to prevent further paint damage.

Another culprit could be poor surface preparation before painting. If the walls weren’t properly cleaned, sanded, or primed, the paint might not adhere correctly, leading to bubbles. Dirt, grease, and previous paint layers can create a barrier that prevents new paint from sticking as it should.

Low-quality paint or incorrect application techniques can also lead to issues. Cheaper paints might lack the necessary components for proper adhesion and flexibility, making them more prone to bubbling. Additionally, applying paint in unsuitable conditions, such as high humidity or extreme temperatures, can contribute to the problem.

Evaluating the Extent of Damage

Before jumping into solutions, it’s crucial to assess the extent of the damage. Minor bubbling may only affect small areas and can often be remedied with minimal effort. A quick inspection and some touch-up work might suffice, saving time and resources.

However, if you notice extensive wall peeling or large paint bubbles, this could indicate a more serious problem. Major issues might suggest significant moisture infiltration or structural concerns that need addressing before repainting can occur. Ignoring these signs can lead to further deterioration and costly repairs down the line.

Examine the affected areas closely. A small patch of bubbling localized to a single area might be an isolated incident. However, if multiple walls or the entire ceiling are affected, it might be time to consider more comprehensive measures, potentially enlisting the help of a professional.

Repairing Paint and Wall Damage  

Once you’ve evaluated the damage, it’s time to start repairing. Begin by removing the old, damaged paint. Use a scraper to gently peel away the loose sections without damaging the underlying surface. Patience is key here—removing the paint carefully will prevent further surface damage.

Next, address any cracks or holes that have surfaced. Fill them with a suitable filler or spackle, smoothing them out to create a seamless finish. Allow the filler to dry completely before moving on to the next step. This process ensures the surface is even and ready for repainting.

Sanding is an essential step in ensuring a smooth finish. Use fine-grit sandpaper to gently sand the filled areas and the surface around them. This helps create a texture that the new paint will adhere to, minimizing the risk of future bubbles and peeling. Remember to clean the surface thoroughly after sanding to remove any dust and debris.

Preventing Future Paint Issues

Prevention is better than cure. To avoid future paint issues, improving ventilation in your home is crucial. Ensure adequate airflow in areas prone to humidity, such as bathrooms and kitchens. Installing exhaust fans or dehumidifiers can help regulate moisture levels and protect your walls.

Choosing the right paint is also a critical step. Opt for high-quality paints designed for specific environments. For example, use moisture-resistant paint in bathrooms and kitchens. This type of paint is formulated to withstand higher humidity levels, reducing the risk of bubbling and peeling over time.

Sealing surfaces before painting can enhance paint adhesion. Applying a primer suitable for your wall type creates a barrier that prevents moisture infiltration and promotes a smoother finish. Primers are especially beneficial for surfaces that have undergone significant repairs or are being painted for the first time.

DIY vs Professional Drywall Repair

Deciding whether to tackle the issue yourself or hire a professional depends on several factors. Minor bubbling and peeling that affects only a small area can be a manageable DIY project. With the right tools and guidance, you can restore your walls to their former glory.

However, if the problem is extensive, or if you suspect underlying structural or moisture issues, consulting a professional is advisable. Experts in drywall repair and drywall finishing have the skills and knowledge to address complex problems effectively, ensuring a long-lasting solution.

Weigh the pros and cons of each approach. DIY projects can be cost-effective and satisfying, but they require time, patience, and a willingness to learn. Professional services, while more costly upfront, offer peace of mind and expertise, particularly for significant or complicated repairs.

Cost Considerations and Budgeting Tips

Understanding the costs associated with paint repair and prevention is essential for budgeting. DIY repairs typically involve purchasing materials such as paint, primer, filler, sandpaper, and tools. While these costs are generally lower, the time investment should also be considered, especially for larger projects.

Hiring a professional comes with higher initial costs but offers the benefit of expert solutions and faster turnaround times. Professionals can provide accurate assessments, comprehensive repairs, and high-quality finishes, often saving money in the long run by preventing repeated issues.

Consider obtaining multiple quotes from reputable contractors to compare prices and services. This will help you make an informed decision that aligns with your budget and the severity of the issue. Don’t forget to account for any additional improvements, like installing ventilation, that can prevent future problems and protect your investment.

Final Thoughts

Dealing with bubbling and peeling paint is a common challenge for homeowners, but it’s one that can be effectively managed with the right approach. Understanding the causes, evaluating the damage, and implementing tailored solutions are key steps in restoring your walls and ceilings.

Remember, timely intervention and regular maintenance not only enhance the appearance of your home but also protect your investment. By addressing issues as they arise and taking preventive measures, you can enjoy a durable and attractive paint job for years to come.

Should you require further assistance or wish to explore professional services, consider reaching out to a reputable drywall repair company. They can offer valuable advice and expertise tailored to your specific needs.

Are you tired of looking at your wall and ceiling damage? Let us revamp your space at a price you can afford. Contact Drywall by Renso at 317-269-7319 for professional drywall services in Indianapolis, Indiana. We serve residential and commercial clients.

Related Posts:

Professional Painting Guide for New Sheetrock Walls
How to Prime Your Walls Before Painting Them
Apply These Painting Tricks to Paint Like a Professional

The Real Cost of Drywall Repair: Insights for Every Budget

In the world of home maintenance, drywall plays a pivotal role. It’s the canvas for your interior decor and the backbone of your home’s walls and ceilings. But just like any other part of your home, drywall can suffer damage over time. Whether it’s a small crack or a larger hole, addressing these issues promptly is essential for maintaining the overall health and aesthetic of your living or working space.

For homeowners, property managers, landlords, and small business owners, understanding the nuances of drywall repair is crucial for making informed decisions that won’t break the bank. In today’s post, we will  dive into the real cost of drywall repair and provide insights for every budget.

Call 317-269-7319 for Professional Drywall Repair Service in Indianapolis Indiana

Understanding the Factors Affecting Drywall Repair Costs

When it comes to drywall repair, several factors can influence the cost. The first is the type of damage you’re dealing with. Cracks and holes are common issues, but water damage and mold can also rear their ugly heads. Each type of damage presents its own challenges and, therefore, can affect the overall cost of repair. Cracks might require simple patching, whereas mold could necessitate extensive treatment and replacement of materials.

Another significant factor is the size and severity of the damage. A minor crack may be a quick and easy fix, but extensive water damage or a large hole can require more materials and labor, driving up costs. The extent of the damage can also determine whether you need a professional drywall contractor, which will influence the overall cost.

Finally, material and labor costs are always a consideration. The price of drywall supplies can vary, and labor costs can differ depending on the complexity of the repair and the expertise required. Understanding these factors can help you budget effectively and make the best choice between professional drywall service or a DIY approach.

Average Cost Breakdown by Repair Type

Let’s break down the average costs associated with different types of drywall damage. For common repairs like fixing small holes or cracks, costs can range from $50 to $150, depending on the materials and tools required. However, if you’re dealing with more severe issues like water damage, costs can rise significantly, often reaching between $200 and $500.

Regional variations in repair costs can also impact your budget. In urban areas, where living expenses are higher, the cost of drywall installation and repair may reflect this. Conversely, rural regions might offer more affordable rates. It’s important to consider these regional variations when planning your repair budget.

By understanding the typical costs associated with each type of repair, you can better anticipate expenses and plan accordingly. This knowledge not only helps in budgeting but also in determining whether a professional drywall contractor is necessary for larger, more complex repairs.

DIY vs. Professional Repair

When faced with drywall damage, you’re often presented with two options: tackle the repair yourself or hire a professional. Each choice has its own set of advantages and disadvantages. DIY repair is usually more cost-effective and can be satisfying if you’re handy. However, it requires time, effort, and the right tools. A less-than-perfect job can lead to additional repairs down the road.

On the other hand, professional repair ensures quality workmanship and can handle more complicated issues like extensive water damage or structural problems. The downside? It often comes with a higher price tag. In many cases, the cost of hiring a professional is justified by the quality and efficiency of the work, particularly for larger projects.

The decision ultimately comes down to the nature of the damage and your confidence in handling repairs. For minor cracks and holes, DIY might be sufficient. But for more significant damage, investing in professional drywall services could save you time and money in the long run.

Tips for Reducing Drywall Repair Costs

Reducing drywall repair costs is possible with a few strategic approaches. First, consider preventive maintenance to minimize the need for repairs. Regularly inspect your walls and ceilings for signs of damage, such as small cracks or discoloration, and address these issues early to prevent them from worsening.

When repairs are necessary, choosing cost-effective methods can make a difference. Opt for quality materials that offer durability, which may cost more upfront but save money in the long run by reducing the need for future repairs. Additionally, gathering multiple quotes from drywall contractors can help you find the best deal without sacrificing quality.

Lastly, consider bundling multiple repairs into one project. If you have several areas that need attention, addressing them all at once can often reduce labor costs compared to handling each repair separately.

Conclusion

Understanding the real cost of drywall repair is essential for homeowners, property managers, landlords, and small business owners. By considering factors such as the type of damage, the size and severity, and the choice between DIY and professional repairs, you can make informed decisions that align with your budget. Preventive maintenance and cost-effective strategies can further reduce expenses.

Remember, when in doubt, it’s always wise to seek the advice of professional drywall contractors who can provide expert guidance and ensure the longevity of your repairs. For more detailed information or to explore our drywall services, reach out to us today. Whether you’re fixing a minor crack or tackling extensive water damage, your walls and ceilings deserve the best care possible.

Don’t hesitate to reach out to our expert team for personalized advice and assistance. Contact Drywall by Renso at 317-269-7319 for professional drywall services in Indianapolis, Indiana. Whether you’re tackling a small repair or a large-scale renovation, we’re here to help you achieve the perfect finish.

Related Posts:

The Complete Handbook on Drywall Repairs and Maintenance
Drywall Problems Decoded: A Guide to Drywall Repair and Maintenance
Avoid DIY Disasters: The Importance of Professional Drywall Installation

Drywall Problems Decoded: A Guide to Drywall Repair and Maintenance

Drywall is an essential element in modern homes. It creates the perfect canvas for interior design while providing insulation and fire resistance. However, like any other part of your home, drywall is not immune to issues. Understanding these common drywall problems is crucial for maintaining the integrity and aesthetic of your living space.

Whether you’re a seasoned DIY enthusiast or a homeowner looking to protect your investment, this guide offers insights into common problems and practical solutions. From identifying signs of trouble to knowing when to call in the experts, we’ve got you covered.

Call 317-269-7319 for Drywall Repair Service in Indianapolis Indiana

Understanding the Role of Drywall in Your Home

Drywall, often referred to as plasterboard or gypsum board, forms the foundation of most interior walls and ceilings. It serves as a backdrop for paint, wallpaper, and other decorative finishes. Its versatility and cost-effectiveness make it a popular choice among builders and homeowners alike. However, with its prevalence comes the potential for problems.

The importance of drywall goes beyond aesthetics, as it also contributes to the structural soundness of your home. It acts as a barrier against noise and helps regulate temperature by providing insulation. Thus, maintaining your drywall is imperative, not just for visual appeal, but for overall home health.

Unfortunately, various issues can arise over time, many of which are easily overlooked until they become significant problems. The good news is that by understanding these issues and addressing them early, you can extend the life of your drywall and enhance your home’s value.

Recognizing the Signs of Drywall Damage

One of the first steps in tackling drywall issues is learning to recognize the signs. Visible cracks are among the most common symptoms of drywall problems. These may appear as minor hairline fractures or larger, more pronounced splits. Drywall cracks can result from settling foundations or temperature fluctuations, and understanding their cause is vital for effective repair.

Water damage is another frequent issue, often manifesting as discoloration, stains, or swollen sections of drywall. This damage is typically caused by leaks in plumbing or roofing, and it requires prompt attention to prevent further deterioration and mold growth. Mold not only damages drywall but can also pose health risks, making early detection and resolution critical.

Sagging drywall is a sign of structural issues or improper installation. It can occur when drywall is not adequately supported or when moisture weakens its integrity. Addressing sagging drywall is important to maintain the safety and appearance of your home.

What Causes Drywall Problems?

Several factors contribute to drywall problems, understanding these causes can help in prevention and repair. Environmental influences, such as humidity and temperature changes, can lead to expansion and contraction of drywall, resulting in cracks and warping. This is especially prevalent in climates with extreme seasonal variations.

Poor installation practices often lead to drywall issues. Incorrectly spaced screws, insufficient joint compound, or improper finishing techniques can result in weak seams and unsightly bulges. Ensuring proper installation techniques and using quality drywall supplies can mitigate these risks.

Structural challenges, such as shifting foundations or settling, can exert pressure on drywall, causing cracks and other damages. Regular inspections can help identify these underlying issues early, allowing for timely intervention. Lastly, general wear and tear from daily activities can also take a toll on your drywall over time.

Quick Fixes for Minor Drywall Issues

For minor drywall problems, such as small cracks or holes, DIY solutions are both feasible and cost-effective. Begin by gathering the necessary drywall supplies, including patching compound, a putty knife, sandpaper, and a paintbrush. With these tools, you can address small imperfections with relative ease.

To repair a small crack, start by applying a thin layer of patching compound over the affected area using a putty knife. Smooth out the compound to blend with the surrounding surface. Allow it to dry completely before sanding it down to create a seamless finish. Once sanded, apply a coat of primer and paint to match the rest of the wall.

For holes in the wall, you’ll need to cut a piece of drywall to fit the opening. Secure it with drywall screws and cover the seams with joint tape. Apply joint compound over the tape, feathering the edges to blend with the existing wall. After the compound dries, sand it smooth and apply paint. This method is effective for small repairs and can be a satisfying DIY project for homeowners.

Knowing When to Call in the Pros

While many drywall issues can be handled with DIY techniques, some situations call for professional intervention. Extensive water damage, for instance, often indicates an underlying issue that requires expert assessment and repair. Professionals can ensure that the source of the water is addressed and that damaged areas are properly restored.

Significant structural damage, such as large cracks or sagging drywall, may indicate foundational problems. These require the skills and knowledge of drywall contractors who can evaluate the situation and suggest appropriate solutions. Attempting to resolve these issues without professional help can lead to further complications and increased costs.

If you’re unsure about the severity of a drywall problem, it’s always wise to consult with a professional drywall contractor. They can provide valuable insights and recommendations to ensure your home’s safety and longevity. Additionally, hiring a professional can save time and provide peace of mind knowing that the job is done correctly.

Proactive Measures to Prevent Drywall Problems

Taking preventative measures can go a long way in avoiding common drywall problems. Regular home maintenance, such as checking for leaks and ensuring proper ventilation, can help prevent water damage and mold growth. Being proactive in addressing these issues can save you significant time and money in the long run.

Investing in quality drywall supplies and proper installation techniques is crucial for preventing future issues. Ensure that your drywall is installed by experienced professionals who adhere to best practices. This includes using the right type of drywall for different areas of your home, such as moisture-resistant panels in bathrooms and kitchens.

Regular inspections of your home’s structure can also help identify potential issues before they escalate. By monitoring the condition of your drywall and addressing minor problems promptly, you can maintain your home’s integrity and aesthetics for years to come. Implementing these practices will help you enjoy a trouble-free drywall experience.

Wrapping Up

In conclusion, understanding and addressing common drywall problems is essential for maintaining your home’s value and safety. By recognizing signs of damage, understanding underlying causes, and taking proactive measures, you can effectively manage your drywall’s health and appearance.

Whether you’re tackling minor repairs yourself or consulting with professionals for more significant issues, staying informed and proactive is key to preserving your home’s integrity. Remember, prompt attention to drywall problems can prevent costly repairs and ensure a beautiful, functional living space.

If you encounter drywall challenges that seem beyond your expertise, don’t hesitate to reach out to drywall contractors for guidance. Their expertise can provide the assurance you need to keep your home in top condition. For personalized advice on your unique situation, consider contacting a professional today.

While many repairs are suitable for DIY enthusiasts, don’t hesitate to call a professional for more complex or extensive damage. At Drywall By Renso, we specialize in professional drywall repair services in Indianapolis, ensuring your walls and ceilings look as good as new. Contact us today at 317-269-7319  for a consultation and let our experts handle all your drywall repair needs. Your satisfaction is our top priority, and we’re here to help you maintain a beautiful and functional space.

Related Posts:

The Complete Handbook on Drywall Repairs and Maintenance
Tips for Avoiding DIY Drywall Mistakes
Avoid DIY Disasters: The Importance of Professional Drywall Installation

The Perfect Finish: Mastering Drywall Sanding for DIY Enthusiasts

Are you a DIY enthusiast, home renovator, or Dad trying to fix a hole in the wall? Achieving a flawless drywall finish can be the key to transforming any space. Proper drywall preparation is crucial in the renovation process, ensuring that your walls look smooth and professional. In this comprehensive guide, we’ll explore the ins and outs of sanding drywall, offering valuable tips, techniques, and step-by-step instructions to help you achieve the perfect finish.

Call 317-269-7319 for Professional Drywall Repair and Installation in Indianapolis Indiana

A Preview to the Drywall Sanding Process

Before we jump into the how-to, let’s familiarize ourselves with the basics of sanding drywall. The sanding process involves using various types of sandpaper and sanding tools to smooth out the surface of drywall joints, corners, and imperfections. The goal is to create a seamless and even surface that blends perfectly with the surrounding wall.

Types of Sandpapers

The key to a successful sanding job lies in choosing the right type of sandpaper. Generally, sandpapers com e in different grits, ranging from coarse to fine. Coarse grits (40-80) are ideal for initial sanding to remove excess joint compound quickly. Medium grits (100-150) are used for smoothing out the surface, while fine grits (180-220) provide that final polished finish.

Essential Sanding Tools

To achieve professional results, it’s essential to have the right tools on hand. Here are some must-have sanding tools for drywall:

  • Sanding Block: A simple yet effective tool for manual sanding, providing better control over pressure.
  • Pole Sander: Ideal for reaching high or extended areas, ensuring even sanding across large surfaces.
  • Orbital Sander: A power tool that makes quick work of extensive sanding tasks, delivering consistent results.
  • Sanding Sponge: Perfect for detailed work and corners, offering flexibility and precision.

Step-by-Step Guide to Sanding Drywall

Mastering drywall sanding requires a systematic approach. Follow these steps to achieve a smooth and professional finish:

Initial Preparation

Preparation is the key to success in any renovation project. Start by ensuring the drywall surface is clean and free of any debris. Cover the floors and furniture with drop cloths to protect them from dust. Wear protective gear, including a mask, goggles, and gloves, to safeguard yourself from dust particles.

Applying Joint Compound

Before sanding, apply a thin layer of joint compound to the seams and screw holes. Use a taping knife to feather the edges, creating a smooth transition between the drywall and compound. Allow the joint compound to dry completely before proceeding to the next step.

Sanding the Surface

Begin sanding the dried joint compound using coarse grit sandpaper. Hold the sanding block or pole sander at a slight angle and use light pressure. Move in circular motions to avoid creating grooves or uneven surfaces. Once the majority of the compound is smoothed out, switch to medium grit sandpaper for further refinement.

Blending and Feathering

To achieve a seamless finish, focus on blending and feathering the edges of the joint compound. Use fine grit sandpaper to gently sand the edges, ensuring they blend smoothly with the surrounding drywall. This step is crucial to creating an even surface that hides the seams and imperfections.

Tips and Techniques for a Professional Finish

Achieving a flawless drywall finish takes practice and attention to detail. Here are some tips and techniques to help you along the way:

Avoiding Common Mistakes

One common mistake is applying too much pressure while sanding, leading to uneven surfaces. Instead, use light, consistent pressure to avoid creating indentations. Additionally, be cautious not to over-sand the joint compound, which can result in exposed seams.

Checking for Smoothness

Periodically check the smoothness of the surface by running your hand over it. If you feel any rough spots or ridges, continue sanding until the surface feels even and polished. Using a bright light source can also help highlight any imperfections that need further attention.

Sanding the Corners

Sanding corners can be challenging, but using a sanding sponge can make the task easier. Fold the sponge to create a sharp edge and gently sand the corners in a back-and-forth motion. This will help achieve a clean and sharp corner finish.

Importance of Dust Control and Safety Measures

Sanding drywall generates a significant amount of dust, which can be harmful if not properly managed. Implementing dust control measures is essential to ensure a safe and clean working environment.

Using a Dust Extractor

Investing in a dust extractor or vacuum with a HEPA filter can significantly reduce dust levels. Attach the extractor to your sanding tools to capture dust particles at the source, preventing them from spreading throughout the room.

Sealing Off the Work Area

Seal off the work area using plastic sheeting and painter’s tape to contain the dust. Close doors and windows to prevent dust from circulating into other parts of your home. After sanding, use a damp cloth to wipe down surfaces and remove any remaining dust.

Personal Protective Equipment (PPE)

Always wear appropriate PPE, including a dust mask, safety goggles, and gloves. This protective gear will shield you from inhaling dust particles and protect your eyes and hands from irritation.

Conclusion

Mastering the art of drywall sanding is a valuable skill for any DIY enthusiast, home renovator, or interior designer. By following the step-by-step guide and implementing the tips and techniques outlined in this post, you can achieve a smooth and professional finish that enhances the overall look of your space.

If you’re ready to take your sanding skills to the next level, don’t hesitate to reach out to our expert team for personalized advice and assistance. Contact Drywall by Renso at 317-269-7319 for professional drywall services in Indianapolis, Indiana. Whether you’re tackling a small repair or a large-scale renovation, we’re here to help you achieve the perfect finish.

Related Posts:

Avoid Drywall Dust With Wet Sanding
Tips for Avoiding DIY Drywall Mistakes
How to Cut Drywall With Just Two Simple Tools

Common Joint Taping Issues and How to Solve Them

If you’ve tackled drywall projects, you know how crucial joint taping is. Taping ensures your walls look seamless and professional. However, common joint tape issues can mar even the best DIY or professional efforts. This blog post aims to help DIY enthusiasts and home improvement professionals understand and solve these common joint tape problems.

Call 317-269-7319 for Professional Drywall Installation and Repair in Indianapolis

Common Joint Taping Issues

Bubbling and Wrinkling

Bubbling and wrinkling are among the most frustrating issues in drywall taping. They often result from improper taping techniques or environmental factors like humidity. Understanding why these problems occur is essential for effective solutions.

Tape Peeling

Nothing ruins an otherwise perfect drywall job quite like peeling tape. This issue often arises from poor adhesive application or low-quality tape. Identifying the root causes can help you avoid this pitfall.

Poor Adhesion

Poor adhesion is another frequent concern, particularly in areas with fluctuating temperatures or high humidity. It can lead to loose tape, creating an unsightly finish. Knowing how to ensure strong adhesion is vital for a long-lasting result.

Visible Joints

Visible joints compromise the aesthetics of a wall. They often stem from an inadequate application of taping compound or uneven sanding. Addressing this problem requires attention to detail and proper technique.

Detailed Explanations and Solutions

Bubbling and Wrinkling

Causes: Bubbling and wrinkling typically occur due to excessive compound application or insufficient pressure during tape smoothing. Moisture trapped between layers can also be a culprit.

Solutions:

  • Remove affected tape sections and clean the area.
  • Apply a thin layer of joint compound and press the tape firmly.
  • Smooth the tape using a drywall knife, ensuring no air pockets remain.

Best Practices: For professionals, using high-quality paper tape and maintaining consistent pressure during application can minimize these issues.

Tape Peeling

Causes: Peeling tape often results from using low-quality tape or insufficient compound beneath the tape.

Solutions:

  • Remove the peeling tape and any loose compound.
  • Apply a fresh layer of compound and use quality tape.
  • Press the tape firmly and apply additional compound layers as needed.

Best Practices: Professionals should always opt for premium tape and ensure the surface is clean before application.

Poor Adhesion

Causes: Poor adhesion usually stems from using low-quality compound or working in unfavorable conditions like high humidity.

Solutions:

  • Ensure the surface is clean and dry before starting.
  • Use a high-quality joint compound and apply it evenly.
  • Press the tape firmly and allow adequate drying time.

Best Practices: Using a dehumidifier in humid environments can improve adhesion. Professionals should also consider temperature and humidity levels when scheduling drywall work.

Visible Joints

Causes: Visible joints are often due to uneven compound application or inadequate sanding.

Solutions:

  • Apply the joint compound evenly, feathering the edges.
  • Sand the area lightly but thoroughly after it dries.
  • Apply a second coat if necessary, ensuring a smooth transition between the tape and drywall.

Best Practices: For professionals, investing in quality sanding tools and taking time with each step can ensure flawless results.

Importance of Using High-Quality Tape and Tools

Using high-quality tape and tools is essential for achieving a professional finish. Low-quality materials can lead to various issues, including those mentioned earlier. Investing in premium products ensures durability and ease of application.

Quality Affects Finishing Results

High-quality tape and tools provide better adhesion, smoother application, and fewer issues during the finishing process. This investment often pays off in the long run by reducing rework and enhancing the overall appearance.

Recommendations for Tape and Tools:

  • Paper Tape
  • Mesh Tape
  • Stainless Steel Drywall Knife
  • Professional-Grade Joint Compound
  • High-Quality Sanding Tools

Conclusion

Mastering drywall taping is essential for achieving smooth, professional-looking walls. By understanding common issues such as bubbling, wrinkling, tape peeling, poor adhesion, and visible joints, you can take proactive steps to address and prevent these problems. Using high-quality materials and adhering to best practices significantly enhances the final result, reducing the need for rework and ensuring a durable finish.

Whether you’re a DIY enthusiast or a seasoned professional, investing time and effort in proper taping techniques will pay off in the long run, resulting in beautifully finished walls that stand the test of time.

On the other hand, if do-it-yourself drywall work is not working out, we can help. Contact Drywall by Renso at 317-269-7319 for professional drywall services and custom drywall texture in Indianapolis, Indiana. We serve both residential and commercial clients.  Request a free estimate, today!

Related Posts:

Troublesome Nail Pops? Here’s How to Spot, Fix, and Prevent Them
Avoid DIY Disasters: The Importance of Professional Drywall Installation
Wall Anchor Removal Guide