A Homeowner’s Guide to New Construction Drywalling  

New construction drywalling is a critical step in creating solid, beautiful walls and ceilings for your new home or commercial space. While it often goes unnoticed when completed properly, drywall provides both structural stability and a blank canvas ready for interior painting or design. Getting it right the first time can save time, money, and frustration down the line. 

Whether you’re taking a DIY approach or hiring professional drywall contractors, our guide will walk you through the key considerations, from planning and material selection to installation and finishing. 

Call 317-269-7319 for Professional New Construction Drywall in Indianapolis

Planning and Preparation for New Construction Drywall

Before you begin your new construction drywall project, proper planning and preparation can set you up for success. Here’s what you need to consider:

Assess Project Scope 

Define your project requirements clearly. Are you working on a single room, an entire home, or a commercial space? Larger projects will require more materials and careful coordination. 

Set a Budget 

Understanding your budget constraints is essential. Key factors to account for include:

  • Material Costs: Different types of drywall come with varying price tags. Opt for the type that suits your needs.
  • Labor Costs: If you’re hiring professional drywall contractors, obtain quotes for the job. 
  • Tools and Equipment Rental: For those going the DIY route, factor in the cost of renting or purchasing tools like drywall lifts or sanders.
  • Disposal Fees: If old drywall or debris needs removal, include disposal costs.
  • Contingency Funds: Unexpected issues happen. Allocate at least 10% of your budget for surprises like incorrect measurements or damaged materials. 

Create a Realistic Timeline 

Create a project timeline with clear milestones. Keep in mind that certain steps, like mudding and sanding, require specific drying times to avoid compromising the finish. 

Get a Quote for New Construction Drywall

Choosing the Right Drywall Material 

Selecting the right type of drywall is key to ensuring durability and meeting specific needs for each space. Here’s an overview of popular drywall options and their common uses:

  • Standard Drywall – Best for general interior walls and ceilings. It’s cost-effective and suitable for spaces with low moisture exposure. 
  • Moisture-Resistant Drywall – This green or purple board is perfect for bathrooms, laundry rooms, and basements. It resists mold and mildew better than standard drywall. 
  • Fire-Resistant Drywall – Ideal for garages, utility rooms, or areas near furnaces, this type prioritizes safety by slowing fire spread. 
  • Soundproof Drywall – If privacy is important, this denser drywall minimizes noise between rooms and is a favorite for home offices, theaters, and bedrooms. 
  • Cement Board – While not technically drywall, this material is used as a base for tiling projects in wet areas like showers. 

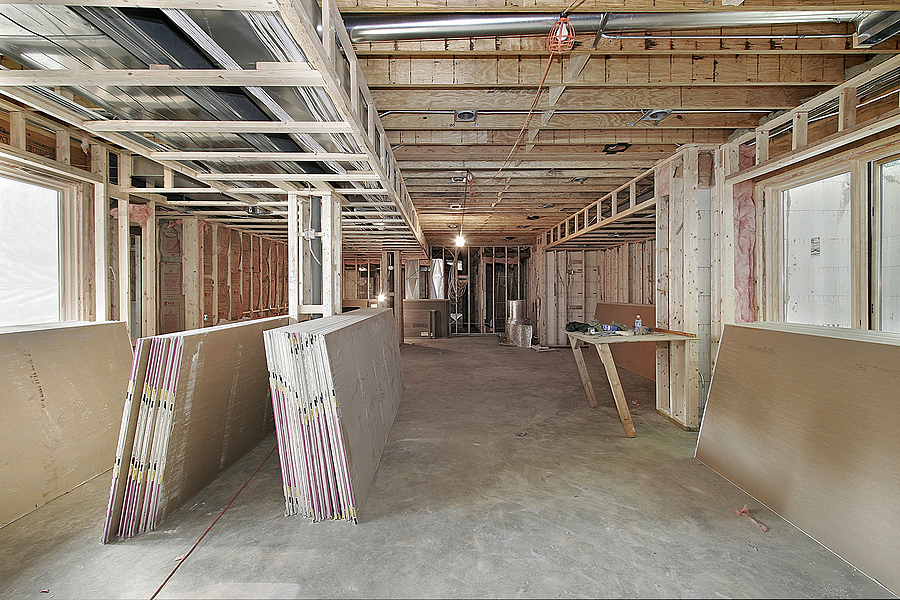
The Step-by-Step Installation Process 

Once you’ve chosen your materials and planned the project, it’s time to begin installation. Here’s how to install drywall like a pro:

Step 1: Measure and Cut 

Accurate measurements are the foundation of proper installation. Measure each wall and ceiling area, then cut drywall sheets to fit snugly. Always leave a small gap at the bottom of walls to prevent moisture absorption from floors. 

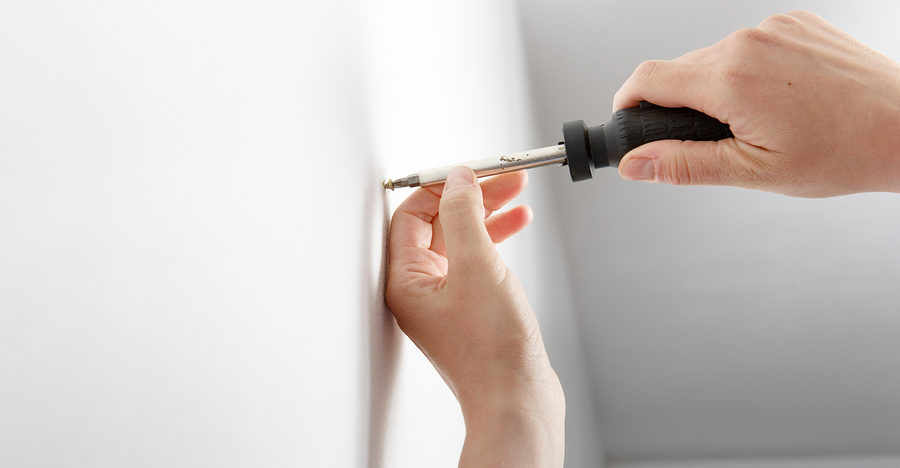
Step 2: Attach Drywall Sheets 

Use screws instead of nails for greater stability and to minimize the risk of popping. Start by affixing sheets to the ceiling before moving to walls, ensuring each piece aligns properly with studs. 

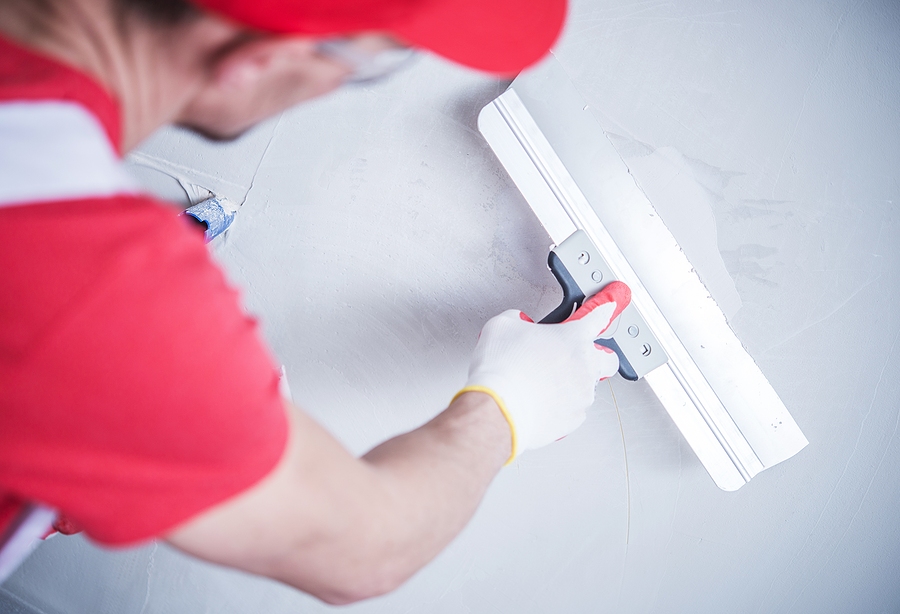
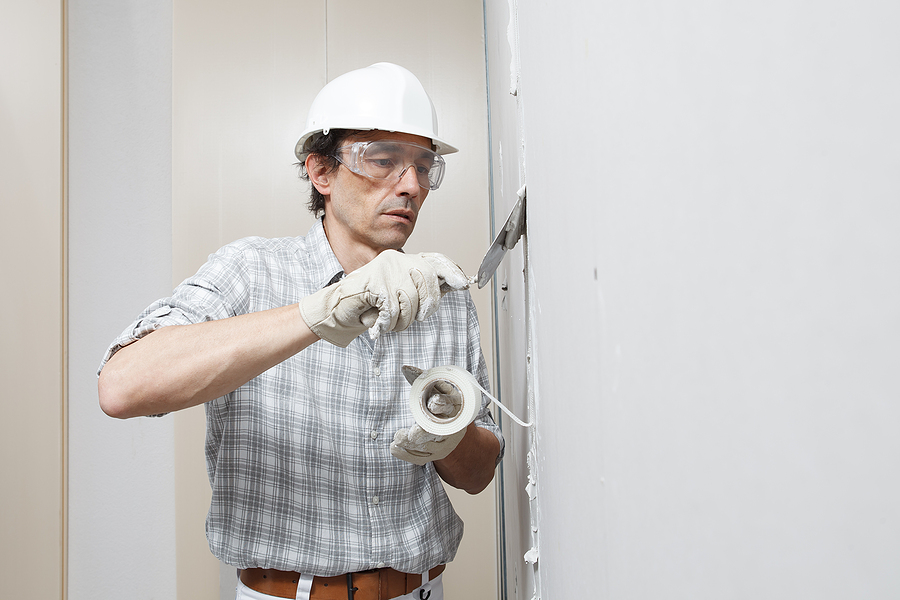
Step 3: Mudding and Taping 

Apply joint compound (mud) to the seams and use drywall tape to cover them. Smooth out excess compound for a seamless finish. Try the All Purpose Ready-Mixed Joint Compound by USG Sheetrock Brand.
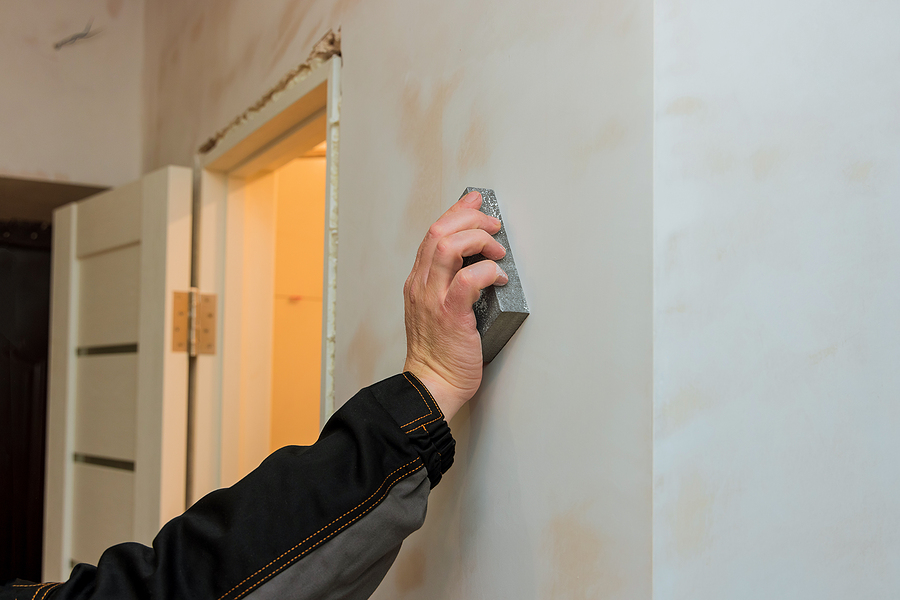
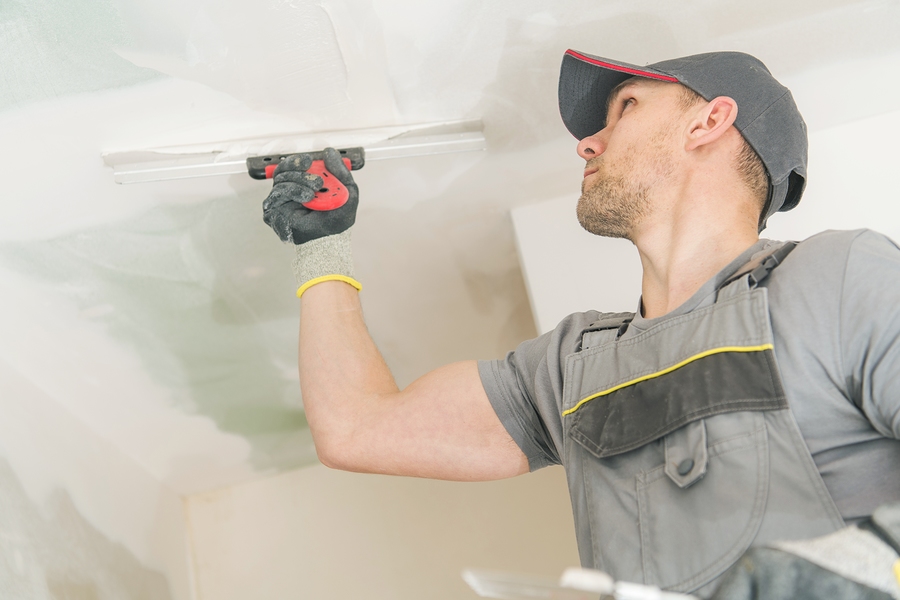
Step 4: Sanding 

After the mud has dried, sand the joints to create a smooth surface. This step is essential for achieving a flawless finish before applying primer or paint. 

Step 5: Priming 

Before beginning any interior painting, apply a drywall primer to prepare the surface for even color absorption and a polished look. 

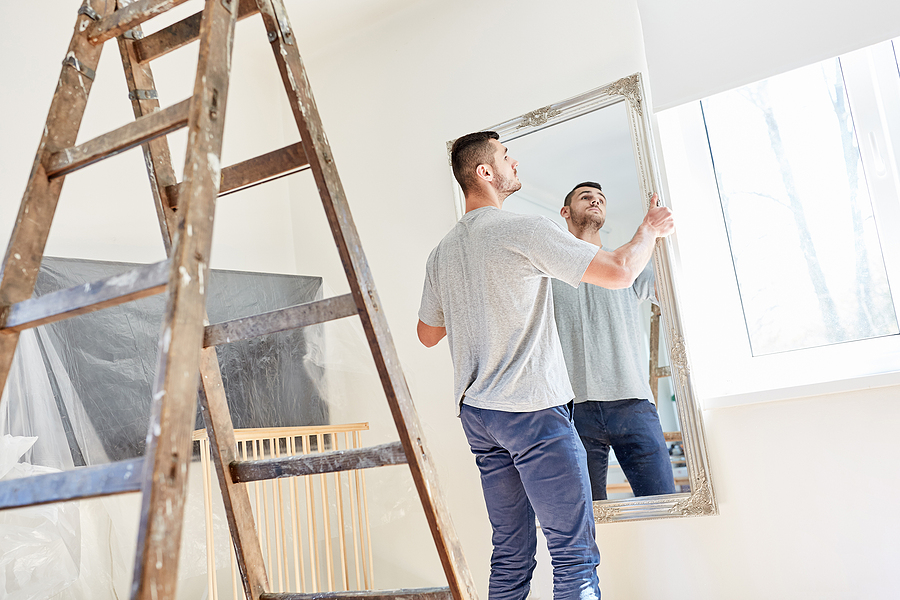
Finishing Touches for a Professional Look 

Drywall finishing isn’t just about covering imperfections; it’s about creating a polished foundation for the final design. Follow these tips for flawless results:

  • Use fine-grit sandpaper for a smooth finish without over-sanding. 
  • Ensure all screws are flush with the drywall surface. 
  • Inspect every seam and corner to identify areas needing extra attention. 
  • Always vacuum or clean up dust before priming. 

Common Drywall Installation Mistakes to Avoid 

Mistakes during drywalling can lead to costly fixes or unsightly results. Here are some common pitfalls to watch out for and how to prevent them:

  • Improper Measuring – Accurate measurements prevent material waste and misalignment. Double-check all dimensions before cutting. 
  • Incorrect Fastening – Over-driving screws can weaken the drywall, while under-driving can leave bumps that ruin the smooth finish. Always ensure screws are flush. 
  • Sloppy Joint Treatment – Poor mudding, taping, or sanding can result in visible seams and cracks over time. Take your time with these steps for a professional look. 
  • Using the Wrong Drywall Type – Installing standard drywall in moisture-prone areas can lead to long-term damage and mold issues. 
  • Rushing the Process – Skipping drying times between steps can compromise the strength and appearance of the finish. Patience is key to a durable result. 

DIY or Hire a Professional? 

Deciding between DIY drywall installation and hiring professionals depends on your budget, skill level, and timeline.

▶ DIY Drywall Installation 

Pros:

  • Cost savings on labor expenses. 
  • Flexibility to work at your own pace. 

Cons:

  • Requires skill and tools for professional results. 
  • Time-consuming and prone to mistakes without experience. 

▶ Professional Drywall Installation 

Pros:

  • Faster completion with high-quality results. 
  • Reduced risk of errors or rework. 

Cons:

  • Higher upfront costs due to labor fees. 
  • Less control over the timeline. 

Key Takeaways

New construction drywalling doesn’t have to be daunting. By planning effectively, choosing the right materials, and avoiding common mistakes, you can create a stunning interior that’s ready for finishing touches like interior painting or design. 

Looking for expert assistance? Schedule your drywall installation today and partner with Drywall By AMFA who prioritize precision and quality. 

Contact us for expert consultation.

Related Post: Why Choose Metal Stud Framing for Your Drywall Construction Project

The Real Cost of Drywall Repair: Insights for Every Budget

In the world of home maintenance, drywall plays a pivotal role. It’s the canvas for your interior decor and the backbone of your home’s walls and ceilings. But just like any other part of your home, drywall can suffer damage over time. Whether it’s a small crack or a larger hole, addressing these issues promptly is essential for maintaining the overall health and aesthetic of your living or working space.

For homeowners, property managers, landlords, and small business owners, understanding the nuances of drywall repair is crucial for making informed decisions that won’t break the bank. In today’s post, we will  dive into the real cost of drywall repair and provide insights for every budget.

Call 317-269-7319 for Professional Drywall Repair Service in Indianapolis Indiana

Understanding the Factors Affecting Drywall Repair Costs

When it comes to drywall repair, several factors can influence the cost. The first is the type of damage you’re dealing with. Cracks and holes are common issues, but water damage and mold can also rear their ugly heads. Each type of damage presents its own challenges and, therefore, can affect the overall cost of repair. Cracks might require simple patching, whereas mold could necessitate extensive treatment and replacement of materials.

Another significant factor is the size and severity of the damage. A minor crack may be a quick and easy fix, but extensive water damage or a large hole can require more materials and labor, driving up costs. The extent of the damage can also determine whether you need a professional drywall contractor, which will influence the overall cost.

Finally, material and labor costs are always a consideration. The price of drywall supplies can vary, and labor costs can differ depending on the complexity of the repair and the expertise required. Understanding these factors can help you budget effectively and make the best choice between professional drywall service or a DIY approach.

Average Cost Breakdown by Repair Type

Let’s break down the average costs associated with different types of drywall damage. For common repairs like fixing small holes or cracks, costs can range from $50 to $150, depending on the materials and tools required. However, if you’re dealing with more severe issues like water damage, costs can rise significantly, often reaching between $200 and $500.

Regional variations in repair costs can also impact your budget. In urban areas, where living expenses are higher, the cost of drywall installation and repair may reflect this. Conversely, rural regions might offer more affordable rates. It’s important to consider these regional variations when planning your repair budget.

By understanding the typical costs associated with each type of repair, you can better anticipate expenses and plan accordingly. This knowledge not only helps in budgeting but also in determining whether a professional drywall contractor is necessary for larger, more complex repairs.

DIY vs. Professional Repair

When faced with drywall damage, you’re often presented with two options: tackle the repair yourself or hire a professional. Each choice has its own set of advantages and disadvantages. DIY repair is usually more cost-effective and can be satisfying if you’re handy. However, it requires time, effort, and the right tools. A less-than-perfect job can lead to additional repairs down the road.

On the other hand, professional repair ensures quality workmanship and can handle more complicated issues like extensive water damage or structural problems. The downside? It often comes with a higher price tag. In many cases, the cost of hiring a professional is justified by the quality and efficiency of the work, particularly for larger projects.

The decision ultimately comes down to the nature of the damage and your confidence in handling repairs. For minor cracks and holes, DIY might be sufficient. But for more significant damage, investing in professional drywall services could save you time and money in the long run.

Tips for Reducing Drywall Repair Costs

Reducing drywall repair costs is possible with a few strategic approaches. First, consider preventive maintenance to minimize the need for repairs. Regularly inspect your walls and ceilings for signs of damage, such as small cracks or discoloration, and address these issues early to prevent them from worsening.

When repairs are necessary, choosing cost-effective methods can make a difference. Opt for quality materials that offer durability, which may cost more upfront but save money in the long run by reducing the need for future repairs. Additionally, gathering multiple quotes from drywall contractors can help you find the best deal without sacrificing quality.

Lastly, consider bundling multiple repairs into one project. If you have several areas that need attention, addressing them all at once can often reduce labor costs compared to handling each repair separately.

Conclusion

Understanding the real cost of drywall repair is essential for homeowners, property managers, landlords, and small business owners. By considering factors such as the type of damage, the size and severity, and the choice between DIY and professional repairs, you can make informed decisions that align with your budget. Preventive maintenance and cost-effective strategies can further reduce expenses.

Remember, when in doubt, it’s always wise to seek the advice of professional drywall contractors who can provide expert guidance and ensure the longevity of your repairs. For more detailed information or to explore our drywall services, reach out to us today. Whether you’re fixing a minor crack or tackling extensive water damage, your walls and ceilings deserve the best care possible.

Don’t hesitate to reach out to our expert team for personalized advice and assistance. Contact Drywall by AMFA at 317-269-7319 for professional drywall services in Indianapolis, Indiana. Whether you’re tackling a small repair or a large-scale renovation, we’re here to help you achieve the perfect finish.

Related Posts:

The Complete Handbook on Drywall Repairs and Maintenance
Drywall Problems Decoded: A Guide to Drywall Repair and Maintenance
Avoid DIY Disasters: The Importance of Professional Drywall Installation

The Perfect Finish: Mastering Drywall Sanding for DIY Enthusiasts

Are you a DIY enthusiast, home renovator, or Dad trying to fix a hole in the wall? Achieving a flawless drywall finish can be the key to transforming any space. Proper drywall preparation is crucial in the renovation process, ensuring that your walls look smooth and professional. In this comprehensive guide, we’ll explore the ins and outs of sanding drywall, offering valuable tips, techniques, and step-by-step instructions to help you achieve the perfect finish.

Call 317-269-7319 for Professional Drywall Repair and Installation in Indianapolis Indiana

A Preview to the Drywall Sanding Process

Before we jump into the how-to, let’s familiarize ourselves with the basics of sanding drywall. The sanding process involves using various types of sandpaper and sanding tools to smooth out the surface of drywall joints, corners, and imperfections. The goal is to create a seamless and even surface that blends perfectly with the surrounding wall.

Types of Sandpapers

The key to a successful sanding job lies in choosing the right type of sandpaper. Generally, sandpapers com e in different grits, ranging from coarse to fine. Coarse grits (40-80) are ideal for initial sanding to remove excess joint compound quickly. Medium grits (100-150) are used for smoothing out the surface, while fine grits (180-220) provide that final polished finish.

Essential Sanding Tools

To achieve professional results, it’s essential to have the right tools on hand. Here are some must-have sanding tools for drywall:

  • Sanding Block: A simple yet effective tool for manual sanding, providing better control over pressure.
  • Pole Sander: Ideal for reaching high or extended areas, ensuring even sanding across large surfaces.
  • Orbital Sander: A power tool that makes quick work of extensive sanding tasks, delivering consistent results.
  • Sanding Sponge: Perfect for detailed work and corners, offering flexibility and precision.

Step-by-Step Guide to Sanding Drywall

Mastering drywall sanding requires a systematic approach. Follow these steps to achieve a smooth and professional finish:

Initial Preparation

Preparation is the key to success in any renovation project. Start by ensuring the drywall surface is clean and free of any debris. Cover the floors and furniture with drop cloths to protect them from dust. Wear protective gear, including a mask, goggles, and gloves, to safeguard yourself from dust particles.

Applying Joint Compound

Before sanding, apply a thin layer of joint compound to the seams and screw holes. Use a taping knife to feather the edges, creating a smooth transition between the drywall and compound. Allow the joint compound to dry completely before proceeding to the next step.

Sanding the Surface

Begin sanding the dried joint compound using coarse grit sandpaper. Hold the sanding block or pole sander at a slight angle and use light pressure. Move in circular motions to avoid creating grooves or uneven surfaces. Once the majority of the compound is smoothed out, switch to medium grit sandpaper for further refinement.

Blending and Feathering

To achieve a seamless finish, focus on blending and feathering the edges of the joint compound. Use fine grit sandpaper to gently sand the edges, ensuring they blend smoothly with the surrounding drywall. This step is crucial to creating an even surface that hides the seams and imperfections.

Tips and Techniques for a Professional Finish

Achieving a flawless drywall finish takes practice and attention to detail. Here are some tips and techniques to help you along the way:

Avoiding Common Mistakes

One common mistake is applying too much pressure while sanding, leading to uneven surfaces. Instead, use light, consistent pressure to avoid creating indentations. Additionally, be cautious not to over-sand the joint compound, which can result in exposed seams.

Checking for Smoothness

Periodically check the smoothness of the surface by running your hand over it. If you feel any rough spots or ridges, continue sanding until the surface feels even and polished. Using a bright light source can also help highlight any imperfections that need further attention.

Sanding the Corners

Sanding corners can be challenging, but using a sanding sponge can make the task easier. Fold the sponge to create a sharp edge and gently sand the corners in a back-and-forth motion. This will help achieve a clean and sharp corner finish.

Importance of Dust Control and Safety Measures

Sanding drywall generates a significant amount of dust, which can be harmful if not properly managed. Implementing dust control measures is essential to ensure a safe and clean working environment.

Using a Dust Extractor

Investing in a dust extractor or vacuum with a HEPA filter can significantly reduce dust levels. Attach the extractor to your sanding tools to capture dust particles at the source, preventing them from spreading throughout the room.

Sealing Off the Work Area

Seal off the work area using plastic sheeting and painter’s tape to contain the dust. Close doors and windows to prevent dust from circulating into other parts of your home. After sanding, use a damp cloth to wipe down surfaces and remove any remaining dust.

Personal Protective Equipment (PPE)

Always wear appropriate PPE, including a dust mask, safety goggles, and gloves. This protective gear will shield you from inhaling dust particles and protect your eyes and hands from irritation.

Conclusion

Mastering the art of drywall sanding is a valuable skill for any DIY enthusiast, home renovator, or interior designer. By following the step-by-step guide and implementing the tips and techniques outlined in this post, you can achieve a smooth and professional finish that enhances the overall look of your space.

If you’re ready to take your sanding skills to the next level, don’t hesitate to reach out to our expert team for personalized advice and assistance. Contact Drywall by AMFA at 317-269-7319 for professional drywall services in Indianapolis, Indiana. Whether you’re tackling a small repair or a large-scale renovation, we’re here to help you achieve the perfect finish.

Related Posts:

Avoid Drywall Dust With Wet Sanding
Tips for Avoiding DIY Drywall Mistakes
How to Cut Drywall With Just Two Simple Tools

Common Joint Taping Issues and How to Solve Them

If you’ve tackled drywall projects, you know how crucial joint taping is. Taping ensures your walls look seamless and professional. However, common joint tape issues can mar even the best DIY or professional efforts. This blog post aims to help DIY enthusiasts and home improvement professionals understand and solve these common joint tape problems.

Call 317-269-7319 for Professional Drywall Installation and Repair in Indianapolis

Common Joint Taping Issues

Bubbling and Wrinkling

Bubbling and wrinkling are among the most frustrating issues in drywall taping. They often result from improper taping techniques or environmental factors like humidity. Understanding why these problems occur is essential for effective solutions.

Tape Peeling

Nothing ruins an otherwise perfect drywall job quite like peeling tape. This issue often arises from poor adhesive application or low-quality tape. Identifying the root causes can help you avoid this pitfall.

Poor Adhesion

Poor adhesion is another frequent concern, particularly in areas with fluctuating temperatures or high humidity. It can lead to loose tape, creating an unsightly finish. Knowing how to ensure strong adhesion is vital for a long-lasting result.

Visible Joints

Visible joints compromise the aesthetics of a wall. They often stem from an inadequate application of taping compound or uneven sanding. Addressing this problem requires attention to detail and proper technique.

Detailed Explanations and Solutions

Bubbling and Wrinkling

Causes: Bubbling and wrinkling typically occur due to excessive compound application or insufficient pressure during tape smoothing. Moisture trapped between layers can also be a culprit.

Solutions:

  • Remove affected tape sections and clean the area.
  • Apply a thin layer of joint compound and press the tape firmly.
  • Smooth the tape using a drywall knife, ensuring no air pockets remain.

Best Practices: For professionals, using high-quality paper tape and maintaining consistent pressure during application can minimize these issues.

Tape Peeling

Causes: Peeling tape often results from using low-quality tape or insufficient compound beneath the tape.

Solutions:

  • Remove the peeling tape and any loose compound.
  • Apply a fresh layer of compound and use quality tape.
  • Press the tape firmly and apply additional compound layers as needed.

Best Practices: Professionals should always opt for premium tape and ensure the surface is clean before application.

Poor Adhesion

Causes: Poor adhesion usually stems from using low-quality compound or working in unfavorable conditions like high humidity.

Solutions:

  • Ensure the surface is clean and dry before starting.
  • Use a high-quality joint compound and apply it evenly.
  • Press the tape firmly and allow adequate drying time.

Best Practices: Using a dehumidifier in humid environments can improve adhesion. Professionals should also consider temperature and humidity levels when scheduling drywall work.

Visible Joints

Causes: Visible joints are often due to uneven compound application or inadequate sanding.

Solutions:

  • Apply the joint compound evenly, feathering the edges.
  • Sand the area lightly but thoroughly after it dries.
  • Apply a second coat if necessary, ensuring a smooth transition between the tape and drywall.

Best Practices: For professionals, investing in quality sanding tools and taking time with each step can ensure flawless results.

Importance of Using High-Quality Tape and Tools

Using high-quality tape and tools is essential for achieving a professional finish. Low-quality materials can lead to various issues, including those mentioned earlier. Investing in premium products ensures durability and ease of application.

Quality Affects Finishing Results

High-quality tape and tools provide better adhesion, smoother application, and fewer issues during the finishing process. This investment often pays off in the long run by reducing rework and enhancing the overall appearance.

Recommendations for Tape and Tools:

  • Paper Tape
  • Mesh Tape
  • Stainless Steel Drywall Knife
  • Professional-Grade Joint Compound
  • High-Quality Sanding Tools

Conclusion

Mastering drywall taping is essential for achieving smooth, professional-looking walls. By understanding common issues such as bubbling, wrinkling, tape peeling, poor adhesion, and visible joints, you can take proactive steps to address and prevent these problems. Using high-quality materials and adhering to best practices significantly enhances the final result, reducing the need for rework and ensuring a durable finish.

Whether you’re a DIY enthusiast or a seasoned professional, investing time and effort in proper taping techniques will pay off in the long run, resulting in beautifully finished walls that stand the test of time.

On the other hand, if do-it-yourself drywall work is not working out, we can help. Contact Drywall by AMFA at 317-269-7319 for professional drywall services and custom drywall texture in Indianapolis, Indiana. We serve both residential and commercial clients.  Request a free estimate, today!

Related Posts:

Troublesome Nail Pops? Here’s How to Spot, Fix, and Prevent Them
Avoid DIY Disasters: The Importance of Professional Drywall Installation
Wall Anchor Removal Guide

Troublesome Nail Pops? Here’s How to Spot, Fix, and Prevent Them

Walls are an essential part of every home, serving both functional and aesthetic purposes. However, when you start noticing bumps or cracks, your pristine walls can become a source of frustration. One common culprit behind these imperfections is nail pops. In this comprehensive guide, we’ll explore what nail pops are, how to identify them, the dangers of ignoring them, and how you can either fix them yourself or prevent them in the future.

Call 317-269-7319 for Professional Wall Damage Repair in Indianapolis Indiana

What are Nail Pops?

Nail pops are small bumps or cracks that appear on walls, usually where nails or screws have loosened and pushed through the drywall. These imperfections are especially common in newly constructed homes but can occur in older homes as well.

Common Causes of Nail Pops

One major cause of nail pops is the natural settling of a house. As the wooden frame of a house contracts and expands with changes in humidity and temperature, the nails or screws securing the drywall may loosen. Another common cause is improper installation during construction. If the drywall wasn’t secured tightly or the nails weren’t driven in at the correct angle, nail pops are more likely to occur.

How Nail Pops Form

When nails or screws push through the drywall, they create small, round bumps. Over time, these bumps can crack the paint and even lead to holes. Understanding the causes and process of nail pops can help you better identify and address them before they become a bigger problem.

Identifying Nail Pops

Spotting nail pops early is crucial for maintaining the integrity and appearance of your walls. Here are some tips to help you identify them:

Visual Cues – Nail pops often manifest as small, round bumps on the surface of your wall. They may be more noticeable under certain lighting conditions. Look for areas where the paint has cracked or chipped away in a circular pattern.

Practical Tests – To confirm whether a bump is a nail pop, gently press around the bump with your fingers. If it feels like there’s a small, hard object beneath the surface, it’s likely a nail or screw that has popped.

Regular Inspections – Make it a habit to regularly inspect your walls, especially in rooms with high humidity or significant temperature changes. Early identification can save you from more extensive repairs later on.

The Dangers of Ignoring Nail Pops

Ignoring nail pops can lead to more serious issues down the line. Here’s why you shouldn’t procrastinate on fixing them.

Structural Integrity – While a single nail pop might not seem like a big deal, multiple nail pops can indicate a larger issue with your home’s structural integrity. Over time, this can lead to more severe drywall damage, including large cracks and holes.

Aesthetic Damage – Nail pops can quickly turn a smooth, clean wall into an eyesore. The longer you wait to fix them, the more noticeable and unappealing they become. This can detract from the overall appearance of your home, especially if you’re planning to sell.

Costly Repairs – The longer you ignore nail pops, the more extensive the damage can become. What starts as a simple DIY repair can turn into a costly professional job if left unaddressed.

DIY vs. Professional Repair

When it comes to fixing nail pops, you have two options: doing it yourself or hiring a professional. Let’s weigh the pros and cons of each.

DIY Repair

DIY repair is a cost-effective option if you have the right tools and some basic handyman skills. You’ll need a few materials like a hammer, nails or screws, drywall compound, and sandpaper. However, keep in mind that improper repair can lead to recurring issues.

Professional Repair

Hiring a professional drywall repair company ensures the job is done correctly and efficiently. Professionals have the expertise and tools needed to fix nail pops without causing further damage. Although this option is more expensive, it offers peace of mind and long-lasting results.

When to Choose Which

If you’re dealing with a few isolated nail pops and feel confident in your skills, a DIY approach may be sufficient. However, if you notice multiple nail pops, suspect there’s a deeper issue, or require additional drywall or painting beyond nail pop repair, it’s best to consult a professional.

Step-by-Step DIY Repair Guide

Ready to tackle nail pops on your own? Follow these detailed steps to ensure a smooth and effective repair process:

Tools and Materials Needed:

  • Hammer or screwdriver
  • Drywall compound
  • Sandpaper
  • Paint and primer
  • Nail or screw replacements
  1. Preparing the Area – Start by removing any loose paint or drywall around the nail pop. Use a utility knife to cut away damaged material, creating a clean surface for repair.
  2. Reinforcing the Drywall – Using a hammer or screwdriver, drive a new nail or screw into the drywall about an inch above or below the original nail pop. Be sure to countersink the nail or screw slightly to prevent future pops.
  3. Applying Drywall Compound – Apply a generous amount of drywall compound over the nail or screw head, smoothing it out with a putty knife. Allow the compound to dry completely before sanding it smooth.
  4. Finishing Touches – Once the compound is dry and smooth, apply a coat of primer and paint to match the rest of the wall. Voila! Your wall should now look good as new.

Preventing Nail Pops in the Future

Prevention is always better than cure. Here are some tips to help you avoid nail pops in the future.

  • Use the Right Materials – When constructing or renovating your home, use high-quality materials and follow proper installation techniques. Opt for screws instead of nails, as they are less likely to loosen over time.
  • Maintain Humidity Levels – Fluctuating humidity levels can cause wood to expand and contract, leading to nail pops. Use a humidifier or dehumidifier to maintain consistent humidity levels in your home.
  • Regular Inspections – Regularly inspect your walls for any signs of nail pops. Early detection and prompt repair can prevent more extensive damage down the line.

Key Takeaways

Nail pops may seem like a minor issue, but they can lead to significant problems if left unaddressed. By understanding what nail pops are, how to identify them, and how to fix and prevent them, you can keep your walls looking pristine and ensure the structural integrity of your home. Whether you choose to tackle the repairs yourself or hire a professional, addressing nail pops promptly will save you time, money, and stress in the long run.

Don’t wait until nail pops become a bigger problem. Take action today to protect your home and maintain its beauty. Contact Drywall By AMFA at 317-269-7319 for reliable and efficient drywall repair service in Indianapolis, Indiana. Your walls and your wallet will thank you! We serve residential and commercial clients throughout the Greater Indy areas. Request an estimate, today.

Related Posts:

Tips for Avoiding DIY Drywall Mistakes
How to Hang Pictures on Walls
Basic Toolbox for Drywall Repair

Do I Use Joint Compound or Drywall Spackle?

If you have a drywall repair to do, and you have no idea what you are doing, it is wise to do your research first. It is very easy to make drywall repair mistakes, so familiarize yourself with the basics before you take a turn at drywall repair. A great place to start is understanding the various tools you need for drywall repair, like drills, saws, miter boxes, utility knives, taping knives, drywall tape, mud pans, drywall screws, and of course, your adhesion product. This can be either joint compound or spackle.

Continue reading to learn the primary differences between joint compound and drywall spackle, and which applications call for each.

Indianapolis Drywall and Painting 317-269-7319

Joint Compound

Drywall joint compound is a white powder containing gypsum board dust as its main ingredient. It is combined with water to produce a mud, which can be used for joining drywall seams and bedding drywall seam tape. It has a lighter consistency than spackle, which means it is not well-suited for the same applications. It can be used to patch holes and cracks, but it takes longer to dry and shrinks more than spackling paste.

Drywall Spackle

Spackle is different from joint compound since it is mainly used to patch up holes and cracks in plaster and gypsum board. It has a thicker consistency, which is why it is also known as “drywall mud.” Spackle comes in two primary forms: quick-setting and premixed. Quick-setting drywall mud is also referred to as “hot” mud because a chemical reaction occurs during the curing process that causes heat release.

Premixed Drywall Mud

Premixed drywall mud is the more common or traditional drywall spackle, probably because it is ready to use. The type of spackle you choose for your project depends on the type of drywall work you are doing. Hot mud is recommended for small patch jobs, like door knob holes because you don’t have to wait 24 hours to reapply your second or third coat.

Drywall Repair Tips

It is important to have the proper tools, materials, and equipment to finish drywall. Not only is it a challenging task to undertake without experience or knowledge, but it is also a costly investment. A better option would be to hire professional Indianapolis drywall contractors. They have the specialized training, experience, and resources to get the job done right, and in a convenient time frame.  This is strongly encouraged for large-scale or complex drywall repair projects.

Indianapolis Indiana Drywall Installation and Repair at the Best Price

Call Drywall by AMFA at 317-269-7319 for Indianapolis drywall repair and installation service. We are experienced drywall contractors who offer a wide range of residential and commercial drywall service, including repair, replacement, installation, new home construction, metal stud framing, custom drywall texture, grid ceilings, and much more. Call 317-269-7319 to request a free estimate, today.

How to Find Dry Wall Studs Without Stud Finder Tool

Five holes in the wall and counting, with one hand holding a leveler and the other holding a pen; and the system continues to repeat, only to fail over and over again. Sound familiar? It is frustrating enough trying to hang a picture just right, let alone finding a stud to do it on first; but it’s vital to use studs in order to retain proper support and avoid wall damage. So many walls have suffered from failed stud finders and bad hunches. Not to worry, as we have all had our failed stud-exploration experiences that we so badly wish to forget. Fortunately, that it is all in the past now. There are easier ways to find dry wall studs, rather than using an ineffective tool or stud finder to do it.

Continue reading and learn how to locate drywall studs without using a stud finder or other tool.

Indianapolis Drywall & Painting Contractors

Tips for Locating Wall Studs

Before looking in the right place for wall studs, you must first know a few important facts about walls. For instance, the purpose of a stud is to hold up interior drywall and exterior sheathing. So, you can always safely assume that studs are located at the top, bottom, or corners of walls. You can also assume that studs are 16 inches apart from center in newer homes, and mostly likely 24 inches from center in older homes.

You can count on finding a stud behind an electrical box as they are generally held up by one. Another fact about walls you should know before going on a stud-hunt is that most molding and trim are nailed to studs. Also important to know, studs are typically located on either side of a window. This is good knowledge for curtain and valance hanging.

Instructions for Finding Drywall Studs:

If present, start at the trim or crown molding. Even though these areas are painted and caulked, you can sometimes see the nail cavity, or the point in which it was nailed into the wall. These features are only nailed into studs, so if you find where trim is nailed to the wall, simply measure 16 inches up and you should find a stud.

For properties without trim, you can start with the outlets and light switches. These are another indication of nearby wall studs. There is an electrical box on either side of an outlet, you simply have to figure out which one with a quick knock or tap. When you find the right side, measure 3/4th inch out, and then in 16 inch increments until you hit the right stud. 

Since we mentioned studs are at tops, bottoms, and corners of walls, you can also start at a corner wall and measure 16 inches inward to the center. Since all rooms are not always divisible by 16, use intuition and the knock-test to find a wall stud if measuring from a corner to center. Keep in mind that a stud could be just before, or just after, 16 inches from a corner wall, depending on the room’s dimensions.

Always remember to mark each stud as you find them, and patch up and fix any practice or mistake holes with caulk and paint. In the case that you have put too many holes in your wall, or you simply need to replace drywall for another reason, your best option is to call an Indianapolis drywall contractor for professional service.

Indianapolis Drywall Services You Can Trust

Call Drywall by AMFA at 317-269-7319 when you need professional drywall services in Indianapolis, Indiana. We are a licensed, bonded, and insured drywall company that provides residential and commercial drywall work at competitive prices. Call 317-269-7319 to request a free estimate, today. Call 317-269-7319 to request a free estimate, today.

The Difference Between Manual and Spray Drywall Textures

Drywall texture is an important design application that delivers enhanced warmth, appeal, and overall aesthetic to an interior. Although there are hundreds of different styles of drywall texture, all fall under one of two primary application processes: manual or spray. Continue reading to learn more about each category of drywall texture application, including what sets them apart and how to choose which style for your remodel.

Indianapolis Drywall and  Painting 317-269-7319
Indianapolis Drywall and Painting 317-269-7319

Manual Drywall Textures

When drywall texture is applied by hand, they are manual textures, or hand textures. For this type of drywall texture application, basic hand tools, like trowels and hawks, are used to achieve the desired look. Most often, a simple pan and knife are the tools chosen to apply manual drywall textures. Additional hand tools, such as specialized brushes and rollers, are used to complete the textured swirl, stomp, and swoosh motifs into the drywall mud. Sometimes, commercial paint sprayers are used to apply drywall texture, but this method is still considered manual.

Spray Drywall Textures

When drywall texture is sprayed onto a surface, they are spray textures. This method of drywall texture application requires specialized machinery that pumps drywall texture onto surfaces. Such machines are can be electric or gas-powered, but all are manufactured with powerful pumps that supply drywall mud through inner lines, and out of a special nozzle or tip. The designs in the drywall mud are created using compressed air and a sprayer gun, rather than by hand.

Common Drywall Texture Names:

➤ Skip Trowel
➤ Popcorn
➤ Smooth Wall
➤ Hawk and Trowel
➤ Crows-Foot Stomp
➤ Splatter Knockdown
➤ Orange Peel
➤ Rosebud
➤ Stomp Knockdown
➤ Santa-Fe Texture
➤ Double Skip
➤ Swirl Drywall

Indianapolis Drywall Services You Can Trust

Call Drywall by AMFA at 317-269-7319 when you need professional drywall services in Indianapolis, Indiana. We are a licensed, bonded, and insured drywall company that provides residential and commercial drywall work at competitive prices. Call 317-269-7319 to request a free estimate, today. Call 317-269-7319 to request a free estimate, today.

What You Need to Cut Drywall in a Short Amount of Time

Ever wonder how professional contractors can get drywall cutting needs met within a short amount of time? Well, that is because they use an age-old, industry secret to save time. Interestingly, this secret method only requires two very basic and common toolbox staples: a tape measurer and a utility knife. But before you rush to the work shed for your toolbox and drywall supplies, it is important to understand that this method of cutting drywall requires a learning curve of practice.

After a lot of practice and patience, you too can cut drywall using this method, just like the pros do. Continue reading to learn how!

Indianapolis Drywall Contractors
Indianapolis Drywall Contractors 317-269-7319

How to Cut Drywall With Only 2 Tools

Many people naturally want to place the tape measurer hook at the edge of the drywall sheet for stability, but this is actually wrong. Instead, the tape measurer hook should be placed along the drywall board where you will be making the actual cut.

From there, you must place the tip of the utility blade against the tape measurer hook and then hold it in place by pinching it with your thumb. Steadily move your free hand to the end of the drywall board and pinch your thumb and forefinger together on the tape measurer at the right increment.

Here’s where practice will pay off for you. In one swift movement, simultaneously move your knife and hands down the drywall using a consistent downward pressure. Once you have completed the cut, simply snap off the scrap piece and cut the paper liner on the other side to separate it entirely.

Practice is the Real Secret

Be sure to practice this method of drywall cutting before making it a staple move in your work. Furthermore, be sure you are wearing all the proper protective gear to reduce the risk of serious injuries. If you are not adept in drywall work, or have little to no experience working with drywall materials, it is not recommended to start with this method of cutting. Learn the basics first, practice for a long time, and then commit to improving your skills as you ride the learning curve. This is the best method of becoming a skilled handyman in any trade.

Indianapolis Drywall Services You Can Trust

Call Drywall by AMFA at 317-269-7319 when you need professional drywall services in Indianapolis, Indiana. We are a licensed, bonded, and insured drywall company that provides residential and commercial drywall work at competitive prices. Our highly trained and experienced drywall contractors are fully equipped to provide quality drywall repair services regardless of your projects size and scope. And as a licensed, bonded, and insured company, we guarantee all of our drywall work. Call 317-269-7319 to request a free estimate, today. Call 317-269-7319 to request a free estimate, today.

How to Take Out Dry Wall Anchors

Old, exposed drywall anchors are not appealing. So it is only natural to want them removed. But many homeowners are scared to try this task on their own because they are concerned about damaging their drywall. Also totally natural. If you are in the same position right now, you don’t have to fret much longer with your DIY decision. Waiting for you below is a simple step-by-step guide that just might change your mind about removing unwanted dry wall anchors by yourself!

Continue reading to get started!

Indianapolis Drywall Contractors 317-269-7319

What You’ll Need

✅ Drill
✅ Drill Bit (or Set)
✅ Putty Knife
✅ Utility Gloves
✅ Old Towel

Before You Begin

It is important to gather all your items and supplies before you start. The gloves will protect your hands from scratches or blisters, while the towel can be laid on the floor below to manage any drywall mess. It is also important to choose the correct drill bit size for the best results. If you do not have a full set of drill bits, simply purchase one that is a couple sizes larger than the opening in the wall anchor.

Keep in mind that if you plan to paint the wall you are working on, you will first need to prime the patched areas where the wall anchor holes were. And if you are planning to install new drywall anchors, be sure to buy ones that can be easily removed for future convenience!

Step One

Remove the screw from the wall anchor.

Step Two

Place the bit inside the center hole of the wall anchor and begin slowly drilling. Use a drill bit that is two sizes larger than the width of the center hole of the anchor. The bit should sit perfectly outside of the edge of the hole, without slipping inside.

Step Three

Once you begin drilling, the collar of the wall anchor should break free from the wall and automatically push itself out. Let it fall on the floor so you are not tempted to grab it while the drill is rotating. Be careful not to let the bit push deep into the wall cavity, which can interrupt electrical wiring or plumbing pipes.

Step Four

Push the residual drywall material back into the hole using your putty knife. You may have to fill this hole in stages for best results.

Step Five

Sand, prime, and paint!

Indianapolis Drywall Services You Can Trust

Call Drywall by AMFA at 317-269-7319 when you need professional drywall services in Indianapolis, Indiana. We are a licensed, bonded, and insured drywall company that provides residential and commercial drywall work at competitive prices. Call 317-269-7319 to request a free estimate, today. Call 317-269-7319 to request a free estimate, today.