Easy Alternatives to Make Your House Warmer

Is your heating system not cut out for this chilling Indiana winter? If you are still not warm enough, consider these simple and effective alternatives instead!

Indianapolis Drywall Contractors
Indianapolis Drywall Contractors 317-269-7319

How to Be Cozy Without Central Heat

Fireplace – One of the oldest ways to stay warm and one of the best. 

Space Heaters – If using space heaters please be careful and make sure to turn off the unit when not being used.  To maximize the effectiveness of the space heater, be sure to close doors or windows in the area being used. 

Lights – Use Incandescent lights instead of LEDs and compact fluorescents because incandescent lights produce heat and LEDs and fluorescents produce very little heat.   

Electric Blankets – More energy efficient than a space heater, and great for one or two people. 

Sleeping Bags – These are meant for outdoor weather and some can be effective in minus 40 degrees.  Hopefully your house will not get that cold.

Cozy Clothes – The best way to wear clothing to stay warm is to layer.  Be sure not to wear so much clothing that it makes you sweat.  Sweating in cold weather can lead to hypothermia.

Warm Beverages – Warming yourself from the inside of your body can be very helpful at warming your core temperature. 

Cooking – The heat created by baking or cooking will not only warm the air but also be able to dry it out.

Candles – Candles produce more heat than you would think but please be careful.  Make sure all candles are blown out when the area is not in use.

Cuddling – Cuddle up to someone warm-blooded, whether a loved one or a pet. Body contact from will allow you to stay warm on cold nights or days. 

Hair Dryer – For a quick warm up…try turning on the blow dryer and dousing yourself with warm. Just be sure not to get too close or you can burn yourself.

Curtains – Keep open during the day and closed at night.

Bushes and Trees – Trim up your bushes and trees so your house gets exposed to as much sun as possible.

Rugs – Rugs allow for an additional layer of insulation, therefore keeping out extra chill. 

Unused Rooms – Closing the door to unoccupied rooms will save heat, while also diverting heat dispersion to high traffic areas where heat is needed.

Windows – Be sure there are no gaps in your window and sills in order to prevent drafts.

Doors – Doors with gaps can allow a lot of warm air out and cold air in.  Sealing doors will prevent this.

Insulation – Adding more insulation to your walls, attic, and closets can instantly increase your home’s warmth factor.

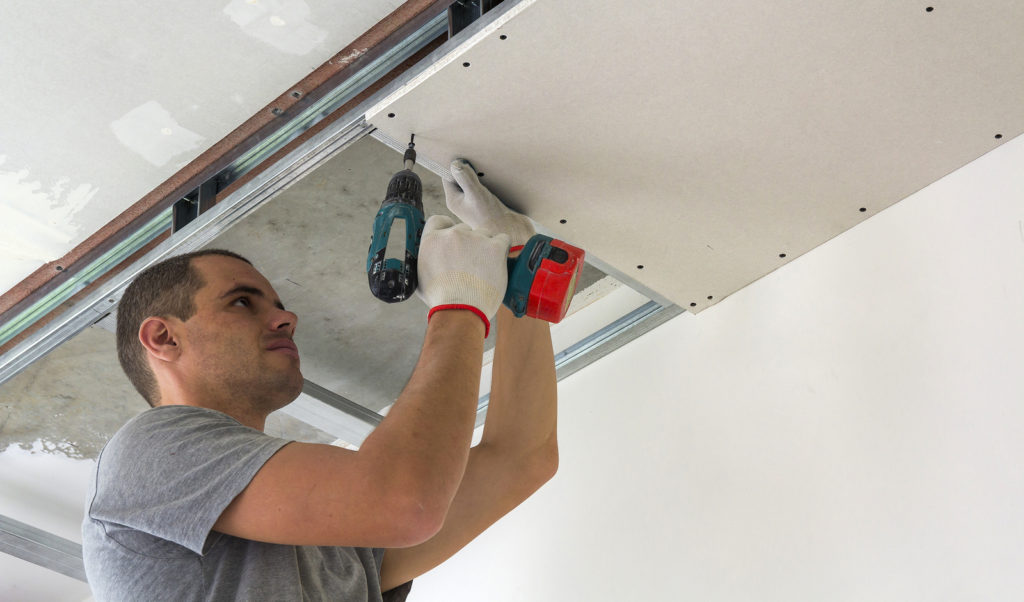
How to Improve Your Home’s Drywall Insulation in Indianapolis

Call Drywall by Local Builders at 317-269-7319 for Indianapolis drywall repair and installation service. We are experienced drywall contractors who offer a wide range of residential and commercial drywall service, including repair, replacement, installation, new home construction, metal stud framing, custom drywall texture, grid ceilings, and much more. Call 317-269-7319 to request a free estimate, today.

Indianapolis Drywall Contractors
Indianapolis Drywall Contractors 317-269-7319

4 Ways to Locate a Stud in the Wall

There are plenty of things we need to hang on our walls. From cabinets and mirrors, to pictures, décor, and more, our walls provide us an open canvas to exhibit our unique personalities and trend-setting tastes. However, what you are hanging is really of no concern; how you hang it is what really matters. We are talking about wall studs, of course. Whether you are hanging a mirror or a painting, your best bet is to attach it to a wall stud. Otherwise, you can risk your wall décor falling off, or worse, cracking your drywall. Not sure how to locate wall studs? No problem. The task couldn’t be simpler, so long as you have the right knowledge.

Continue reading to learn the top 4 ways you can find wall studs all on your own, as well as, what to do if your previous attempts at hanging stuff on your walls caused some drywall damage.

Indianapolis Drywall Contractors 317-269-7319

❶ Knuckle Taps

Your first option for located wall studs is to simply use your own fist. Using your knuckles, tap the wall a few times, and then horizontally move over every couple of inches and tap some more. The wall should emit a sound that implies hollowness when you tap, until you tap on a stud. When you tap on a stud, the sound will change to a more abrupt reverberation, letting you know there is something behind it. This option is a good method when you are not equipped with any supplies or tools, but you want to check out the wall stud assembly in the moment.

❷ Rare Earth Magnet

Metal wall studs are often used in apartments and commercial buildings. To locate them, you can use a rare earth magnet. These magnets are incredibly strong and will instantly attract to hidden nails or screws within walls when passed over them. You can purchase these types of magnets online, or at your local home improvement store. You might also be able to find them at a nature or holistic sciences store. Run the magnet horizontally along the wall until it feels like it is sticking. Once it does, you are likely on top of a metal stud.

❸ Light Switches

When working with plaster walls, it can be challenging finding wall studs because they throw off the readings of a stud finder device. In this case, you can rely on your light switches. Most often, light switch plates are installed inside the first wall stud by the nearest door frame since the box that holds all the electrical wiring needs to be connected to something sturdy. Start with one light switch and implement the tap test. You can also just remove the light switch plate and look behind the wall.

❹ Stud Finder

The most common way to locate a wall stud is to use a stud finder. This tool will electronically detect the edge or center of a wall stud. You can purchase these at any local home improvement store, hardware store, or online. They range in size, brand, quality, and more, which means they will also vary in price. Expect to pay anywhere between $15 and $45 for a quality stud finder. See our blog, “Top-Rated and Recommended Electronic Stud Finders” for some suggestions.

Got Some Drywall Damages?

Call Drywall by Local Builders at 317-269-7319 for Indianapolis drywall repair and installation service. We are experienced drywall contractors who offer a wide range of residential and commercial drywall service, including repair, replacement, installation, new home construction, metal stud framing, custom drywall texture, grid ceilings, and much more. Call 317-269-7319 to request a free estimate, today.

Indianapolis Drywall Contractors
Indianapolis Drywall Contractors 317-269-7319

How to Take Out Dry Wall Anchors

Old, exposed drywall anchors are not appealing. So it is only natural to want them removed. But many homeowners are scared to try this task on their own because they are concerned about damaging their drywall. Also totally natural. If you are in the same position right now, you don’t have to fret much longer with your DIY decision. Waiting for you below is a simple step-by-step guide that just might change your mind about removing unwanted dry wall anchors by yourself!

Continue reading to get started!

Indianapolis Drywall Contractors 317-269-7319

What You’ll Need

✅ Drill
✅ Drill Bit (or Set)
✅ Putty Knife
✅ Utility Gloves
✅ Old Towel

Before You Begin

It is important to gather all your items and supplies before you start. The gloves will protect your hands from scratches or blisters, while the towel can be laid on the floor below to manage any drywall mess. It is also important to choose the correct drill bit size for the best results. If you do not have a full set of drill bits, simply purchase one that is a couple sizes larger than the opening in the wall anchor.

Keep in mind that if you plan to paint the wall you are working on, you will first need to prime the patched areas where the wall anchor holes were. And if you are planning to install new drywall anchors, be sure to buy ones that can be easily removed for future convenience!

Step One

Remove the screw from the wall anchor.

Step Two

Place the bit inside the center hole of the wall anchor and begin slowly drilling. Use a drill bit that is two sizes larger than the width of the center hole of the anchor. The bit should sit perfectly outside of the edge of the hole, without slipping inside.

Step Three

Once you begin drilling, the collar of the wall anchor should break free from the wall and automatically push itself out. Let it fall on the floor so you are not tempted to grab it while the drill is rotating. Be careful not to let the bit push deep into the wall cavity, which can interrupt electrical wiring or plumbing pipes.

Step Four

Push the residual drywall material back into the hole using your putty knife. You may have to fill this hole in stages for best results.

Step Five

Sand, prime, and paint!

Indianapolis Drywall Services You Can Trust

Call Drywall by Local Builders at 317-269-7319 when you need professional drywall services in Indianapolis, Indiana. We are a licensed, bonded, and insured drywall company that provides residential and commercial drywall work at competitive prices. Call 317-269-7319 to request a free estimate, today. Call 317-269-7319 to request a free estimate, today.

Indianapolis Drywall Contractors
Indianapolis Drywall Contractors 317-269-7319

How to Pick the Perfect Paint Color

Have you ever painted something before only to feel instant color regret once it dried? Or perhaps the color did not end up looking anything like it did on the label? If so, you could use some tips on how to choose the perfect paint color for your intended project application. Continue reading to get started!

Indianapolis Drywall Contractors 317-269-7319

There are simple methods and techniques you can rely on to ensure you pick the right paint color for your home or project. By using these tips, you can feel confident in your painting results. Below you will find the right advice on how to guarantee paint color satisfaction!

Paint Samples

The most important aspect of choosing the right paint color is using samples. Take advantage of free paint samples at your paint store of choice. But do not just rely on the swatches unless you are ready to gather every single shade group and line it up in a chart to understand how the hues change from one group to another. If you do not do this, you will end up with a yellow-beige, rather than a tan beige. Designate an area of your wall for sampling actual paint. This will allow you to see how the paint applies, dries, finishes, and acclimates with the surrounding lighting and décor.

Paint Finishes

Once you have a color in mind, your job doesn’t stop there. You will also need to choose the proper finish, unless of course, you chose a product that is an All-in-One or dual purpose paint. Your standard options will include flat, eggshell, satin, semi-gloss, and gloss. Here is a little guide:

Flat – This finish is best used for ceilings, bedrooms, and living rooms, or for walls with several imperfections that need to be covered. They are more challenging to clean, so avoid using them in kitchens and bathrooms.

Eggshell – This finish is has low sheen, so it is recommended for bedrooms or living rooms. It marks easily, so avoid using it in high-traffic areas, like hallways and mudrooms.

Satin – This finish has a silky look and cleans up easily. Use it in kitchens, bathrooms, mudrooms, and hallways.

Semi-Gloss – This finish is humidity-resistant, making it perfect for kitchens and bathrooms. It is also recommended for crown moulding and woodwork.

Gloss – This finish has a high sheen, so it will show every single imperfect. It is not recommended for walls, but rather moulding and trim work only.

Additional Considerations:

Saturation Points – If you are using more than one paint color in a room, be sure they are in the same hue group. Otherwise, your palette will not be unified.

Ceilings – Be sure to consider your ceiling color. The general rule of thumb is 3 shades lighter than your primary paint color.

Color Pops – If you are painting your walls a light color or pastel, be sure to use a bright white for crown moulding and woodwork to avoid washing out the room.

Drywall Repair – If your walls are not perfectly smooth, you should repair them before applying a new coat of paint for the best results.

Professional Drywall and Painting Work

Call Drywall by Local Builders at 317-269-7319 when you need professional drywall repair and painting service in Indianapolis, Indiana. We are a licensed, bonded, and insured drywall company that provides residential and commercial drywall work at competitive prices. Call 317-269-7319 to request a free estimate, today.

Indianapolis Drywall Contractors
Indianapolis Drywall Contractors 317-269-7319

Where to Find Trusted Commercial Drywall Service in Indy

Your search for reliable drywall work is over! You will get professional drywall installation and repair at a competitive price when you call Drywall by Local Builders in Indiana!

Indianapolis Drywall Contractors 317-269-7319

Drywall By Local Builders is Your Solution!

Here at Drywall By Local Builders, we are a locally owned and operated drywall company based out of Indianapolis, Indiana. Our highly-trained drywall contractors are licensed, insured, and bonded, with more than a decade of hands-on experience in the industry. We offer a wide range of drywall services for both residential and commercial properties, but for municipal and governmental properties as well!

Drywall by Local Builders is fully-equipped and staffed to manage any drywall project, regardless of size or scope. We are proficient in everything drywall, from simple drywall installation and repair, to major work like new construction homes, grid ceilings, metal stud framing, custom drywall textures, remodels, basements, and more!

Unparalleled Customer Support and Care

At Drywall by Local Builders, you can expect a prompt hello and a warm greeting. We are true industry professionals who are always eager to answer all of your drywall questions! Request a free estimate, information, or referrals, anytime! Just take a look below at all the reasons why you should choose us for your commercial drywall needs!

WHY CHOOSE US:

☑ Licensed, Bonded, & Insured
☑ Commercial & Residential
☑ 10+ Years of Experience
☑ Satisfaction Guarantee
☑ High Quality Craftsmanship
☑ Economy-Based Prices
☑ Unparalleled Customer Service
☑ Highly Trained Contractors
☑ Strong Work Ethic
☑ Flexible Scheduling
☑ Friendly Phone Attendants
☑ Devoted Business Owners
☑ Free Estimates
☑ Free Drywall Advice
☑ Job is Done Right the First Time

Contact Us Today!

Call the Drywall by Local Builders office today at 317-269-7319 to speak with a licensed Indianapolis drywall contractor about your property remodeling and renovation needs. Trust us for outstanding results at a competitive price! So pick up the phone and request your free estimate, today.

Best Practices for Removing Painted Over Wallpaper

If you discover walls in your new home that were originally wallpapered, and then later painted over, you are probably looking for the fastest way to undo these outdated renovations. However, there is no real “quick fix” or secret method behind removing painted wallpaper; it simply takes a lot of time, effort, and materials, especially compared to a traditional wallpapered wall. Furthermore, if your wallpapered wall is covered in several layers of paint, the best option is to simply replace the drywall altogether.

If this is not an option for you, continue reading to learn the best practice for removing painted-over wallpaper.

Indianapolis Drywall Contractors 317-269-7319
Indianapolis Drywall & Painting 317-269-7319

What You Need

If you do not already know how to remove wallpaper, simply review the steps before getting started. What you will see is that it is a very similar process to removing painted wallpaper. You will first need to gather all the necessary items, including:

☑ 3-in-1 Scraper Tool or Broad Knife

☑ Serrated Paper Scoring Tool (or stiff wire brush)

☑ Wallpaper Stripper Solution (or liquid fabric softener mixed with water and vinegar)

☑ Wallpaper Removal Cloth

☑ Ladder or Step Stool

☑ Large Plastic Bucket

☑ 2 Gallons Warm Water

☑ Rubber Gloves

☑ Protective Eye Wear

☑ Drop Cloths or Tarps

What To Do

Keep in mind that you may require new drywall installation if you find that there are several layers of paint on top of the wallpaper. If there are only a few layers of paint, you may be successful at removing it without having to replace the drywall. Once you have all the necessary supplies, you are ready to get your hands wet! Here’s how to get started:

Using medium pressure, score the outer layer on the wall with the paper scoring tool. Too much pressure can damage the wall so take your time on this part. You may also use a thick-bristled wire brush, or both. Choose the tool that you are more comfortable using and that produces the most results.

Once you have scored the paint, spray on your wallpaper stripper solution, focusing on small sections at a time. Then allow the solution to soak into the wall for a few minutes. Spraying too much solution on at once can damage the wall, so don’t be too generous with the spray bottle. If you do not wish to use a commercial wallpaper stripper solutions, you can mix water, vinegar, and liquid fabric softener into a plastic spray bottle instead.

After the solution has soaked into the wall for a few minutes, grab your 3-in-1 scraper tool (available at any local hardware or home improvement store for a low cost), and start with the sharpest edge. Get underneath the painted wallpaper and work slowly to scrape it away. Scraping in alternate directions will help expedite the effects.

Expect this process to take several hours, or even days depending on the drywall or plaster used, the type of wallpaper adhesive, the square footage of the wall, the extent of paint on top of the wallpaper, and much more.  After an abundant amount of dedication, patience, and effort, you will eventually get it all!

And if the Job Proves to Be Too Big…

Indianapolis Drywall Contractors 317-269-7319

Call Drywall by Local Builders at 317-269-7319 when you need professional drywall service in Indianapolis, Indiana. We are a licensed, bonded, and insured drywall company that provides residential and commercial drywall work at competitive prices. Call 317-269-7319 to request a free estimate, today.

The 10 Standard Steps to Removing Soaked Drywall

When you have a major flood or water leak inside your property, you can be sure you’ll have damaged drywall as well. Soaked or soggy drywall should be removed immediately, before mold and mildew can develop. But before you decide to take on the project yourself, it may be wise to review the basic steps you can expect the process to involve. This insight may convince you that drywall removal and installation is best left in the hands of trained and equipped professionals.

Continue reading to review the 10 basic steps for removing soaked drywall, as well as, who to trust to get the job done right, and at a fair price.

Indianapolis Drywall Contractors 317-269-7319

How to Remove Water-Damaged Drywall

The steps for removing water-damaged, soggy drywall are quite comprehensive and detailed. Furthermore, they ebb and flow depending on certain conditions and circumstances, both foreseen and unexpected. However, below are the basic, “skeletal steps”, so to say, for taking out soaked drywall. These will give you an idea of what the project will entail and to what extent. In order to learn how to remove water-damaged drywall exactly, you will need to do your research or consult a professional for advice.

Step ❶: Laying Down Tarps

In the first step, you will do all of your project area preparations, including placing down plastic protective floor tarps. These will make cleanup much easier, and protect floors from a big mess or irreversible damage.

Step ❷: Marking the Cut Line

In this step, you will need to locate the highest point reached by the water. This water line is where you will base your cut marks on. Cut marks should be made 6 to 12 inches above the water line using a laser level.

Step ❸: Cutting the Drywall

Now you are ready to make the actual cuts, following along your original markings from the previous step. You will do this using a very sharp utility knife that is specially designed for drywall, gypsum board work.

Step ❹: Making a Hole

In this step, you can look forward to puncturing a hole in the drywall using a framing hammer. The hole should be made in a center section of the damaged drywall, below the cut line, and between two wall studs. Furthermore, it should be large enough to fit your hand through to the other side.

Step ❺: Pulling Out the Drywall

In this step, you will have to first remove the baseboards and electrical outlet plate covers, if any. Once this is done, you will have to reach inside the hole you made (hopefully wearing work gloves) and pull on the drywall until it comes loose from the wall studs. Then you will need to use a flat bar, hammer, or flat-nosed shovel to pry it the rest of the away off.

Step ❻: Testing for Moisture

In this step, you’ll need to assess the moisture level of the exterior walls, as well as, the inner insulation. You need to remove all the drywall up to where the insulation is dry. So if you still feel damp insulation or drywall, you’ll need to go back step 2. Keep in mind, if any electrical cables, outlets, or outlet boxes have to be removed and replaced, you must hire a licensed electrician.

Step ❼: Removing Soggy Components

Drywall won’t be the only component that is soggy and water-soaked. You will also need to remove wet fiberglass insulation in this step, as well as, the drywall screws, nails, and anything else that is affected by water or that will be trashed.

Step ❽: Disposal and Cleanup

When you have cut all the soggy drywall out and removed the wet insulation, you will have quite the mess on your hands. In this step, you can look forward to carrying all the debris and scrap drywall out to the appointed dumpster or truck that will eventually take it to a landfill.

Step ❾: Ventilation

Even after taking out all the wet, damaged components of drywall, you will still have to air it all out and ventilate the affected areas. High-powered construction floor fans are needed for the job, which will speed up evaporation of moisture, and prevent condensation and mold growth.

Step ❿: Drywall Replacement

Of course, you don’t want gaping holes or missing walls in your home; so you will need to replace the damaged drywall with new material. In addition to drywall installation, you will also have to prime, sand, and paint all over again.

As you can see, the process of removing soggy drywall is tedious and exhausting. This is why it is best left to trained professionals who are fully-equipped for the job!

Indianapolis Drywall Contractors 317-269-7319

Call Drywall by Local Builders at 317-269-7319 for Indianapolis drywall repair and installation service. We are experienced drywall contractors who offer a wide range of residential and commercial drywall service, including repair, replacement, installation, new home construction, metal stud framing, custom drywall texture, grid ceilings, and much more. Call 317-269-7319 to request a free estimate, today.

How to Spot Improper Drywall Installation

When drywall does not look or perform the way it should, it usually boils down to improper installation. Drywall installation is the key to longevity and appeal, making the decision of hiring a drywall contractor a serious one. If you are on the market for a new property, or perhaps have already purchased a new place, you may want to learn what improper drywall installation looks like. Spotting drywall problems early on can save you loads of money down the line.

Continue reading to learn the most common consequences of incorrect or poor drywall installation, as well as, who to call for drywall repair near you.

Indianapolis Drywall Repair 317-269-7319

✨ Always Hire a Qualified Pro

If you do not hire a licensed and insured drywall installation company with the proper industry credentials, you can face a series of aesthetic disappointments, out-of-pocket costs, and various other inconveniences. Basically, professional-grade drywall installation starts with a skilled contractor who is fully-equipped and capable of taking on the job. Otherwise, these are some things that can go wrong with your property:

Inadequate Dust Management

If you have ever witnessed drywall being cut and installed, you know that the process is extremely messy. This is especially true when it comes to the finishing portion of the job, which is even messier if done improperly. The amount of dust and debris produced by drywall cutting, finishing, and overall installation, is massive, and can spread through vents and air ducts, and travel into the living quarters of the home. Not only is the cleanup a hassle, the inhalation of drywall dust and debris can be harmful, especially to young children and those with suppressed immune systems. You must hire a qualified drywall company that is equipped with the proper materials, equipment, and knowledge of technique, to abate dust and debris.

Un-Leveled Surfaces

If drywall finishing is not done properly, not only will it cause a massive amount of harmful dust and debris, it will also be uneven and look terrible. If you notice that certain areas of wall look lumpy, uneven, or off in anyway, it could be due to improper drywall finishing. Take a closer look at corners and edges of the walls too; if they are not taped and finished properly at the time of installation, these areas can appear uneven as well. To make matters worse, you may think that covering these imperfections with primer and paint will solve the problem, but the truth is, these mistakes are challenging to fix.

Cracking and Splitting

If you see areas on the wall that are cracked, splitting, breaking off, or fractured, you can chalk it up to poor installation. This applies to ceilings too. Although this could also be a result of the property’s foundation shifting or settling, most often, improper drywall taping and finishing are mostly to blame. Corners, edges, and seams are commonly affected areas to watch out for. Drywall blemishes like these can show up right after installation, or even years down the road. You would need to talk to a qualified drywall contractor for advice on the best strategies to remedy drywall cracking and breaking.

Indianapolis Drywall Contractors You Can Trust

Indianapolis Drywall Contractors 317-269-7319

Call Drywall by Local Builders at 317-269-7319 for affordable Indianapolis drywall repair and installation services you can trust. We service all of Central Indiana, as well as the Metro Indy areas. We offer a wide range of residential and commercial drywall services, including new home construction, grid ceilings, metal stud framing, and more.

How to Remove Water Damaged Drywall

If your property experienced an interior water leak, chances are that you have some water soaked drywall on your hands. If so, you will need to take immediate action to resolve such damage in order to preserve the structural integrity of your home or building. Waiting too long to repair water damage can lead to dangerous mold growth, electrical problems, and more.

Continue reading to learn the basic steps to removing water damaged drywall, and who to call for trusted drywall replacement services near you.

Indianapolis Drywall Contractors 317-269-7319

Indianapolis Drywall Contractors 317-269-7319


It is important that you have experience in the construction industry when it comes to removing water damaged drywall. Not only will you need to ensure your work is correct and up to code, you may also require professional assistance from a plumber and electrician before any drywall and insulation replacement can ensue. Furthermore, you wouldn’t want to accidentally take out a load-bearing wall or disturb any plumbing and electrical systems. This is especially important after a major flood or water leak. It is strongly encouraged to hire a professional company for water damaged drywall repair.

If you are confident in your construction skills, you can get the project started by removing the water damaged areas of drywall soon after discovering the leak. Below you will find a list of what you will need and which steps to follow. If you have any questions, contact a licensed Indianapolis drywall contractor for professional advice and assistance.

What You Will Need:

Replacement Insulation
Pencil or Chalk
Utility Knife
Hammer
Large Garbage Bags
Industrial Fans or Blowers
Gloves
Safety Glasses
Full Coverage Footwear
Floor and Furniture Coverings
Moisture Meter (optional)

Getting Started:

Set Up Your Work Space

First, put on all of your personal protective gear, including gloves and safety goggles. Then prepare your work space by setting up all your materials and laying down protective floor and furniture coverings where needed. To protective floors and furniture, you can use plastic tarp or old bed sheets.

Mark the Wall

Next, mark the wall. Start at the floor and make a straight line up. You want to remove all water soaked areas, but keep in mind that you will need to go farther than where the drywall is wet since water travels upward. So make your line extend up 2 to 4 feet above the visible wet drywall. Do this on both sides so that you have two vertical lines parallel to one another. Connect them at the top, making a large square around the entire affected areas.

Begin Scoring the Surface

Take your utility knife and score the drywall along your marked lines, inserting the knife only halfway through the thickness of the wall.

Remove the Damaged Drywall

Using your hammer, carefully tap out a hole in the drywall directly beneath your top score line. Then insert your fingers into the hole and gently pull back and forth on it to loosen the affected areas away from the studs behind them. Then just manually pull out the damaged drywall and fill up your garbage bags.

Remove All Wet Insulation

Now that you have your giant hole in the wall, your next step is to remove all of the water soaked insulation. Be meticulous here, and really try to remove all of the damaged insulation, soaked and mildly damp. Water soaks into insulation deeply, allowing it to travel much further than in drywall. If you are not sure whether or not the insulation needs to be removed, remove it all. It is very cheap to replace, so it is better to be safe than sorry.

Set Up Your Fans

With all the water damaged wall and insulation removed, you are ready to set up your fans and blowers. Allow them to dry the area for 48 to 72 hours, or longer if need be. This should sufficiently increase air flow behind the walls and dry out the wooden studs and sub-floors. Set up your moisture meter as well to monitor the moisture levels around the affected area.

Indianapolis Drywall Replacement

Indianapolis Drywall Contractors 317-269-7319

Indianapolis Drywall Contractors 317-269-7319

Call Drywall by Local Builders at 317-269-7319 for professional drywall replacement in Indianapolis and its surrounding areas. We are experienced drywall contractors who offer a wide range of residential and commercial drywall service, including repair, replacement, installation, new home construction, metal stud framing, custom drywall texture, grid ceilings, and much more. Call 317-269-7319 to request a free estimate, today.

Popular Moulding Materials to Choose From

Whether you prefer crown, base, plinth, chair, or rosette, moulding provides a decorative and functional accent. When added to any room, it can instantly transform a dismal environment into a stunning, elegant space. As a highly-versatile home furnishing, it can be installed on walls, ceilings, bases of floors, around doors and windows, and much more. In fact, it is so versatile that it comes in various styles and designs, all of which ranging in look, size, quality, texture, and more.

A first step in choosing the right moulding for your home or office is deciding on a species or material. Traditionally made of wood, moulding is now available in several alternative materials too. Continue reading to learn the most popular species and material options for moulding.

Indianapolis Moulding Installation 317-269-7319

Indianapolis Moulding Installation 317-269-7319

Top 10 Moulding Materials

Aspen Aspen is a soft wood that has a straight grain and fine uniform texture. It is commonly used for more decorative moulding silhouettes.

Fir Fir is a wood species with two grain patterns: mixed grain and vertical grain. Mixed grain is course, and comes in light to dark hues. Vertical grains have tighter grain patterns and less color disparity. It generally requires staining prior to application.

Medium Density Fiberboard Also recognized as MDF, medium density fiberboard is a high-grade, composite material commonly used for moulding because it is durable and easy to paint.

Oak Oak is a hardwood that, when applied in the moulding manufacturing industry, it primarily derived from Red or White oak trees. It has attractive grain pattern qualities and it is very easy to work with.

Pine Pine is a wood species that, in the moulding manufacturing and consumer industry, is appealing for its unique textures and random knots.

Poplar Poplar wood is among the most preferred in the design industry because of its natural crisp grain lines and rich wood tones.

Primed Finger Joint Products Speaking of pine and poplar, primed finger joint products are derived from both. It is engineered moulding comes in smaller pieces that must be fitted together to make a whole board.

Polystyrene This is a prefinished moulding admired for its light weight and easy workability. They are slightly flexible and moisture resistant, making them a great choice for “untrue walls” and rooms that have higher levels of moisture, like kitchens and bathrooms.

Polyurethane Polyurethane moulding is a man-made material composed of high-density polyurethane. It is warp, rot, and split resistant, making it a prime choice as an alternative to wood materials.

PVC PVC, or polyvinylchloride, is another man-made material that flawlessly mimics the look of wood. It’s a popular choice because it’s easy to cut and install.

Indianapolis Drywall Contractors

Indianapolis Drywall Contractors 317-269-7319

Indianapolis Drywall Contractors 317-269-7319

Call Drywall by Local Builders at 317-269-7319 to request a free estimate for drywall installation in Indianapolis, Indiana. We offer a wide range of drywall services, for both residential and commercial properties, including new construction homes, remodels, repairs, metal stud framing, ceiling grids, and of course, moulding installation. Request a free estimate, today.