Smooth Walls Ahead: Mastering the Drywall Repair Process

In the world of home improvement, few tasks offer as much satisfaction as a perfectly smooth and freshly painted wall. Drywall, the unsung hero of modern interiors, provides the canvas upon which our homes and commercial spaces are built. However, like any other element of construction, drywall is not immune to wear and tear.

Whether you’re dealing with minor dents or major holes, understanding the drywall repair process can save you both time and money. This blog post is your ultimate guide to navigating the world of drywall repair, offering insights and practical steps for homeowners, property managers, and DIY enthusiasts alike.

Call 317-269-7319 for Professional Indianapolis Drywall Repair Service

Why Drywall is the Backbone of Modern Interiors

Drywall, also known as gypsum board or plasterboard, is a staple in modern construction due to its affordability, ease of installation, and versatility. It forms the walls and ceilings of our homes, providing a smooth surface for painting and decorating. Its importance cannot be overstated, as it contributes significantly to the aesthetic and functional aspects of any interior space.

Homes and commercial properties rely heavily on drywall to create partitions, cover structural elements, and improve acoustics. Without it, our living and working spaces would lack the polish and refinement we’ve come to expect. Yet, despite its strengths, drywall is susceptible to damage. Everyday activities, moisture exposure, and structural settling can all lead to dents, cracks, and holes. Understanding the causes of such damage is crucial for effective drywall maintenance and repair.

Common Culprits Behind Drywall Damage

Before embarking on the drywall repair process, it’s essential to identify the common causes of damage. Understanding these factors can help you prevent future issues and protect your walls from unnecessary wear and tear. One prevalent cause of drywall damage is accidental impact. Moving furniture, opening doors too forcefully, or even an energetic pet can result in dents and holes. These seemingly minor incidents can accumulate over time, leaving your walls less than pristine.

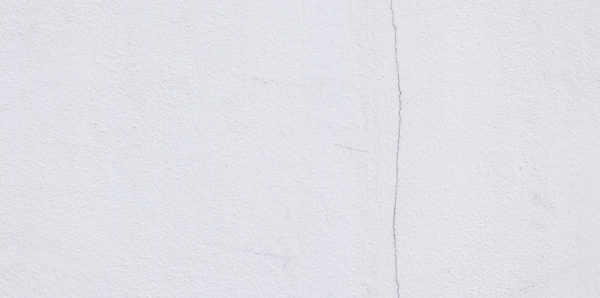
Moisture is another major enemy of drywall. Leaks, high humidity, and poor ventilation can lead to mold growth, warping, and deterioration of the material. Addressing the root cause of moisture issues is crucial to preventing further damage. Additionally, settling and structural shifts can cause cracks in drywall. This is especially common in new constructions as the building shifts and settles over time. Understanding these common culprits can guide your repair efforts and prevent future occurrences.

Your Step-by-Step Guide to Drywall Repair

Repairing drywall might seem daunting, but with the right approach and a bit of patience, it can become a manageable task. Here’s a comprehensive step-by-step guide to help you through the drywall repair process.

Assessing the Damage

Begin by thoroughly assessing the extent of the damage. Identify whether you’re dealing with a small dent, a medium-sized hole, or a large section that requires replacement. This assessment will determine the tools and materials you’ll need for the job. Small dents and wall holes can often be fixed with patching, while larger damages might require cutting out and replacing sections of drywall. Take note of any underlying issues, such as moisture or structural problems, that need addressing before proceeding.

Gathering the Necessary Tools and Materials

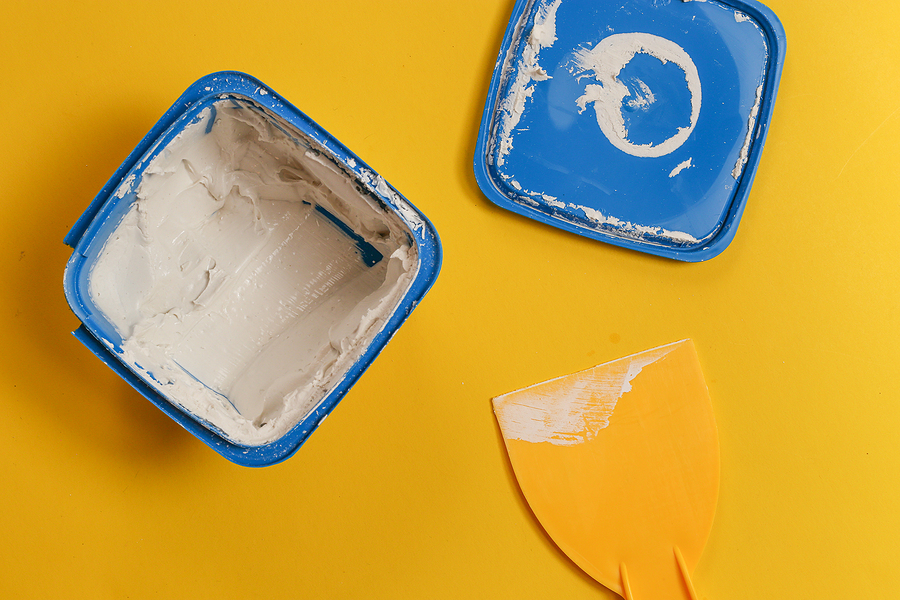
Once you’ve assessed the damage, gather the necessary tools and materials. For minor repairs, you’ll need patching compound, sandpaper, a putty knife, and paint that matches your wall color. For larger repairs, you’ll need a drywall saw, replacement drywall panels, joint tape, and screws. Having everything ready before you start will make the process smoother and more efficient.

Preparing the Area

Before you begin repairing, prepare the area by clearing the surrounding space and laying down protective coverings. Dust and debris can spread easily during the repair, so safeguarding your furniture and flooring is essential. If you’re repairing a wall near electrical outlets or switches, ensure that the power is turned off for safety.

Repairing Small and Large Holes

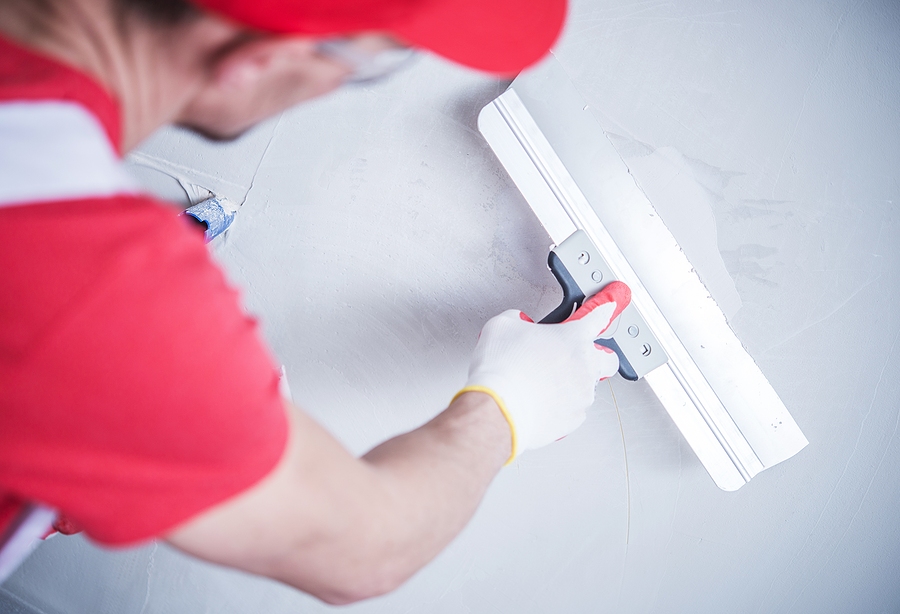
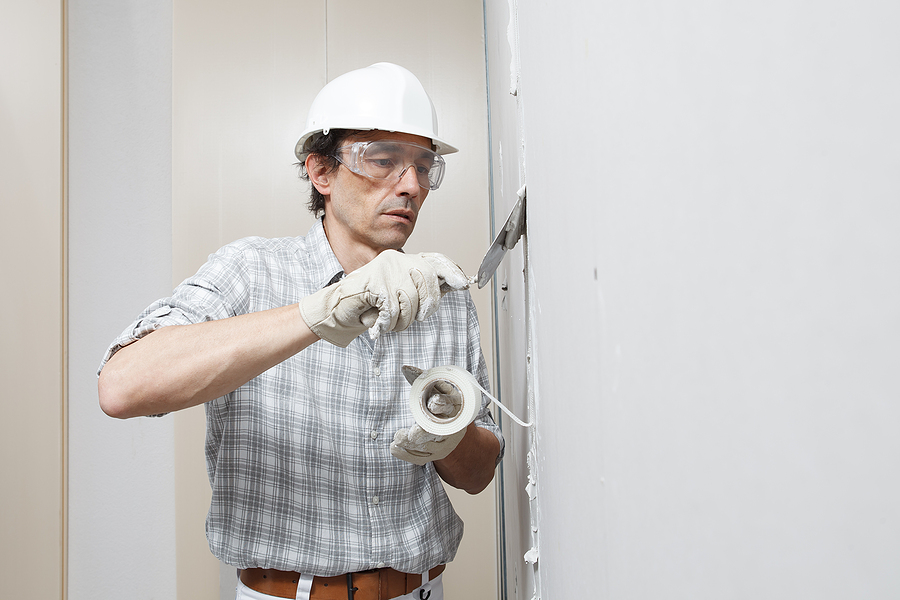
For small dents and holes, start by applying a thin layer of patching compound using a putty knife. Smooth it out and allow it to dry before sanding it down to create a seamless finish. For larger holes, cut out the damaged section and replace it with a new piece of drywall. Secure it with screws, apply joint tape, and use compound to blend the edges. Sand the area once the compound is dry for a uniform surface.

Sanding and Finishing

Sanding is a critical step in achieving a polished look. Use fine-grit sandpaper to gently smooth the patched area, ensuring that it’s flush with the surrounding wall. Be cautious not to over-sand, as this can damage the drywall surface further.

Painting and Final Touches

Once the repair is complete and the surface is smooth, it’s time to paint. Use a primer to ensure even paint application, then apply a coat of paint that matches your existing wall color. Feather the edges to blend the new paint seamlessly into the old. Stand back and admire your handiwork—a wall restored to its former glory.

Tips for DIY Drywall Repairs

While the drywall repair process can be tackled by anyone, a few tips can enhance your success. First, take your time. Rushing through the repair can lead to mistakes and a less-than-perfect finish. Patience is key to achieving a professional-looking result. Practice makes perfect. If you’re new to drywall repair, consider practicing on a scrap piece of drywall before tackling visible sections. This will help you refine your technique and build confidence.

Don’t hesitate to seek guidance. Online tutorials and home improvement resources can provide valuable insights and tips from experienced DIYers. Learning from others’ experiences can save you time and frustration.

Knowing When to Call a Professional

While many drywall repairs can be handled independently, there are situations where calling a professional is the best choice. Extensive damage, underlying issues like mold, or lack of experience can lead to more significant problems if not addressed correctly. Professionals bring expertise and specialized tools to the table, ensuring a smooth and long-lasting repair. If you’re unsure about tackling a particular repair, reaching out to a professional can save you time and headaches.

Wrapping Up

In conclusion, understanding and mastering the drywall repair process is a valuable skill for homeowners, property managers, and DIY enthusiasts. Regular maintenance and timely repairs not only enhance the aesthetic appeal of your spaces but also contribute to the overall integrity of your property. By addressing common causes of damage and following a systematic repair process, you can keep your walls looking pristine and well-maintained.

Maintaining your drywall is a proactive step in preserving the beauty and value of your home. Don’t hesitate to take action when damage occurs, and remember that seeking professional help is always an option.

If you’re ready to tackle your next drywall repair project or need assistance with more extensive repairs, our team of experts is here to help. Contact Drywall by AMFA at 317-269-7319 for professional drywall repair service in Indianapolis Indiana. We serve residential and commercial clients all throughout the central part of the state.

Related Posts:

The Real Cost of Drywall Repair: Insights for Every Budget
Drywall Problems Decoded: A Guide to Drywall Repair and Maintenance
Basic Toolbox for Drywall Repair

The Real Cost of Drywall Repair: Insights for Every Budget

In the world of home maintenance, drywall plays a pivotal role. It’s the canvas for your interior decor and the backbone of your home’s walls and ceilings. But just like any other part of your home, drywall can suffer damage over time. Whether it’s a small crack or a larger hole, addressing these issues promptly is essential for maintaining the overall health and aesthetic of your living or working space.

For homeowners, property managers, landlords, and small business owners, understanding the nuances of drywall repair is crucial for making informed decisions that won’t break the bank. In today’s post, we will  dive into the real cost of drywall repair and provide insights for every budget.

Call 317-269-7319 for Professional Drywall Repair Service in Indianapolis Indiana

Understanding the Factors Affecting Drywall Repair Costs

When it comes to drywall repair, several factors can influence the cost. The first is the type of damage you’re dealing with. Cracks and holes are common issues, but water damage and mold can also rear their ugly heads. Each type of damage presents its own challenges and, therefore, can affect the overall cost of repair. Cracks might require simple patching, whereas mold could necessitate extensive treatment and replacement of materials.

Another significant factor is the size and severity of the damage. A minor crack may be a quick and easy fix, but extensive water damage or a large hole can require more materials and labor, driving up costs. The extent of the damage can also determine whether you need a professional drywall contractor, which will influence the overall cost.

Finally, material and labor costs are always a consideration. The price of drywall supplies can vary, and labor costs can differ depending on the complexity of the repair and the expertise required. Understanding these factors can help you budget effectively and make the best choice between professional drywall service or a DIY approach.

Average Cost Breakdown by Repair Type

Let’s break down the average costs associated with different types of drywall damage. For common repairs like fixing small holes or cracks, costs can range from $50 to $150, depending on the materials and tools required. However, if you’re dealing with more severe issues like water damage, costs can rise significantly, often reaching between $200 and $500.

Regional variations in repair costs can also impact your budget. In urban areas, where living expenses are higher, the cost of drywall installation and repair may reflect this. Conversely, rural regions might offer more affordable rates. It’s important to consider these regional variations when planning your repair budget.

By understanding the typical costs associated with each type of repair, you can better anticipate expenses and plan accordingly. This knowledge not only helps in budgeting but also in determining whether a professional drywall contractor is necessary for larger, more complex repairs.

DIY vs. Professional Repair

When faced with drywall damage, you’re often presented with two options: tackle the repair yourself or hire a professional. Each choice has its own set of advantages and disadvantages. DIY repair is usually more cost-effective and can be satisfying if you’re handy. However, it requires time, effort, and the right tools. A less-than-perfect job can lead to additional repairs down the road.

On the other hand, professional repair ensures quality workmanship and can handle more complicated issues like extensive water damage or structural problems. The downside? It often comes with a higher price tag. In many cases, the cost of hiring a professional is justified by the quality and efficiency of the work, particularly for larger projects.

The decision ultimately comes down to the nature of the damage and your confidence in handling repairs. For minor cracks and holes, DIY might be sufficient. But for more significant damage, investing in professional drywall services could save you time and money in the long run.

Tips for Reducing Drywall Repair Costs

Reducing drywall repair costs is possible with a few strategic approaches. First, consider preventive maintenance to minimize the need for repairs. Regularly inspect your walls and ceilings for signs of damage, such as small cracks or discoloration, and address these issues early to prevent them from worsening.

When repairs are necessary, choosing cost-effective methods can make a difference. Opt for quality materials that offer durability, which may cost more upfront but save money in the long run by reducing the need for future repairs. Additionally, gathering multiple quotes from drywall contractors can help you find the best deal without sacrificing quality.

Lastly, consider bundling multiple repairs into one project. If you have several areas that need attention, addressing them all at once can often reduce labor costs compared to handling each repair separately.

Conclusion

Understanding the real cost of drywall repair is essential for homeowners, property managers, landlords, and small business owners. By considering factors such as the type of damage, the size and severity, and the choice between DIY and professional repairs, you can make informed decisions that align with your budget. Preventive maintenance and cost-effective strategies can further reduce expenses.

Remember, when in doubt, it’s always wise to seek the advice of professional drywall contractors who can provide expert guidance and ensure the longevity of your repairs. For more detailed information or to explore our drywall services, reach out to us today. Whether you’re fixing a minor crack or tackling extensive water damage, your walls and ceilings deserve the best care possible.

Don’t hesitate to reach out to our expert team for personalized advice and assistance. Contact Drywall by AMFA at 317-269-7319 for professional drywall services in Indianapolis, Indiana. Whether you’re tackling a small repair or a large-scale renovation, we’re here to help you achieve the perfect finish.

Related Posts:

The Complete Handbook on Drywall Repairs and Maintenance
Drywall Problems Decoded: A Guide to Drywall Repair and Maintenance
Avoid DIY Disasters: The Importance of Professional Drywall Installation

Common Joint Taping Issues and How to Solve Them

If you’ve tackled drywall projects, you know how crucial joint taping is. Taping ensures your walls look seamless and professional. However, common joint tape issues can mar even the best DIY or professional efforts. This blog post aims to help DIY enthusiasts and home improvement professionals understand and solve these common joint tape problems.

Call 317-269-7319 for Professional Drywall Installation and Repair in Indianapolis

Common Joint Taping Issues

Bubbling and Wrinkling

Bubbling and wrinkling are among the most frustrating issues in drywall taping. They often result from improper taping techniques or environmental factors like humidity. Understanding why these problems occur is essential for effective solutions.

Tape Peeling

Nothing ruins an otherwise perfect drywall job quite like peeling tape. This issue often arises from poor adhesive application or low-quality tape. Identifying the root causes can help you avoid this pitfall.

Poor Adhesion

Poor adhesion is another frequent concern, particularly in areas with fluctuating temperatures or high humidity. It can lead to loose tape, creating an unsightly finish. Knowing how to ensure strong adhesion is vital for a long-lasting result.

Visible Joints

Visible joints compromise the aesthetics of a wall. They often stem from an inadequate application of taping compound or uneven sanding. Addressing this problem requires attention to detail and proper technique.

Detailed Explanations and Solutions

Bubbling and Wrinkling

Causes: Bubbling and wrinkling typically occur due to excessive compound application or insufficient pressure during tape smoothing. Moisture trapped between layers can also be a culprit.

Solutions:

  • Remove affected tape sections and clean the area.
  • Apply a thin layer of joint compound and press the tape firmly.
  • Smooth the tape using a drywall knife, ensuring no air pockets remain.

Best Practices: For professionals, using high-quality paper tape and maintaining consistent pressure during application can minimize these issues.

Tape Peeling

Causes: Peeling tape often results from using low-quality tape or insufficient compound beneath the tape.

Solutions:

  • Remove the peeling tape and any loose compound.
  • Apply a fresh layer of compound and use quality tape.
  • Press the tape firmly and apply additional compound layers as needed.

Best Practices: Professionals should always opt for premium tape and ensure the surface is clean before application.

Poor Adhesion

Causes: Poor adhesion usually stems from using low-quality compound or working in unfavorable conditions like high humidity.

Solutions:

  • Ensure the surface is clean and dry before starting.
  • Use a high-quality joint compound and apply it evenly.
  • Press the tape firmly and allow adequate drying time.

Best Practices: Using a dehumidifier in humid environments can improve adhesion. Professionals should also consider temperature and humidity levels when scheduling drywall work.

Visible Joints

Causes: Visible joints are often due to uneven compound application or inadequate sanding.

Solutions:

  • Apply the joint compound evenly, feathering the edges.
  • Sand the area lightly but thoroughly after it dries.
  • Apply a second coat if necessary, ensuring a smooth transition between the tape and drywall.

Best Practices: For professionals, investing in quality sanding tools and taking time with each step can ensure flawless results.

Importance of Using High-Quality Tape and Tools

Using high-quality tape and tools is essential for achieving a professional finish. Low-quality materials can lead to various issues, including those mentioned earlier. Investing in premium products ensures durability and ease of application.

Quality Affects Finishing Results

High-quality tape and tools provide better adhesion, smoother application, and fewer issues during the finishing process. This investment often pays off in the long run by reducing rework and enhancing the overall appearance.

Recommendations for Tape and Tools:

  • Paper Tape
  • Mesh Tape
  • Stainless Steel Drywall Knife
  • Professional-Grade Joint Compound
  • High-Quality Sanding Tools

Conclusion

Mastering drywall taping is essential for achieving smooth, professional-looking walls. By understanding common issues such as bubbling, wrinkling, tape peeling, poor adhesion, and visible joints, you can take proactive steps to address and prevent these problems. Using high-quality materials and adhering to best practices significantly enhances the final result, reducing the need for rework and ensuring a durable finish.

Whether you’re a DIY enthusiast or a seasoned professional, investing time and effort in proper taping techniques will pay off in the long run, resulting in beautifully finished walls that stand the test of time.

On the other hand, if do-it-yourself drywall work is not working out, we can help. Contact Drywall by AMFA at 317-269-7319 for professional drywall services and custom drywall texture in Indianapolis, Indiana. We serve both residential and commercial clients.  Request a free estimate, today!

Related Posts:

Troublesome Nail Pops? Here’s How to Spot, Fix, and Prevent Them
Avoid DIY Disasters: The Importance of Professional Drywall Installation
Wall Anchor Removal Guide

How to Fix Small Cracks in Drywall

After a while, tiny little fissures and cracks can appear in drywall and show through the paint. Although minuscule, these little cracks are quite frustrating since they disrupt the perfect, flawless finish of your walls. Most drywall cracks are a result of the old drywall compound dehydrating and shrinking. Fortunately, there are some easy ways to fix drywall cracks, so long as you have the right materials, the right knowledge, and a little experience patching holes in walls.

Continue reading to learn how to repair small cracks in drywall, and what to do if feel like the project is too much for you to take on.

Indianapolis Drywall Contractors 317-269-7319

Indianapolis Drywall Contractors 317-269-7319

What To Get:

To fix small cracks in drywall, you won’t need a bunch of complex supplies and materials, but you will require the essentials. Here is what you will need to get for your drywall repair project:

⇒ Drywall Compound
⇒ Mud Pan
⇒ Utility Knife (paint scraper or chisel works just as well)
⇒ Drywall Trowel
⇒ Sandpaper (100 – 120 Grit)
⇒ Microfiber Cloth
⇒ Work Gloves

Getting Started:

Check the area of the crack to see if it extends through the paper, or has been pulled away from the wall. If on a straight seam (horizontal or vertical) use your utility knife to carefully pull open the crack to make these determinations.

If the drywall tape is still intact, you are dealing with a minor crack. Start your repairs by filling it in with some joint compound.

Swipe your drywall trowel across the surface of the crack both ways, until the blade is clean. Hold the trowel at a 70-degree angle for proper application.

Allow the compound to fully dry. Once entirely dry, you can sand the surface smooth with 100 or 120 grit sanding sheet. You can also use a sanding sponge or a 150 or 220 grit sand screen.

After you have finished sanding, you can wipe the dust away with a microfiber cloth. If the wall was previously painted, you will need to prime and paint using the same colors. If you do not have the same paint, you can have it matched at your local paint shop.

Don’t Think You Can Handle the Job Alone?

Call Drywall by AMFA at 317-269-7319 for Indianapolis drywall repair and installation service. We are experienced drywall contractors who offer a wide range of residential and commercial drywall service, including repair, replacement, installation, new home construction, metal stud framing, custom drywall texture, grid ceilings, and much more. Call 317-269-7319 to request a free estimate, today.