Modern Drywall Options Choosing the Right Solution for Your Space 

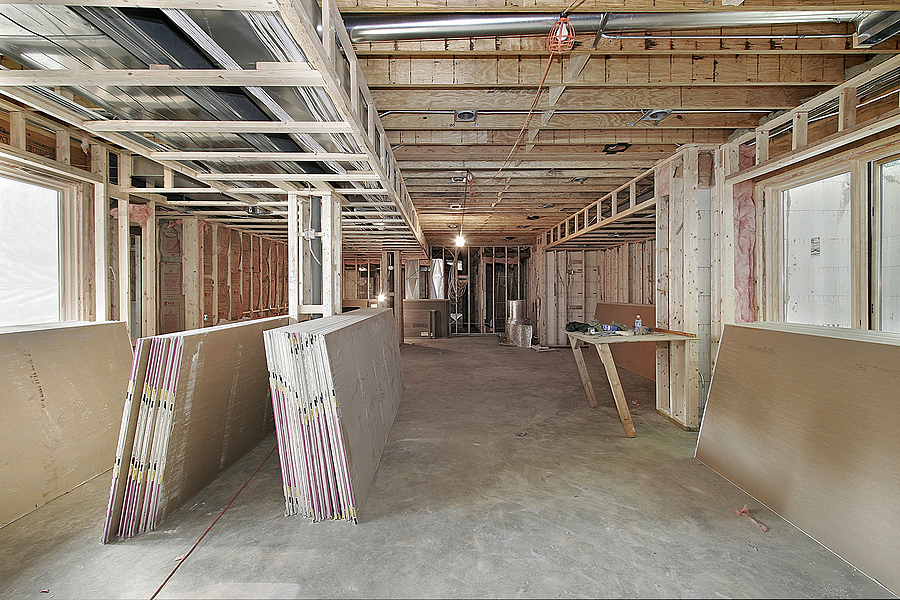
Drywall is the unsung hero of most homes. It shapes your walls, provides a canvas for creativity, and protects against external elements. But drywalling isn’t just about standard sheets anymore. Advancements in materials and technology have introduced modern drywall options catering to specific needs, from soundproofing to eco-friendly solutions. 

Whether you’re a DIY enthusiast, homeowner, or renovator, understanding the variety of drywall trends available can help you make informed decisions for your project. This guide dives deep into the types of drywall, their benefits, and practical tips to enhance your next project. 

Call 317-269-7319 to Get a Free Drywall Installation Quote in Indianapolis

Discovering the Types of Drywall in 2025 

Standard Drywall 

This is the traditional option you’ll find in most homes. Ideal for general-purpose use, standard drywall is affordable and easy to install. It’s available in different thicknesses, with 1/2 inch being the most common for walls and 5/8 inch for ceilings. 

Pros: 

  • Cost-effective
  • Readily available
  • Suitable for most rooms

Cons: 

  • Limited specialty features
  • Susceptible to moisture and sound leakage

Moisture Resistant Drywall 

For bathrooms, kitchens, or anywhere dampness is a concern, moisture-resistant drywall (often called Green Board or Mold-Resistant Drywall) is a game-changer. The moisture-repellent coating and mold-resistant core enhance durability in wet environments. 

Popular Example: Mold-Resistant Drywall 

Specifically engineered to resist mold growth.

Pros: 

  • Ideal for high-moisture areas
  • Reduces mold risk

Cons: 

  • Slightly more expensive than standard drywall

Fire Resistant Drywall 

Fire-resistant drywall, often referred to as Type X Drywall, provides enhanced safety, particularly for certain code-required areas like garages or stairwells. Its reinforced gypsum core holds up longer under high heat, giving you added peace of mind. 

Pros: 

  • Meets safety code requirements
  • Adds protection in fire-prone areas

Cons: 

  • More difficult to cut and shape due to its density

Soundproof Drywall 

Tired of hearing thudding footsteps or noisy neighbors? Soundproof drywall, like SoundBreak, features a sound-dampening layer to minimize noise transfer between rooms, creating quiet and serene spaces. 

Popular Example: SoundBreak Drywall 

Specifically engineered to reduce noise transmission.

Pros: 

  • Great for bedrooms, offices, or media rooms
  • Significantly improves sound isolation

Cons: 

  • Higher cost compared to standard drywall

Eco-Friendly Drywall 

For the environmentally conscious, eco-friendly drywall options like EcoRock are making waves. Made from recycled materials, these options are a greener choice without compromising strength or durability. 

Popular Example: EcoRock 

Gypsum-free, made from industrial byproducts and recycled materials.

Pros: 

  • Sustainable and eco-friendly
  • Contributes to LEED certification for buildings

Cons: 

  • Might be harder to source locally

Comparing Drywall Options 

Type of DrywallBest ForDrawbacks
Standard DrywallGeneral-purpose useLacks specialty features like moisture or fire resistance
Moisture-ResistantWet environmentsSlightly pricier than standard drywall
Fire-ResistantFire-prone areasHeavier and harder to install
SoundproofReducing noiseHigher cost
Eco-FriendlySustainable buildsLimited availability in some areas

Get a Free Drywall Installation Quote!

Factors to Consider When Choosing Your Drywall 

  • Room Requirements: Bathrooms require moisture-resistant boards, while media rooms benefit from soundproofing.
  • Budget: Balance your budget with features that genuinely improve your space.
  • Sustainability Goals: Opt for eco-friendly boards to reduce your environmental impact.
  • Code Compliance: Certain areas, like garages, may require fire-resistant drywall by law.
  • Ease of Installation: If you’re tackling this project solo, lightweight drywall can save time and hassle.

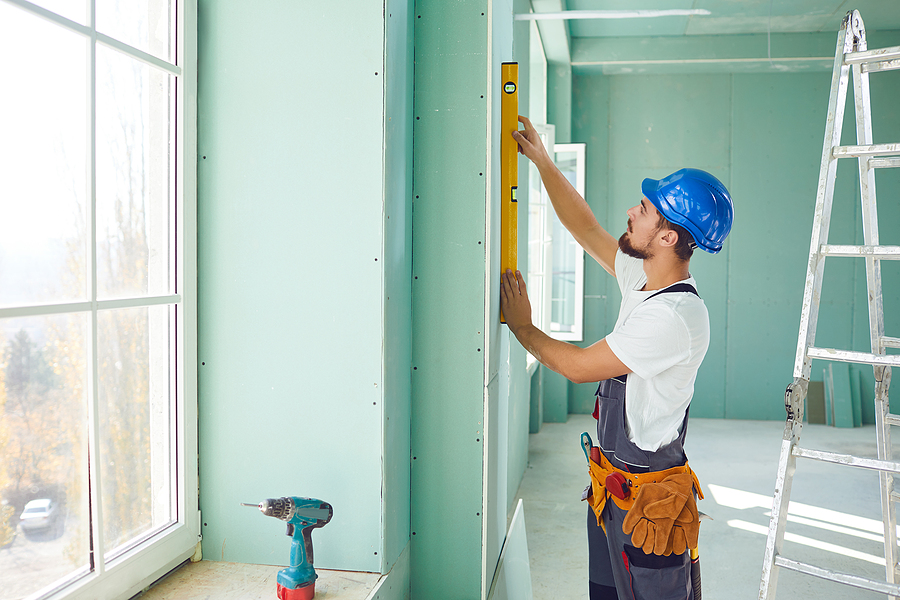
Tips for Installing Drywall Like a Pro 

Whether you’re a seasoned DIYer or new to drywalling, efficiency and precision are key. Follow these expert tips for flawless results. 

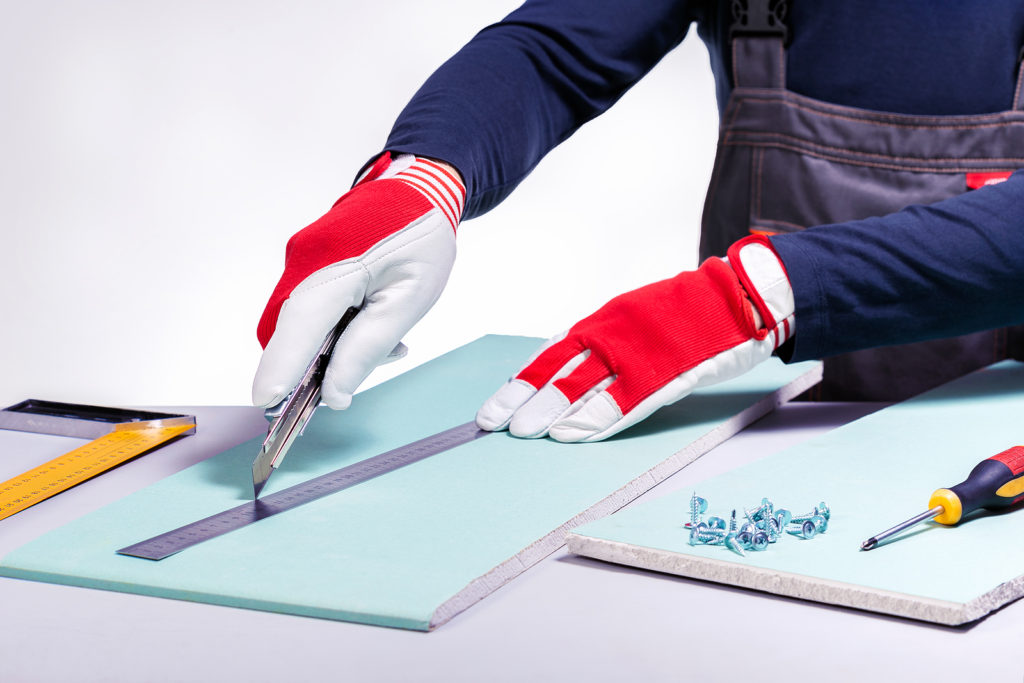
  • Measure Twice, Cut Once: Minimize waste and ensure an exact fit by double-checking your measurements.
  • Use the Correct Tools: Equip yourself with a drywall knife, T-square, and drywall screws for accuracy.
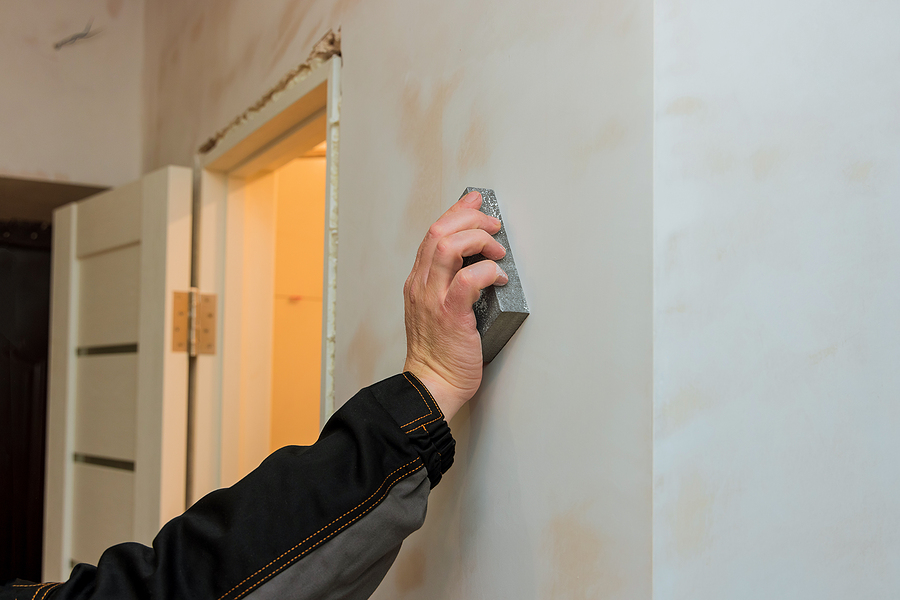
  • Apply Joint Compound in Thin Layers: Allow each coat to dry before applying the next to avoid lumps.
  • Sand for a Smooth Finish: Once the compound is dry, sand it down for a seamless surface before painting.
  • Ensure Proper Ventilation: Reduce dust and improve drying times by working in well-ventilated areas.

Troubleshooting Common Drywall Problems 

Cracks 

  • Issue: Small cracks can appear over time.
  • Solution: Fill them with joint compound; reinforce larger cracks with mesh tape.

Dents 

  • Issue: Shallow dents happen from accidental bumps.
  • Solution: Fill with joint compound and sand smooth. Deep dents may require replacing the damaged section.

Nail Pops 

  • Issue: Nails or screws that push through drywall.
  • Solution: Re-secure the drywall with screws above and below the popped nail, then cover with compound.

Water Damage 

  • Issue: Staining, bubbling, or sagging caused by leaks.
  • Solution: Replace the affected areas and fix the source of the water problem before re-installing.

Mold Growth 

  • Issue: Damp conditions causing hazardous mold on drywall.
  • Solution: Remove the moldy drywall, treat the area with anti-mold solution, and address moisture issues.

Bubbling Paint 

  • Issue: Paint that lifts from the drywall surface.
  • Solution: Scrape the loose paint, sand the area, apply primer, and repaint.

Key Takeaways

Modern drywall options provide endless opportunities to optimize your home. Whether you need soundproof walls, moisture-resistant drywall, or an eco-friendly solution like EcoRock, there’s a perfect choice for your project. 

Investing time in understanding drywall trends and following best practices for installation can ensure great results and a space you’ll love for years to come. 

If you’re still unsure about which option serves your needs best, consult a professional drywall specialist today to get expert guidance. 

For expert advice, top-quality materials, and flawless drywall installation or repair, trust the professionals at Drywall By AMFA. Serving the Indianapolis area with dedication and expertise, we are committed to bringing your vision to life.

Talk to a Drywall Contractor Now

Related Post: The 3 Main Types of Drywall

Hole in the Wall? Here Are Your Best Options for Repair

Have you ever noticed a small (or not-so-small) hole in your wall and thought, “Where do I even start?” Whether it’s a nail hole from picture frames, a pesky dent from a door handle, or even damage caused by movers, wall imperfections can disrupt the aesthetic of your living space. The good news? Fixing holes in your walls is easier than you think and doesn’t have to cost a fortune.

This guide breaks down everything you need to know about drywall repair, so whether you’re a seasoned DIY weekend warrior or new to repairing walls, you’ll have all the tools and tips you need to get your walls back to flawless condition.

Call 317-269-7319 for Expert Wall Hole Repair in Indianapolis Indiana

Understanding Different Types of Wall Damage

Not all wall damage is created equal. The type and severity of the damage will determine the method and tools required for repair. Here are a few common scenarios:

  • Nail holes – Quick fixes for holes left behind by picture frames or decorations.
  • Door handle dents – These can range in size and may need a bit more filling and sanding to blend in.
  • Furniture scuffs – Often surface-level damage that requires just a touch-up of paint.
  • Mouse holes – Urgent repairs are needed here to seal off entry points for pests.

By identifying what type of damage you’re dealing with, you can tailor your approach and select the right materials for the job.

Gathering Your Repair Supplies

Before you roll up your sleeves, gather the proper tools. Having the right drywall supplies on hand makes the process smooth and reduces frustration. For most wall repairs, you’ll need:

  • Trowel – For applying joint compound evenly over larger damaged areas.
  • Spackle – Perfect for filling small nail holes or thin cracks.
  • Drywall Patch Kit – Ideal for covering larger holes, often with a mesh backing for support.
  • Joint Compound – Provides a smooth, blendable surface for covering damage and seams.
  • Putty Knife – Used to apply spackle or joint compound with precision.
  • Sandpaper or Sanding Sponge – To smooth the surface before painting.
  • Paint and Primer – To match your wall and ensure a seamless finish.

Contact Us for Expert Drywall Repair

Step-by-Step Guide to Patching Small Holes

For minor damage like nail or screw holes, repairs can be quick and painless. Here’s how to get it done:

  1. Clean the Area – Remove any dirt, dust, or loose paint around the hole.
  2. Apply Spackle with a Putty Knife – Scoop a small amount onto your putty knife and press it into the hole, smoothing it out flush with the wall.
  3. Allow It to Dry – Check the product instructions for drying time, but most spackle dries within a few hours.
  4. Sand the Surface – Use fine-grit sandpaper to create a smooth finish that blends seamlessly with the wall.
  5. Prime and Paint – Touch up the repaired area with primer, then apply matching paint for a flawless look.

Small nail holes may not even require sanding if your spackle application is smooth!

Tackling Larger Holes

Larger damage, like fist-sized holes from accidents or significant dents, requires a more involved approach but is still manageable:

  1. Prepare the Hole – Use a utility knife to create clean, smooth edges around the damaged area.
  2. Attach a Support Patch – For holes larger than a few inches, use a drywall patch (often included in drywall patch kits). Center it over the damage for stability.
  3. Apply Joint Compound – Use a trowel to spread joint compound evenly over the patch. Feather the edges to blend it with the surrounding wall.
  4. Sand and Repeat – Once the joint compound is dry, sand it down to achieve a smooth finish. You may need to apply another thin coat to perfect the blend.
  5. Prime and Paint – Just like with small holes, finish with primer and a matching paint color.

For textured walls, consider using texture spray or special tools to mimic the existing finish.

Preventing Future Wall Damage

Once you’ve restored your walls to their former glory, take these steps to avoid dealing with cracks, holes, and dents in the future:

  • Install doorstops to prevent doorknobs from damaging walls.
  • Use felt pads on furniture to minimize scratches and scuffs.
  • Mount decorations with appropriate hardware, like anchors, to prevent them from falling.
  • Be cautious when moving furniture to avoid bumping into walls.
  • Monitor humidity levels in your home to reduce the risk of drywall cracks.

Simple, proactive measures can save you plenty of time and effort in repairs down the road.

Professional vs DIY

If you’re not confident in your wall repair skills or the damage seems overwhelming, hiring a professional drywall repair company may be the way to go. Here’s what you gain by working with an expert:

  • Guaranteed Results – Professionals deliver seamless, high-quality repairs with no visible patches.
  • Color Matching – They’ll ensure the repaired area blends perfectly with your existing paint.
  • Time Savings – Professional repairs mean less disruption to your daily routine.
  • Peace of Mind – They’ll handle complex or hazardous issues, like walls potentially containing asbestos.

However, if the damage is minor, following the steps in this guide can save you money while still achieving great results.

Wrapping Up

Repairing wall damage doesn’t have to be a stressful or costly endeavor. Whether you’re patching a tiny nail hole or tackling a larger repair, the right tools and techniques make all the difference. By following the steps outlined here, you’ll be well on your way to smooth, flawless walls.

Need help with tougher repairs or don’t have the time to DIY? We’re here to assist. Drywall By AMFA specializes in seamless drywall repair for any size or type of damage. From assessment to color matching, we’ll ensure your walls look as good as new in no time.

Get a quote today!

Related Post: How to Repair a Hole in the Wall From a Door Handle

A Homeowner’s Guide to New Construction Drywalling  

New construction drywalling is a critical step in creating solid, beautiful walls and ceilings for your new home or commercial space. While it often goes unnoticed when completed properly, drywall provides both structural stability and a blank canvas ready for interior painting or design. Getting it right the first time can save time, money, and frustration down the line. 

Whether you’re taking a DIY approach or hiring professional drywall contractors, our guide will walk you through the key considerations, from planning and material selection to installation and finishing. 

Call 317-269-7319 for Professional New Construction Drywall in Indianapolis

Planning and Preparation for New Construction Drywall

Before you begin your new construction drywall project, proper planning and preparation can set you up for success. Here’s what you need to consider:

Assess Project Scope 

Define your project requirements clearly. Are you working on a single room, an entire home, or a commercial space? Larger projects will require more materials and careful coordination. 

Set a Budget 

Understanding your budget constraints is essential. Key factors to account for include:

  • Material Costs: Different types of drywall come with varying price tags. Opt for the type that suits your needs.
  • Labor Costs: If you’re hiring professional drywall contractors, obtain quotes for the job. 
  • Tools and Equipment Rental: For those going the DIY route, factor in the cost of renting or purchasing tools like drywall lifts or sanders.
  • Disposal Fees: If old drywall or debris needs removal, include disposal costs.
  • Contingency Funds: Unexpected issues happen. Allocate at least 10% of your budget for surprises like incorrect measurements or damaged materials. 

Create a Realistic Timeline 

Create a project timeline with clear milestones. Keep in mind that certain steps, like mudding and sanding, require specific drying times to avoid compromising the finish. 

Get a Quote for New Construction Drywall

Choosing the Right Drywall Material 

Selecting the right type of drywall is key to ensuring durability and meeting specific needs for each space. Here’s an overview of popular drywall options and their common uses:

  • Standard Drywall – Best for general interior walls and ceilings. It’s cost-effective and suitable for spaces with low moisture exposure. 
  • Moisture-Resistant Drywall – This green or purple board is perfect for bathrooms, laundry rooms, and basements. It resists mold and mildew better than standard drywall. 
  • Fire-Resistant Drywall – Ideal for garages, utility rooms, or areas near furnaces, this type prioritizes safety by slowing fire spread. 
  • Soundproof Drywall – If privacy is important, this denser drywall minimizes noise between rooms and is a favorite for home offices, theaters, and bedrooms. 
  • Cement Board – While not technically drywall, this material is used as a base for tiling projects in wet areas like showers. 

The Step-by-Step Installation Process 

Once you’ve chosen your materials and planned the project, it’s time to begin installation. Here’s how to install drywall like a pro:

Step 1: Measure and Cut 

Accurate measurements are the foundation of proper installation. Measure each wall and ceiling area, then cut drywall sheets to fit snugly. Always leave a small gap at the bottom of walls to prevent moisture absorption from floors. 

Step 2: Attach Drywall Sheets 

Use screws instead of nails for greater stability and to minimize the risk of popping. Start by affixing sheets to the ceiling before moving to walls, ensuring each piece aligns properly with studs. 

Step 3: Mudding and Taping 

Apply joint compound (mud) to the seams and use drywall tape to cover them. Smooth out excess compound for a seamless finish. Try the All Purpose Ready-Mixed Joint Compound by USG Sheetrock Brand.

Step 4: Sanding 

After the mud has dried, sand the joints to create a smooth surface. This step is essential for achieving a flawless finish before applying primer or paint. 

Step 5: Priming 

Before beginning any interior painting, apply a drywall primer to prepare the surface for even color absorption and a polished look. 

Finishing Touches for a Professional Look 

Drywall finishing isn’t just about covering imperfections; it’s about creating a polished foundation for the final design. Follow these tips for flawless results:

  • Use fine-grit sandpaper for a smooth finish without over-sanding. 
  • Ensure all screws are flush with the drywall surface. 
  • Inspect every seam and corner to identify areas needing extra attention. 
  • Always vacuum or clean up dust before priming. 

Common Drywall Installation Mistakes to Avoid 

Mistakes during drywalling can lead to costly fixes or unsightly results. Here are some common pitfalls to watch out for and how to prevent them:

  • Improper Measuring – Accurate measurements prevent material waste and misalignment. Double-check all dimensions before cutting. 
  • Incorrect Fastening – Over-driving screws can weaken the drywall, while under-driving can leave bumps that ruin the smooth finish. Always ensure screws are flush. 
  • Sloppy Joint Treatment – Poor mudding, taping, or sanding can result in visible seams and cracks over time. Take your time with these steps for a professional look. 
  • Using the Wrong Drywall Type – Installing standard drywall in moisture-prone areas can lead to long-term damage and mold issues. 
  • Rushing the Process – Skipping drying times between steps can compromise the strength and appearance of the finish. Patience is key to a durable result. 

DIY or Hire a Professional? 

Deciding between DIY drywall installation and hiring professionals depends on your budget, skill level, and timeline.

▶ DIY Drywall Installation 

Pros:

  • Cost savings on labor expenses. 
  • Flexibility to work at your own pace. 

Cons:

  • Requires skill and tools for professional results. 
  • Time-consuming and prone to mistakes without experience. 

▶ Professional Drywall Installation 

Pros:

  • Faster completion with high-quality results. 
  • Reduced risk of errors or rework. 

Cons:

  • Higher upfront costs due to labor fees. 
  • Less control over the timeline. 

Key Takeaways

New construction drywalling doesn’t have to be daunting. By planning effectively, choosing the right materials, and avoiding common mistakes, you can create a stunning interior that’s ready for finishing touches like interior painting or design. 

Looking for expert assistance? Schedule your drywall installation today and partner with Drywall By AMFA who prioritize precision and quality. 

Contact us for expert consultation.

Related Post: Why Choose Metal Stud Framing for Your Drywall Construction Project

The Perfect Finish: Mastering Drywall Sanding for DIY Enthusiasts

Are you a DIY enthusiast, home renovator, or Dad trying to fix a hole in the wall? Achieving a flawless drywall finish can be the key to transforming any space. Proper drywall preparation is crucial in the renovation process, ensuring that your walls look smooth and professional. In this comprehensive guide, we’ll explore the ins and outs of sanding drywall, offering valuable tips, techniques, and step-by-step instructions to help you achieve the perfect finish.

Call 317-269-7319 for Professional Drywall Repair and Installation in Indianapolis Indiana

A Preview to the Drywall Sanding Process

Before we jump into the how-to, let’s familiarize ourselves with the basics of sanding drywall. The sanding process involves using various types of sandpaper and sanding tools to smooth out the surface of drywall joints, corners, and imperfections. The goal is to create a seamless and even surface that blends perfectly with the surrounding wall.

Types of Sandpapers

The key to a successful sanding job lies in choosing the right type of sandpaper. Generally, sandpapers com e in different grits, ranging from coarse to fine. Coarse grits (40-80) are ideal for initial sanding to remove excess joint compound quickly. Medium grits (100-150) are used for smoothing out the surface, while fine grits (180-220) provide that final polished finish.

Essential Sanding Tools

To achieve professional results, it’s essential to have the right tools on hand. Here are some must-have sanding tools for drywall:

  • Sanding Block: A simple yet effective tool for manual sanding, providing better control over pressure.
  • Pole Sander: Ideal for reaching high or extended areas, ensuring even sanding across large surfaces.
  • Orbital Sander: A power tool that makes quick work of extensive sanding tasks, delivering consistent results.
  • Sanding Sponge: Perfect for detailed work and corners, offering flexibility and precision.

Step-by-Step Guide to Sanding Drywall

Mastering drywall sanding requires a systematic approach. Follow these steps to achieve a smooth and professional finish:

Initial Preparation

Preparation is the key to success in any renovation project. Start by ensuring the drywall surface is clean and free of any debris. Cover the floors and furniture with drop cloths to protect them from dust. Wear protective gear, including a mask, goggles, and gloves, to safeguard yourself from dust particles.

Applying Joint Compound

Before sanding, apply a thin layer of joint compound to the seams and screw holes. Use a taping knife to feather the edges, creating a smooth transition between the drywall and compound. Allow the joint compound to dry completely before proceeding to the next step.

Sanding the Surface

Begin sanding the dried joint compound using coarse grit sandpaper. Hold the sanding block or pole sander at a slight angle and use light pressure. Move in circular motions to avoid creating grooves or uneven surfaces. Once the majority of the compound is smoothed out, switch to medium grit sandpaper for further refinement.

Blending and Feathering

To achieve a seamless finish, focus on blending and feathering the edges of the joint compound. Use fine grit sandpaper to gently sand the edges, ensuring they blend smoothly with the surrounding drywall. This step is crucial to creating an even surface that hides the seams and imperfections.

Tips and Techniques for a Professional Finish

Achieving a flawless drywall finish takes practice and attention to detail. Here are some tips and techniques to help you along the way:

Avoiding Common Mistakes

One common mistake is applying too much pressure while sanding, leading to uneven surfaces. Instead, use light, consistent pressure to avoid creating indentations. Additionally, be cautious not to over-sand the joint compound, which can result in exposed seams.

Checking for Smoothness

Periodically check the smoothness of the surface by running your hand over it. If you feel any rough spots or ridges, continue sanding until the surface feels even and polished. Using a bright light source can also help highlight any imperfections that need further attention.

Sanding the Corners

Sanding corners can be challenging, but using a sanding sponge can make the task easier. Fold the sponge to create a sharp edge and gently sand the corners in a back-and-forth motion. This will help achieve a clean and sharp corner finish.

Importance of Dust Control and Safety Measures

Sanding drywall generates a significant amount of dust, which can be harmful if not properly managed. Implementing dust control measures is essential to ensure a safe and clean working environment.

Using a Dust Extractor

Investing in a dust extractor or vacuum with a HEPA filter can significantly reduce dust levels. Attach the extractor to your sanding tools to capture dust particles at the source, preventing them from spreading throughout the room.

Sealing Off the Work Area

Seal off the work area using plastic sheeting and painter’s tape to contain the dust. Close doors and windows to prevent dust from circulating into other parts of your home. After sanding, use a damp cloth to wipe down surfaces and remove any remaining dust.

Personal Protective Equipment (PPE)

Always wear appropriate PPE, including a dust mask, safety goggles, and gloves. This protective gear will shield you from inhaling dust particles and protect your eyes and hands from irritation.

Conclusion

Mastering the art of drywall sanding is a valuable skill for any DIY enthusiast, home renovator, or interior designer. By following the step-by-step guide and implementing the tips and techniques outlined in this post, you can achieve a smooth and professional finish that enhances the overall look of your space.

If you’re ready to take your sanding skills to the next level, don’t hesitate to reach out to our expert team for personalized advice and assistance. Contact Drywall by AMFA at 317-269-7319 for professional drywall services in Indianapolis, Indiana. Whether you’re tackling a small repair or a large-scale renovation, we’re here to help you achieve the perfect finish.

Related Posts:

Avoid Drywall Dust With Wet Sanding
Tips for Avoiding DIY Drywall Mistakes
How to Cut Drywall With Just Two Simple Tools

Do I Use Joint Compound or Drywall Spackle?

If you have a drywall repair to do, and you have no idea what you are doing, it is wise to do your research first. It is very easy to make drywall repair mistakes, so familiarize yourself with the basics before you take a turn at drywall repair. A great place to start is understanding the various tools you need for drywall repair, like drills, saws, miter boxes, utility knives, taping knives, drywall tape, mud pans, drywall screws, and of course, your adhesion product. This can be either joint compound or spackle.

Continue reading to learn the primary differences between joint compound and drywall spackle, and which applications call for each.

Indianapolis Drywall and Painting 317-269-7319

Joint Compound

Drywall joint compound is a white powder containing gypsum board dust as its main ingredient. It is combined with water to produce a mud, which can be used for joining drywall seams and bedding drywall seam tape. It has a lighter consistency than spackle, which means it is not well-suited for the same applications. It can be used to patch holes and cracks, but it takes longer to dry and shrinks more than spackling paste.

Drywall Spackle

Spackle is different from joint compound since it is mainly used to patch up holes and cracks in plaster and gypsum board. It has a thicker consistency, which is why it is also known as “drywall mud.” Spackle comes in two primary forms: quick-setting and premixed. Quick-setting drywall mud is also referred to as “hot” mud because a chemical reaction occurs during the curing process that causes heat release.

Premixed Drywall Mud

Premixed drywall mud is the more common or traditional drywall spackle, probably because it is ready to use. The type of spackle you choose for your project depends on the type of drywall work you are doing. Hot mud is recommended for small patch jobs, like door knob holes because you don’t have to wait 24 hours to reapply your second or third coat.

Drywall Repair Tips

It is important to have the proper tools, materials, and equipment to finish drywall. Not only is it a challenging task to undertake without experience or knowledge, but it is also a costly investment. A better option would be to hire professional Indianapolis drywall contractors. They have the specialized training, experience, and resources to get the job done right, and in a convenient time frame.  This is strongly encouraged for large-scale or complex drywall repair projects.

Indianapolis Indiana Drywall Installation and Repair at the Best Price

Call Drywall by AMFA at 317-269-7319 for Indianapolis drywall repair and installation service. We are experienced drywall contractors who offer a wide range of residential and commercial drywall service, including repair, replacement, installation, new home construction, metal stud framing, custom drywall texture, grid ceilings, and much more. Call 317-269-7319 to request a free estimate, today.

Basic Drywall Repair and Installation Supplies for All Size Jobs

Regardless of the type of drywall project you have on deck, or the amount of drywalling experience you have under your belt, there are some basic tools and materials you will surely need. Continue below to learn the fundamental supplies you should have in your beginner’s drywall repair toolbox.

Indianapolis Drywall and Painting 317-269-7319
Professional Drywall and Painting in Indianapolis 317-269-7319

Fundamental Drywall Tools and Materials

Drywall Compound

Also called drywall “mud”, there are two common types of joint compound used to repair and patch: light-weight and all-purpose. Both are easy to work with and retain a room-temperature shelf-life of 9 months. The most important tip for buying drywall compound is to buy enough. For large projects, expect to purchase 4.5 gallon bucket of material. For smaller projects, you can get away with a one gallon bucket, but you may be paying close to the same amount for a larger bucket. If you think you might have future work in the next 9 months, it is more cost-effective to go with the larger bucket. If not, go with the smaller amount so to not waste any material.

Spackle and Plaster

Many people are confused about the difference among drywall compound, spackle, and plaster. The differences are subtle, and hardly noticeable to the average layperson, but they do exist. Compound, joint compound, or drywall mud all refer to the same product, and used mostly for larger drywall and gypsum board projects that require more durability, typically for covering joints between panels. Spackle is very similar to joint compound, but used mostly for small household repairs for plaster and drywall. Plaster is a type of wall material found mostly in older or historic buildings. It is a more time-consuming approach to wall repair in comparison to spackle.

Drywall Repair Tools

You can purchase drywall repair kits that come with virtually all the essentials for drywall patching and repair. Kits range in quantity, size, and price, but common ones generally include 2-3 flexible knives, a utility knife, an insider-corner knife, hammer, screwdriver, saw, drill, nails, and screws. But drywall repairs also require additional materials depending on the needs of the project, including:

► Compound
► Self-adhering Mesh Tape
► Paper Tape
► Drywall
► 1×4 Block of Pine Wood
► Hand Sander
► Nail Bar
► Level
► Hack Saw
► Sandpaper
► Miter Box
► Primer
► Paint
► Paint Brush or Roller

Where to Get Drywall Supplies

You can purchase all of the above-listed materials at any local hardware or home improvement store. Ask a store attendant to point you in the right direction, and give advice on the most reliable products. Talk to a licensed drywall contractor for expert advice on household drywall repairs, drywall projects, drywall replacement, and more. They can even take the weight off your shoulders by getting the job done faster, better, and at a price that won’t make you think twice!

Professional Drywall Repair and Installation in Indianapolis

Call Drywall by AMFA at 317-269-7319 for Indianapolis drywall repair and installation service. We are experienced drywall contractors who offer a wide range of residential and commercial drywall service, including repair, replacement, installation, new home construction, metal stud framing, custom drywall texture, grid ceilings, and much more. Call 317-269-7319 to request a free estimate, today.