Tips for Avoiding DIY Drywall Mistakes

Indianapolis Drywall Contractors 317-269-7319

Indianapolis Drywall Contractors 317-269-7319

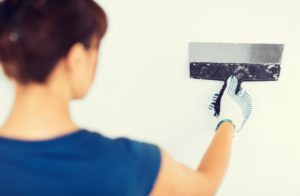
When people attempt to do their own drywall repairs, the potential for making mistakes is high. Without the proper resources and knowledge, drywall repairs can be messy, complex, and unpredictable. They are not the everyday chore you can easily tackle. However, for small jobs, do-it-yourself repairs are possible. If you are preparing to fix a small hole or area of damaged drywall, it is important to review some common mistakes so that you do not repeat them.

Continue reading to learn the most common DIY drywall errors, and how to avoid making them yourself.

Be Sure You Have Proper Edge Support

Many people make the mistake of not checking the framing at the inside corners before starting their drywall repair or installation project. You must have adequate framing and support, or the drywall you hang will be too heavy. For most jobs, you need at least one inch of exposed framing. If you do not have this extra framing, you’ll need to attach an additional 2×4 to provide alongside the framing you do have. You may also have to add blocking, so be sure to check the top of the wall that runs parallel to the ceiling.

Mark Your Framing

Do not forget to mark your framing members. If you forget, and go on to cover your framing with drywall, you will have a lot of trouble finding the proper places to screw. You need to mark the ceiling joists, and then the center of each stud in the floor, as well as the ceiling.

Avoid Tapering Drywall Corners

A tapered edge of a sheet of drywall will not do you any good once it comes time to install the corner bead. This will cause the corner bead to hang too low, which will make it a challenge covering the joint compound. If you have cut edges, place them on the outside corners of the framing.

Trim Openings Before Fastening Drywall

It is common to measure incorrectly or come across an outlet that doesn’t fit. This is why it is important to always check the fit before you fasten anything to the framing.

Use the Longest Drywall Sheets Possible

You want to avoid adding extra joints, especially butt joints. Taping around these joints is time-consuming and complicated, so reduce the quantity by procuring the longest and biggest drywall sheets possible for your project. For the average 8 to 9 foot wall, it is recommended to get specially-cut 54 inch wide drywall sheets. If you have a larger job, you should use 12 foot sheets, but it is recommended to get the materials delivered. They are heavy, and difficult to transport.

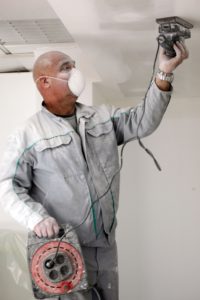
Call a Professional Indianapolis Drywall Repair Company

Call Drywall by AMFA at 317-269-7319 for professional Indianapolis drywall repair at an affordable price. We are highly-trained and licensed drywall contractors that offer a wide range of drywall services for residential and commercial properties. Trust us for outstanding results at a competitive price! Call 317-269-7319 to request an estimate for Indianapolis drywall repair, today.

The 8 Basic Phases of a Basement Refinishing Project

Indianapolis Drywall Contractors 317-269-7319

Indianapolis Drywall Contractors 317-269-7319

Are you considering refinishing your basement on your own? If so, this is a big decision that will involve comprehensive research, trial and error, long hours, and slow progress. Unless you are an experienced handyman, or have experience in the building and construction industry, it is not recommended to refinish a basement without professional assistance. Not only are there several steps involved, there are even more safety and building codes you must adhere to at all times. Furthermore, refinishing a basement is already a huge investment, so adding on the cost of all the needed tools and equipment is just another hit to the budget. Basically, if you want your basement refinished the right way, you need to hire a professional team of drywall contractors who can manage the project effectively and efficiently.

On the other hand, if you are experienced and ready to take on the job, start by reviewing the basic phases of your upcoming remodel in order to prepare yourself on what to expect. Continue reading to review these phases, and who to call for trusted basement refinishing in your town.

8 Basement Refinishing Phases:

Phase 1 – Framing

You will need to frame your walls. Generally, this will involve the majority of planning, as well as, lumber, power tools (framing gun, masonry gun, air compressor, a chop saw, etc.), permits, inspections, wall blocking, ductwork framing, window framing, fire blocking, register extensions, basement poles, existing wall insulation, and much more.

Phase 2 – Electrical

Although you can save hundreds of dollars doing your own electrical, it is never recommended. Money saved is not worth putting your home and your family’s safety at risk. With the innovative changes to the industry, the requirements of professional electricians are much stricter and more complex. Also, there are various codes, new and old, that must always be met. Electricians must know so much more than they did 20 years ago, and this knowledge is critical to electrical safety.

Phase 3 – Plumbing

Just like electrical, it is strongly recommended to hire a professional plumber to ensure your basement plumbing is up to code. You don’t want a septic blowout on your hands! However, with experience and the right knowledge, it is possible to do your own plumbing. Decide wisely.

Phase 4 – Audio Visual

This phase is optional, but most people want television and sound in their finished basement. You can prewire your basement to be a hot spot for all your audio visual and internet needs.

Phase 5 – Drywall

Drywall is heavy, awkward, and challenging to work with. It is dusty, messy, and easily damaged if not handled properly. It also takes a lot of trial and error to learn how to finish drywall properly. You can so this phase yourself, but it will take some time to learn if you do not have experience. Fortunately, you can always hire professional drywall contractors to do the job for you! They can get an entire basement framed and finished in as little as a few days.

Phase 6 – Painting

This is a phase you can certainly do yourself, even without much experience. Just be sure you purchase quality materials and discuss your objectives with the knowledgeable sales people at the paint store. They can get you set up with everything you need.

Phase 7 – Trim & Doors

Trim and doors are an important part of refinishing a basement because it adds the final touches that makes the room feel like the rest of the home. Subtle but impactful, trim and doors are something you want to put some time and effort into for a great result.

Phase 8 – Flooring

Whether you choose tile, carpet, or some other type of flooring, it will be the last step of your basement refinishing project. You can do this step yourself, but it helps to have a partner. However, if you are installing carpet, you may want to use professional installation.

Indianapolis Drywall Contractors

Call Drywall by AMFA at 317-269-7319 to request a free estimate for drywall installation in Indianapolis, Indiana. We offer a wide range of drywall services, for both residential and commercial properties, including new construction homes, remodels, repairs, metal stud framing, ceiling grids, and more. Call 317-269-7319 and speak with our Indianapolis drywall contractors about your home remodeling needs, today.

How to Match Drywall Texture

Indianapolis Drywall Installation 317-269-7319

Indianapolis Drywall Installation 317-269-7319

When you have to patch textured drywall, matching the textures properly can be quite the challenge since there are so many variables involved. In fact, it is strongly recommended to use professional drywall service for patching and repair work on textured drywall unless you have experience. Professional drywall contractors retain all the proper tools, materials, and training to match drywall textures effortlessly. However, if you are going to take on the project yourself, there are a few tips to learn before
you get started.

Continue reading to learn some advice on how to match drywall textures and achieve a seamless finish.

Be Sure the Width of the Drywall Matches the Existing Layer

It is important that the wall is level. To ensure this, you must use the same thickness drywall as the new layer. Otherwise, the new layer will protrude or cave in, which will look defective when finished. Simply measure the width of the existing drywall and find the matching size at your local home improvement store. One exception to this rule is plaster. You may have to use shimming to raise the final layer of your drywall patch since plaster is not always an exact size.

Use as Little Drywall Mud as Possible on the Surrounding Drywall

When taping and coating the surrounding patch area in an effort to make it as flat as possible, be sure to limit the amount of mud you use. Use the thinnest layer possible to get the job done.

Blend the Lines that Distinguish the New Layer with the Existing Layer of Mud

One of the primary focuses of a drywall patching job is to blend the lines so they are not distinguishable when the wall is finished. But there is more to this strategy than this obvious factor. For flat finishes, you could simply feather out the mud and do away with these lines entirely; but for textures, you will need to use a drywall knife or other tool to fill these crevices with excess drywall mud.

Mimic the Same Application Technique Used for the Original Texture

It is vital to use the same tools and techniques used for the existing drywall texture. If you do anything differently, you will not get the same results and your patch will not match the rest of the wall. If you did not apply the initial layer of drywall, you may want to hire a professional for assistance.

Be Sure You Use the Same Amount of Spackle as the Existing Layer of Drywall

Just like you matched the drywall width and technique, you must also match the same amount of drywall mud. If you use less mud than the existing layer, it will appear concaved; and if you use too much, it will look swollen. Work in moderate amounts so you can match the layer accurately.

Indianapolis Drywall Installation and Repair

Call Drywall by AMFA at 317-269-7319 for professional drywall installation and repair in Indianapolis, Indiana and its surrounding areas. We provide residential and commercial drywall service at competitive prices. Call 317-269-7319 to request a free estimate, today.

How to Remove Water Stains from Drywall

As soon as you start to notice water stains accumulating in areas of your walls and ceilings, it is important to act fast. Your first priority should be to locate and remedy the source of the water staining, which is generally a water leak. Once you have your water leak under control, you can move forward with treating your drywall to remove the unwanted stains left behind. Continue reading to learn one of the most recommended practices for removing water stains from drywall and plaster.

Indianapolis Drywall Contractors 317-269-7319

Tools and Supplies to Get:

Large Bucket
Bleach
Clean Water
Rubber Gloves
Soft Sponge
Towels
Drop Clothes
Oil-Based Primer
Water-Based Paint
Paint Brush or Roller

Step ❶

After you gather all your needed materials, start by laying down your drop cloths under your work space. You can use old bed sheets or plastic tarp as well.

Step ❷

Once your surrounding floors and possessions are protected with drop cloths, mix together equal parts of bleach and water in your bucket.

Step ❸

Put on your rubber gloves, and begin to apply the bleach solution to the drywall using your soft sponge. You may also pour the solution into a clean, plastic spray bottle for easier application. The bleach and water combo will remove any mold.

Step ❹

Allow the drywall to dry completely from the bleach water application.

Step ❺

After the area is dry, apply a shellac or oil-based primer to cover the stain. One coat should be enough. You may use a spray can or a roll-on primer.

Step ❻

Allow the primer to dry completely.

Step ❼

Apply your acrylic or water-based paint over the area covering the stain. You may need to re-paint the entire wall or ceiling to ensure the paint shades match.

Indianapolis Drywall Repair

Call Drywall by AMFA at 317-269-7319 for Indianapolis drywall repair and installation service. We are experienced drywall contractors who offer a wide range of residential and commercial drywall service, including repair, replacement, installation, new home construction, metal stud framing, custom drywall texture, grid ceilings, and much more. Call 317-269-7319 to request a free estimate, today.

Avoid Drywall Dust With Wet Sanding

Indianapolis Drywall Contractors 317-269-7319

Many property owners are tempted to use medium density fiberboard (MDF) instead of drywall to avoid all the dust that comes with sanding joint compound. But this is a novice mistake! Although theoretically its smooth fine surface would make an excellent choice for wall material, medium density fiberboard is better off used for wainscoting (paneled crown molding) than for walls. True, MDF is stronger and more stable than wood, but it will still move. Fluctuations in interior and exterior humidity levels causes medium density fiberboard to bend and warp. In fact, a 4 foot panel of MDF can expand and contract as much as 1/8th of an inch simply from average humidity variations. This would cause gaps to open up somewhere in the wall, regardless of how much glue and spline you used on the edges, thus wasting all the labor and money spent on installation in the first place.

On the other hand, drywall hardly moves with humidity changes, making it perfect for homes and buildings in all climates. And by wet-sanding the drywall joints, you can avoid all the dust. Continue reading to learn some helpful tips for wet-sanding drywall joint compound.

Wet-Sanding Drywall

When it comes to drywall work, you can substantially limit dust by wet-sanding the drywall joints. And if you tape with caution, you can even limit the amount of sanding you need to do. A few supplies are required in order to wet-sand drywall. Visit your local home improvement store and purchase a large, flat drywall sponge for under $5. They have a course and less-course side, so they can be used for multiple applications. For drywall joint sanding, you’ll mostly need the less-course side.

Once you have applied the final coat of compound to your drywall, dampen the drywall sponge and smooth out any minor flaws on the surface of the wall. For rougher blemishes, use the course side of the sponge. The moisture in the drywall sponge controls the amount of dust created by smoothing out joint compound, thus making the process easier and more comfortable! By placing drop clothes or old bed sheets around the work space and wearing a respirator, you can reduce the effects of dust even more.

Professional Drywall Repair and Service

For professional drywall installation and repair, choose an experienced drywall contractor for results you can trust. This eliminates the need to exert effort in taking time off work, gathering all the supplies, implementing the project, and cleaning up after. With professional drywall service, you won’t have to miss work, take time out of your weekend, or spend hours shopping for materials. For a fair price, they can handle all aspects of your drywall needs.

Indianapolis Drywall Contractors

Call Drywall by AMFA at 317-269-7319 for professional drywall repair in Indianapolis, Indiana. We are licensed, bonded, and insured drywall contractors with over 10 years of experience in the industry. Our drywall services include installation, repair, replacement, new construction, metal stud framing, remodels, and more. Call 317-269-7319 to request a free estimate for Indianapolis drywall installation and repair, today.

Important Safety Tips for Drywall Work

Indianapolis Drywall Contractors 317-269-7319

Indianapolis Drywall Contractors 317-269-7319

Whether doing it on your own or hiring a professional crew, working with drywall is a serious project that requires an acute attention to detail, and of course, an appreciation for safety. Often times, anyone outsourcing or performing drywall work is on a strict time schedule, which means many people are tempted to rush through the process. If this happens, important safety precautions and practices can be easily overlooked or forgotten.

The chief point here is to remember that proper drywall safety can only be achieved if you to take your time. Cutting corners and taking shortcuts will not improve the outcome of your project, nor will it protect you from accidents. Continue reading to review some important drywall safety tips and reminders to better protect yourself and your team on your next job.

Drywall Safety Tips

Drywall work includes a long list of duties that can lead to serious injuries and accidents if one is not careful. Cutting, lifting, hanging, screwing, taping, and using power tools are just a few parts of the drywall process that can be dangerous if not performed with the utmost care and caution. Follow the safety tips below to avoid harming yourself, others, and your property.

Stay Attentive to Heavy Weight. Remember that drywall sheets are heavy. A standard sheet of ½ inch drywall weighs an average of 1.7 pounds per square foot. So a 4×8 sheet can be as heavy as 54 pounds. You must be careful transporting, lifting, and storing heavy drywall sheets. If one were to topple over on a pet or child, it can cause serious injuries.

Watch Out for Large Buckets. Large 5-gallon buckets of compound are an overlooked, life-threatening hazard for pets and children when left unsupervised. There have been cases of drowning and suffocation in wet drywall compound, as well as, old compound buckets filled with water.

Control and Manage Dust. The dust that is produced from sanding drywall can be hazardous in many ways. It can cause minor to severe head and respiratory complications, such as coughing, sore throat, dry nose, red itchy eyes, skin irritations, and more. But drywall dust can also induce and worsen existing upper respiratory issues like allergies and asthma.

Additional Tips:

???? Use proper tools for comfort, efficiency, and effectiveness.

???? Clear your work area before you begin.

???? Wear proper back braces and lifting gear to move drywall sheets.

???? Use drywall carts, specialized handles, and dollies to move heavy drywall.

???? Have a partner present to help lift and handle drywall sheets. Never lift alone.

???? Place sheets as close as possible to their final destination to reduce repeat lifting.

???? Avoid over-the-head drywall lifting and holding.

???? Take short breaks throughout the day to avoid over-exertion or muscle injury.

???? Wear dust masks, respirators, and safety goggles when sanding drywall.

???? Wear protective footwear, pants, and long-sleeved shirts.

???? Use damp sponges, shop vacuums, and microfiber cloths to remove dust.

???? Wait for dust to settle completely, and always work from the top down.

Indianapolis Drywall Contractors

Call Drywall by AMFA at 317-269-7319 for Indianapolis drywall repair you can trust. We are experienced drywall contractors that offer a wide range of commercial and residential services, including drywall repairs, replacements, installation, remodels, new construction, custom textures, grid ceilings, metal stud framing, and more. Call 317-269-7319 to request a free estimate for professional drywall installation and repair in Indianapolis, Indiana today.

How to Hang Pictures on Walls

Drywall Installation and Repair 317-269-7319

Drywall Installation and Repair 317-269-7319

Decorating your home gives you the platform to showcase your individual style. And what better way is there to express your unique flair and personal history than to hang pictures all around your house? But hanging up pictures takes some time and patience, as well as, a small amount of skill set. In order to get the best overall look, it is important to hang pictures evenly and level. And not just pictures, but other home décor items too, like coat racks, shelving, mirrors, and even personal documents like school diplomas. It is also important to know how to hang items properly so you do not damage your drywall.

If you are feeling a little intimidated about of hanging items on your walls, then you need to review the following guide to learn how to do it all on your own from now on!

What You Need:

• Stud Finder
• Laser Level (carpenters level)
• Tape Measure
• Hammer
• Nails
• Pencil (or painters tape)
• Frame-Backing/Hanger Kit (optional)
• Wall Anchors (optional)

Where to Start

When hanging pictures, you want to be sure the center point of either the picture or the grouping is at eye level. Too high will look odd, and too low will be obtrusive. When grouping items together, be sure to consider them as one whole unit, and use similar sizes, shapes, and colors for a coherent theme. It is helpful to arrange groups on the floor in front of the wall first, so you can adjust as much as you want in order to achieve the desired look. When you have special art, consider hanging them in areas where they can be spotlighted most often, such as foyers, entry ways, and dining rooms.

Another important aspect to consider before hanging wall pictures is anchor weight. Be sure the hanger is strong enough to support the weight of the frame and the art when hung on the wall. You may need to use wall anchors for areas that do not have available wall studs. It is recommended to purchase an assorted hanger and frame-backing kits. These kits come with a wide variety of hardware for hanging items on walls, such as sawtooth hangers, ring hangers, wire and eyelet hangers, and assorted wall anchors.

Step 1

Hold the picture at eye level against the wall.

Step 2

Mark the wall at the top center section of the frame using a pencil or removable painters tape. If it is too heavy or large, use a laser level.

Step 3

Find the “adjustment measurement” by measuring the distance between the top of the frame and the mounting hanger or center of the stretched wire.

Step 4

Underneath your original wall mark, make a second mark using the adjustment measurement. This second mark will indicate where the actual mounting hanger will attach on the wall.

Step 5

If you require wall anchors, install them first. You will need additional tools for pictures that require wall anchors, including a drill, drill bits, fasteners, and more.

Step 6

For pictures that do not require wall anchors, use your hammer to insert a nail into the second wall mark where the mounting hanger goes.

Step 7

Once the nail is in the wall, use both hands to hang the picture on the nail by either the mounting hanger or the stretched wire (whichever one your picture has).

Check out our article on how to remove old wall anchors if you have some left over from previous decor!

Indianapolis Drywall Services

Call Drywall by AMFA at 317-269-7319 for professional drywall repair in Indianapolis, Indiana. We provide a wide range of drywall services, including patchwork, hole repair, crack repair, installation, grid ceilings, custom textures, and more. Whether commercial or residential, our team of licensed drywall contractors are fully-equipped to get the job done in a time frame that’s convenient for you! Call 317-269-7319 to learn about our Indianapolis drywall services, prices and availability, today.