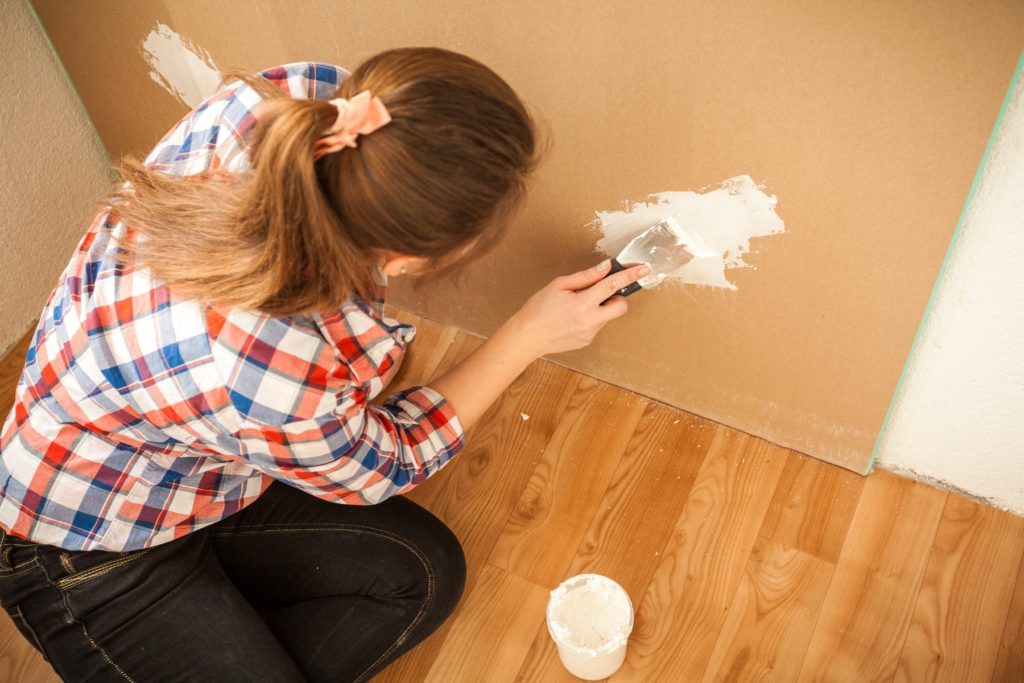
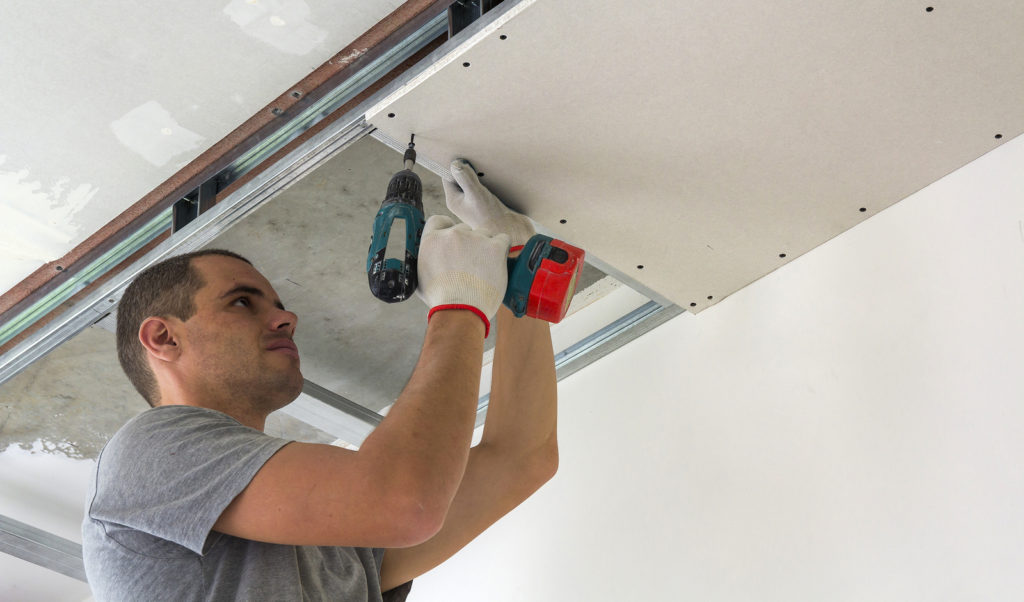
Whether you are carrying a treadmill down to the basement,
or hosting a party of preteen boys, drywall damage is bound to happen at some
point in home ownership. Fortunately, drywall is designed to be fairly easy to
repair and renovation. All you need is the proper knowledge, the right tools,
and a full day’s time.
Continue reading to learn which tools and supplies you’ll
need to grab at your local home improvement store to repair a small to medium-sized
hole in the wall.
Indianapolis Drywall Contractors 317-269-7319
Drywall Repair Tools and Materials
If you are not familiar with handyman or construction work,
it is recommended to purchase a drywall repair kit, which can offer all the
essential tools and materials for drywall patching and repair. These kits vary
in scope and size, but common ones generally include 2 to 3 flexible knives, a
utility knife, an insider-corner knife, hammer, screwdriver, saw, drill, nails,
and screws. But drywall repairs also require additional materials depending on
the needs of the project, including:
? Compound ? Self-adhering Mesh Tape ? Paper Tape ? Drywall ? 1×4 Block of Pine Wood ? Hand Sander ? Nail Bar
? Level ? Hack Saw ? Sandpaper ? Miter Box ? Primer ? Paint ? Paint Brush or Roller
You can purchase all of the above-listed materials at any
local hardware or home improvement store. Ask a store attendant to point you in
the right direction, and give advice on the most reliable products. Talk to a
licensed drywall contractor for expert advice on household drywall repairs,
drywall projects, drywall replacement, and more. They can even take the weight
off your shoulders by getting the job done faster, better, and at a price that
won’t make you think twice!
Unsure About Your Wall Repair Skills? Get Professional Drywall Repair Instead!
Call the Drywall by Renso office today at 317-269-7319 to speak with a licensed Indianapolis drywall contractor about your property remodeling and renovation needs. Drywall by Renso is fully-equipped and staffed to manage any residential drywall repair, regardless of size or scope. We are proficient in everything drywall, from simple drywall installation and repair, to major work like new construction homes, grid ceilings, metal stud framing, custom drywall textures, remodels, basements, and more!
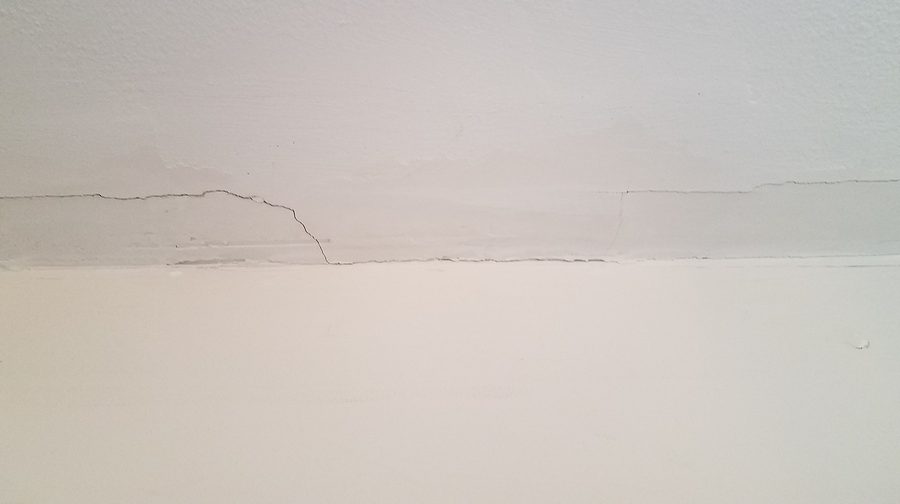
Drywall cracks are the worst. You spend so much time making sure
your home or office is in tip-top shape, and then you notice that alligator fissure
below the bathroom light switch plate. Fortunately, there is a simple and
convenient approach to dealing with this dilemma, but first, you need to figure
what it is that’s causing all your drywall to crack. Without resolving the
underlying problem, your drywall repairs and restorations will be all in vain.
Continue reading to learn the top causes for drywall
cracking, as well as, that simple and
convenient approach we mentioned before.
Indianapolis Drywall Crack Repair 317-269-7319
Causes For Drywall Cracks
Drywall can crack for a number of reasons, making it a
common occurrence. And often times, the appearance or location of a crack can
say a lot about how and why it showed up. They can occur as a result of
contractor error, stress produced from the foundation of the home settling overtime,
and much more. The most common causes for cracking drywall include, but are not
limited to:
⚠ Foundation Settling –When a foundation settles, it can create cracks in the walls and ceilings, overtime.
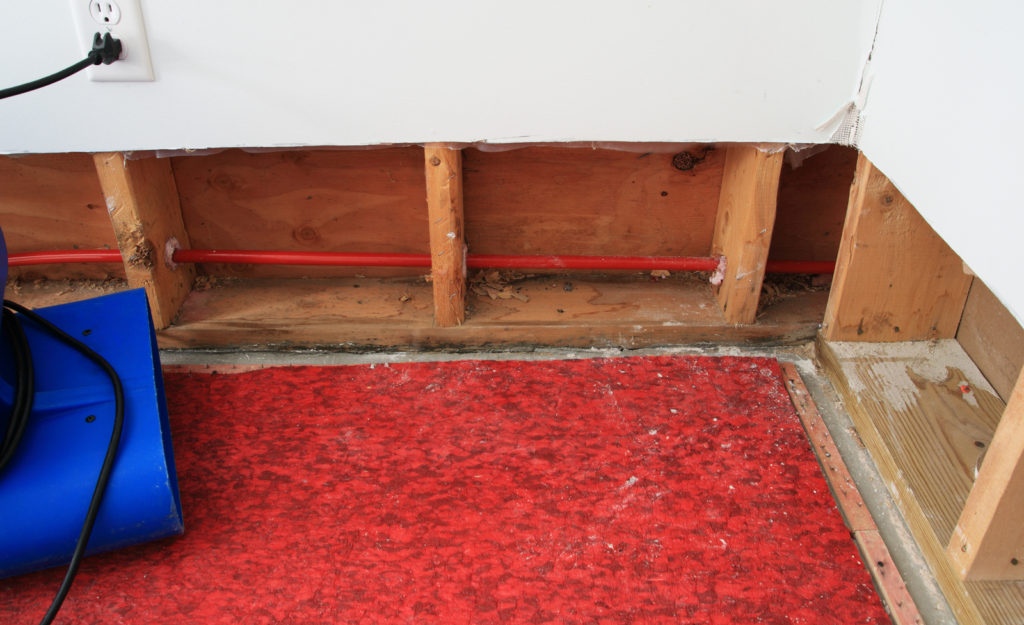
⚠ Moisture –Moisture can create drywall cracking, especially around screws and wall studs.
⚠ Wall Décor –Heavy wall décor can cause cracks in drywall overtime, but often remain hidden behind the art.
⚠ Structural Movement –Structural movements, like heavy storms, can cause stress, which can cause walls to crack.
What To Do About Drywall Cracks
If you have just one hairline crack or small hole, you can
possibly repair it yourself. Any defects larger than those should be managed by
a professional drywall repair company. They have the proper training and
resources to repair drywall, efficiently and accurately. When people attempt to
do their own drywall repairs, the potential for making mistakes is high.
Without the proper resources and knowledge, drywall repairs can be messy,
complex, and unpredictable. They are not the everyday chore you can easily
tackle.
Indianapolis Drywall Repair You Can Trust
Call Drywall by Renso at 317-269-7319 for Indianapolis drywall repair and installation service. We are experienced drywall contractors who offer a wide range of residential and commercial drywall service, including repair, replacement, installation, new home construction, metal stud framing, custom drywall texture, grid ceilings, and much more. Call 317-269-7319 to request a free estimate, today.
Baseboard removal doesn’t have to be a hassle. With the right materials and knowledge, you can remove baseboards without damaging them or your walls. This way, you can restore the look of your existing baseboards and then re-install them for a cost-effective interior upgrade, or, you can reuse them for another woodworking or crafts project. If you are installing new floors, you will also be required to remove your baseboards, so preventing damage during the process will allow you to reuse them and save money.
In the past, removing baseboard without damaging them was a
very difficult job to do. It required a lot of hard work, time, money, and
patience to get the job done right; and even then it wasn’t always successful.
But with the advancements of tools and materials available today, you can get
professional-grade results in a convenient time frame!
Continue reading to learn how you can remove baseboards
without causing them damage, as well as, drywall tips for expert results.
One of the most important tools to acquire for a baseboard
removal job is a trim puller. This ergonomic tool is what makes baseboard
removal much easier than it was years ago. Before trim pullers, you would have
to insert a putty knife in between the trim and the wall and twist back and
forth in order to loosen the boards. With a trim puller, the 15 degree center
wedge allows for simple and quick extraction, and prevents wall and baseboard
damage. This saves loads of time and money, not to mention stress.
If your baseboard seams are caulked, then you will need to
get caulk remover product. But if they are sealed with standard latex paint,
you will only need your utility knife. Gloves are optional but help to prevent
splinters, blisters, and sores. Side-cut pliers are optional as well, but very helpful
for removing leftover pins and nails in walls after the baseboards are removed.
If you have a hammer, the backside will work just as well.
Step 1
If your walls and baseboards are sealed with latex paint, start by using your utility knife to cut along the seam where the baseboards meet the wall to release them from their seal. Be sure to stay along the seam to prevent pulling off any wall color. If your baseboard and wall seams are sealed with caulk, you will need to apply a line of caulk remover instead. Follow the instructions on the label. Then move onto the next step.
Step 2
Starting at one end of a strip of baseboard, place the trim
puller front-faced against the wall, with the sharp edge along the baseboard
seam.
Step 3
Hold the trim puller with one hand, and with the other hand,
strike the top of it with your hammer or mallet. This should drive the
sharpened edge in between the trim and wall. You will notice that the center
wedge of the trim puller (the part that sticks out in the middle) automatically
separates the baseboard from the wall.
Step 4
Gently pull the trim away from the wall with your puller
tool. Then, continue step 3, moving along the baseboard in 1 foot increments
until you reach the end of the strip.
Step 5
Remove any leftover pins or nails with your side-cutting
pliers or the back part of your hammer.
Need Help With Drywall Repairs in Indianapolis?
Call Drywall by Renso at 317-269-7319 to request a free estimate for drywall repair and service in Indianapolis, Indiana. We offer a wide range of drywall services, for both residential and commercial properties, including new construction homes, remodels, repairs, metal stud framing, ceiling grids, and of course, baseboard installation. Request a free estimate, today.
Just like so many other assets and commodities in the home, walls
require a certain level of routine maintenance. So if you want to maintain that
level 5 drywall finish and professional paint job, you will need to learn the
best methods for taking good care of your walls, and then adopt them as a
permanent plan. This includes implementing regular upkeep and care.
Continue reading to learn what you need to know about
getting started with routine wall maintenance, as well as, what to do when you
are stuck with a wall-related problem.
Indianapolis Drywall Contractors 317-269-7319
Odor Control
It is not reasonable, nor entirely possible, to change your
life around in order to prevent your walls from absorbing everyday odors like
cooking grease, smoke, pets, and more. But you can implement some strategies to
help abate the absorption of such smells. For starters, you can choose a paint
that is formulated to retain less odors. Otherwise, it is effective to simply
clean your walls on a periodic basis. See our blog, “How to Remove Odors From
Walls” for a step-by-step guide.
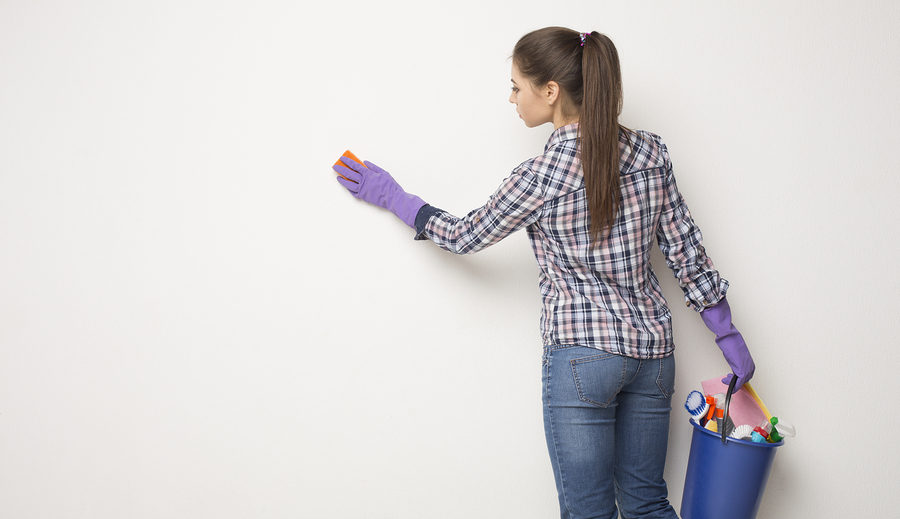
Stain Control
Aside from odors, your walls are also prone to stains.
Everything from fingers and spills, to pet dander, dust, and more, can cause
walls to stain or discolor. To remove a wall stain, use a chemical dry cleaning
sponge, like Mr. Clean Magic Eraserâ,
then finish by using a standard soft sponge and rubbing alcohol to gently wipe
the wall clean.
Damage Control
A small defect can quickly evolve into a large one if it is not
dealt with in a suitable time frame. A good approach to routine wall maintenance
is to stay ahead of drywall and ceiling repairs. Have a hole patched up as soon
as it happens, and have cracks filled when they begin to spread. This will
prevent a small problem from turning into an invasive, time-intensive, costly
drywall repair.
Professional Drywall Service and Repair
Call Drywall by Renso at 317-269-7319 for affordable Indianapolis drywall repair and installation services you can trust. We service all of Central Indiana, as well as the Metro Indy areas. We offer a wide range of residential and commercial drywall services, including new home construction, grid ceilings, metal stud framing, and more. Call 317-269-7319 for drywall repair and installation in Indianapolis, IN and its surrounding locations today.
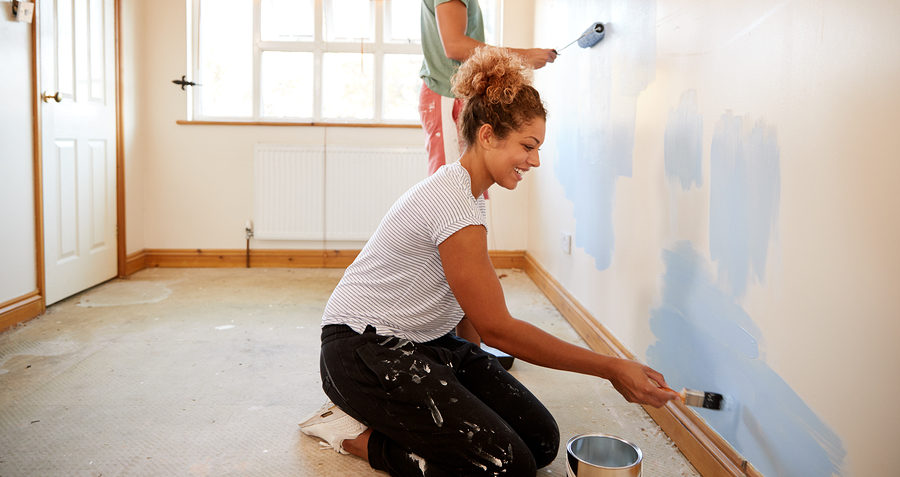
If you want your interior paint job to come out looking like
a level 5 finish, you must rely on the same tips and tricks professional
painting companies use to deliver exceptionally smooth, long-lasting, vibrant
results. Continue reading to learn some secret methods used by professionals
that can be applied to your DIY painting project!
Indianapolis Drywall & Painting 317-269-7319
Painter’s Tape
When you tape up baseboards before painting, it can seem
like a pretty straightforward task. Apply the tape so that the woodwork is
covered and move on; right? Well, many times, after the painting is finished
and the tape is removed, you can find streaks or drops that managed to seep
their way through. To avoid this, do what the pro’s do and use a putty knife to
apply the painting tape on baseboards and molding. Press the knife against the
tape to ensure a thorough seal. This prevents any paint from getting through.
Hole-Patching and Sanding
All holes and deficits should be filled in with a
joint-compound patching product, smoothed down evenly, and allowed to dry
completely. Once these areas of dry, you can sand away all the uneven surfaces.
It is vital to sand away any surface flaws, like spackle, joint-compound
patches, nicks, nail holes, scores, scratches, chips, and more the best you
can. Sand baseboards, molding, walls, and more to get an even smooth surface.
Once you have an even and smooth surface, you can move forward with your
painting project.
Primer
When joint compound is painted over, it can sometimes absorb
all the moisture from the paint and leave a duller, discolored look. This makes
all the patched areas on a wall noticeable. To avoid this problem, which
professionals refer to as “flashing”, be sure to apply a primer before
painting. But to paint like a pro, use a tinted primer. Although white primer
is acceptable and frequently used, professionals typically use a gray-colored
primer, or a primer that is close to the color of the finishing paint. This
covers patched areas and existing paint better than plain white or ivory
primers. This results in a more vibrant finish and less applications.
Paint Boxing
Although you can purchase the same color in five cans, it is
not guaranteed that all five cans will look exactly the same. This can be
evident in a paint job when a new container is opened halfway through painting.
It can result in a different color tones on a wall. To avoid this,
professionals “box” their paint by pouring all cans into one large bucket to
achieve one consistent color.
Paint Application
Ever wonder why a self-paint job looks streaky and a professional’s is always smooth and even? Well the secret is adding a paint extender or paint conditioner into your paint. Popular products, like Floetrol®, are designed to slow down the drying process of the paint, allowing a more balanced application and finish. Not only do paint extenders hide brush strokes, they also eliminate dark lap marks from painting over semi-dried paint.
Ceilings
When ceilings are textured or bumpy, it can be virtually
impossible to paint a clean line between the wall and the ceiling. For this
reason, professionals will use a screwdriver to scrape a ridge along the edge
of the walls and ceiling. This creates a platform for painting a smooth
straight line between ceiling and wall and prevents paint from sticking to
ceiling bumps. The resulting ridge should be fine enough so that the lost
texture is never noticed, but wide enough for brush bristles to fit.
Indianapolis Drywall and Painting Contractors
Call Drywall by Renso at 317-269-7319 when you need professional drywall repair and painting service in Indianapolis, Indiana. We are a licensed, bonded, and insured drywall company that provides residential and commercial drywall work at competitive prices. Call 317-269-7319 to request a free estimate, today.
Have you ever painted something before only to feel instant
color regret once it dried? Or perhaps the color did not end up looking
anything like it did on the label? If so, you could use some tips on how to
choose the perfect paint color for your intended project application. Continue reading
to get started!
Indianapolis Drywall Contractors 317-269-7319
There are simple methods and techniques you can rely on to
ensure you pick the right paint color for your home or project. By using these
tips, you can feel confident in your painting results. Below you will find the
right advice on how to guarantee paint color satisfaction!
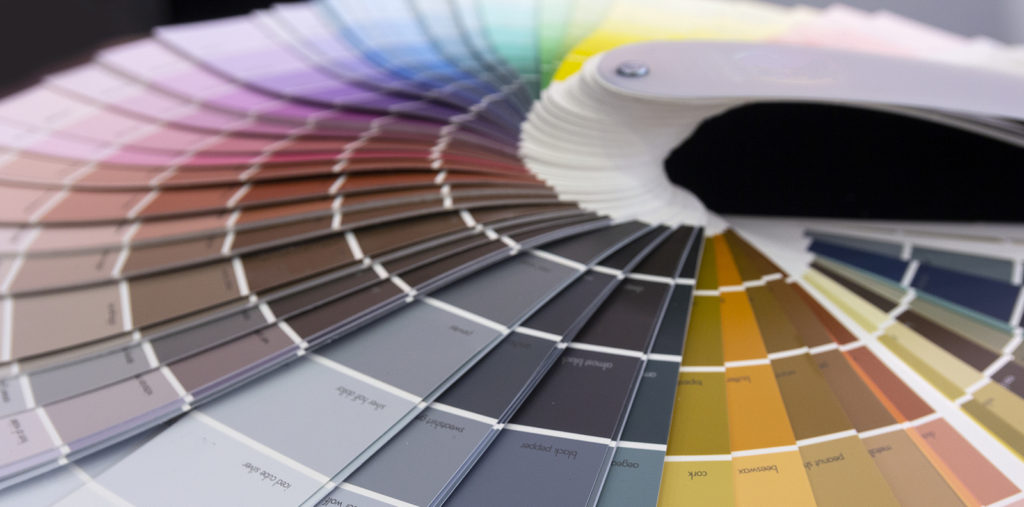
Paint Samples
The most important aspect of choosing the right paint color
is using samples. Take advantage of free paint samples at your paint store of
choice. But do not just rely on the swatches unless you are ready to gather
every single shade group and line it up in a chart to understand how the hues
change from one group to another. If you do not do this, you will end up with a
yellow-beige, rather than a tan beige. Designate an area of your wall for
sampling actual paint. This will allow you to see how the paint applies, dries,
finishes, and acclimates with the surrounding lighting and décor.
Paint Finishes
Once you have a color in mind, your job doesn’t stop there.
You will also need to choose the proper finish, unless of course, you chose a
product that is an All-in-One or dual purpose paint. Your standard options will
include flat, eggshell, satin, semi-gloss, and gloss. Here is a little guide:
Flat – This finish is best used for ceilings, bedrooms, and living rooms, or for walls with several imperfections that need to be covered. They are more challenging to clean, so avoid using them in kitchens and bathrooms.
Eggshell – This finish is has low sheen, so it is recommended for bedrooms or living rooms. It marks easily, so avoid using it in high-traffic areas, like hallways and mudrooms.
Satin – This finish has a silky look and cleans up easily. Use it in kitchens, bathrooms, mudrooms, and hallways.
Semi-Gloss – This finish is humidity-resistant, making it perfect for kitchens and bathrooms. It is also recommended for crown moulding and woodwork.
Gloss – This finish has a high sheen, so it will show every single imperfect. It is not recommended for walls, but rather moulding and trim work only.
Additional Considerations:
Saturation Points – If you are using more than one paint color in a room, be sure they are in the same hue group. Otherwise, your palette will not be unified.
Ceilings – Be sure to consider your ceiling color. The general rule of thumb is 3 shades lighter than your primary paint color.
Color Pops – If you are painting your walls a light color or pastel, be sure to use a bright white for crown moulding and woodwork to avoid washing out the room.
Drywall Repair – If your walls are not perfectly smooth, you should repair them before applying a new coat of paint for the best results.
Professional Drywall and Painting Work
Call Drywall by Renso at 317-269-7319 when you need professional drywall repair and painting service in Indianapolis, Indiana. We are a licensed, bonded, and insured drywall company that provides residential and commercial drywall work at competitive prices. Call 317-269-7319 to request a free estimate, today.
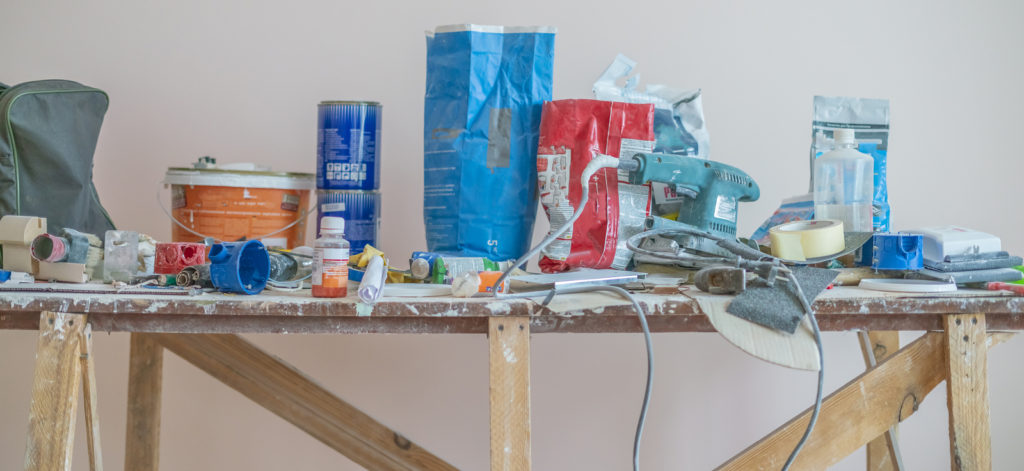
Looking to step up your drywall repair game? One of the easiest
and most rewarding approaches is to fill up your work shed inventory with all
the drywall supplies you will ever need, from basics to pro-grade. Continue
reading for a recommended list to get you started!
Indianapolis Drywall & Painting Contractors 317-269-7319
Drywall Repair and Installation Supplies
For all drywall projects, there is a fundamental set of supplies
for basic tasks, and then a more comprehensive set for higher-level work. From
start to finish, here are all the tools, supplies, and materials you will need
for do-it-yourself drywall projects and repairs:
☑ Sheetrock
Sheetrock is actually a registered brand of drywall manufactured
by the U.S. Gypsum Company. But, it is also informally known as drywall, gypsum
board, gypsum rock, plasterboard, and wallboard. You can purchase drywall at
any local home improvement store, online, or through a contractor. It is
generally sold by the square foot, and doesn’t usually require any minimum purchase
unless you are opting for delivery.
☑ Drill
Drills come in several makes and models. You can choose
between a cordless or corded drill. Both work well with drywall work. Many
professionals prefer cordless for obvious reasons. Drills are used in the
drywall industry for installation purposes. Installing gypsum board requires a
power drill and screws.
☑ Drywall Saw
Saws for drywall come in various shapes, sizes, and
serrations. They are used to cut board to size, so the type you need will vary
depending on the particular needs of your project. You can choose among double-sided
saws, hand saws, fine-finish saws, hacksaws, and more.
☑ Drywall Screws
These are special screws used to hold up gypsum board. They
have extra course threads that stay secure in drywall. There are several kinds,
all with different sizes and applications, including fine-head, self-drilling,
pan-head, and more.
☑ Drywall Tape
Drywall tape is an important tool because it creates a physical
bond between adjacent sheets of drywall. It is the surface to which the plaster
sticks to. It provides a seamless surface for drywall installation and repairs
and more.
☑ Edge Sander
An edge sander will allow you to perfectly finish off and
smooth out the edges of your drywall boards. With a removable sanding disc on
the bottom and an easy-to-grip handle on the top, it is no surprise they are a
popular tool for any do-it-yourself-er.
☑ Joint Compound
This is a white powder containing gypsum board dust that is
combined with water to produce a mud. This mud is then used to seal joints
between drywall sheets. This is also called mud, spackle, or plaster. It is
used to create the smooth, level 5 drywall finishes you see in quality
constructed buildings and homes.
☑ Joint Knife
Also called a taping knife, a joint knife is the tool used
to scoop, scrape, spread, and smooth out drywall mud. It has a wide blade that
comes in various sizes, from 4 inches to 14 inches.
☑ Miter Box
A miter box is a terrific tool used to measure saw strokes
and miter cuts. Not only do they provide smooth and even cutting motion, they
provide safety for your hands and fingers.
☑ Mud Pans
A mud pan is the flat plate, usually paper or metal, that
holds spackle and mud. They come in all different shapes and sizes. Some can
hold up to ½ a gallon of drywall mud.
☑ Rasp
A rasp is an instrument that looks and behaves much like a nail
file. It has a double-sided, hardened steel blade with a course textured surface,
usually rectangular or tapered at the end, and a handle made of plastic, wood,
or metal. It is a handheld, manually-operated tool used to form, file, and
shape gypsum board.
☑ T-Square
A T-square is a helpful, yet technical, tool because it
ensures you make straight cuts on your drywall board. It assists with drawing
diagonals and 90 degree angles as well. In fact, they are often used on drafting
tables.
☑ Utility Knife
Utility knives are used for cutting, leveling, trimming, and
scraping drywall board. They come in multiple fashions and multiple blade
sizes. They are usually made of stainless steel, so they are durable and
long-lasting.
? Masking Paper and Film ? Drywall Bench ? Dust Barriers/Liners ? Drywall Vacuum ? Hammer ? Tape Measurer ? Multi-Pocket Apron ? Respirator Mask ? Gloves ? Safety Goggles ? Hard Hat
When Your Drywall Job is Better Suited for a Pro
Call Drywall by Renso at 317-269-7319 for Indianapolis drywall repair and installation service. We are experienced drywall contractors who offer a wide range of residential and commercial drywall service, including repair, replacement, installation, new home construction, metal stud framing, custom drywall texture, grid ceilings, and much more. Call 317-269-7319 to request a free estimate, today.
Continue reading to learn what we can do for you, and why
you should choose us for all your drywall and new construction needs in Indianapolis!
Indianapolis Drywall Contractors 317-269-7319
Highest Standards of Excellence for Drywall
Here at Drywall by Renso, we are fully equipped to
manage any project, regardless of size and scope. Whether you need us to patch
a hole in the wall, install metal stud framing in your new home addition, or acoustic
drywall service, we have the drive and dedication to provide the highest
standards of excellence for drywall service and repair.
Furthermore, we get the job done right the first time, every
time, and even offer convenient schedule flexibility to accommodate your
personal agenda. We guarantee all our drywall work; and as a licensed, bonded,
and insured drywall construction company, you can count on that promise. We use
a careful approach to understand your vision and answer your questions without
using confusing industry jargon.
This allows us to implement a smooth, hassle-free drywalling
process, and ensure that we get the job done according to your detailed
specifications. While our strong dedication to old fashioned values of honesty,
integrity, and quality set us apart from our competition, it’s our 100% Satisfaction Guarantee lets you
know you can trust our work and be happy with the results.
What We Can Do For You
Drywall by Renso is a licensed, bonded, and insured drywall construction company in Indianapolis, Indiana. Our general contractors have more than 10 years of experience in the building and construction industry, and provide a wide range of drywall services for properties and complexes of all sizes. We provide professional drywall repair, replacement, installation, and finishing for both residential and commercial properties in Indianapolis and throughout Central Indiana. See some of the most common drywall services we offer, below.
Our Primary Drywall Construction Services Include, but not limited to:
✔ Commercial and Residential Service
✔ Drywall Patching
✔ Drywall Finishing
✔ Level 5 Drywall Finishes
✔ Custom Drywall Texture
✔ Drywall for Basements
✔ Grid Ceilings
✔ Suspended Ceilings
✔ Metal Stud Framing
✔ New Home Construction
✔ Remodels
✔ Home Additions
✔ Shed and Garages
✔ Pool Houses
✔ Clubhouses
✔ Acoustic Drywall
✔ Drywall Repair
✔ Drywall Replacement
✔ Drywall Installation
✔ Wall Repair
✔ Wall Patching
✔ Wall Hole Repair
✔ Ceiling Drywall
✔ Ceiling Repair
✔ Stucco Repair
✔ Stucco Application
✔ Plaster Repair
✔ Sheetrock Repair
✔ Wall Crack Repair
✔ Skip “Knockdown” Trowel
✔ Mud Trowel
✔ Custom Hand Trowel
✔ Plasterboard Repair
✔ Wallboard Repair
✔ Gypsum Board Repair
✔ In-Home Consultations
✔ Free Estimates
✔ And More
How to Contact Us
Call Drywall by Renso at 317-269-7319 for professional drywall repair in Indianapolis, Indiana and its surrounding areas. We provide residential and commercial drywall repair at competitive prices. Trust us for outstanding results at a competitive price! Request a free estimate, today.
Textured popcorn ceiling patterns used to be all the rage
back when oak cabinets were still considered modern and microwave ovens were
sitting on their own stands in the kitchen. But just like cabinets and
microwaves, design concepts and trends have changed dramatically over the past
two decades. So if you have popcorn ceilings that are driving you mad, chances
are, your tastes have changed along with everyone else’s. Fortunately, you have
two sensible options for removing a popcorn ceiling, both of which are
economical in price and efficacy.
Continue reading to learn the 4 basic steps for removing
popcorn ceilings, as well as, what you can do if DIY drywall is not something
you have time or energy for.
Indianapolis Drywall Contractors 317-269-7319
ASBESTOS WARNING: Spray-on acoustic ceiling finishes (including textured popcorn ceilings) that were manufactured before 1980 might possibly contain asbestos, which is a known carcinogen. If your ceilings fall within this time frame, have it tested for asbestos before getting started on your project. Covering your face, scrap a small piece from your ceiling and seal it in a container or plastic bag. Then drop off the sample at the local EPA office to have it tested for asbestos. If your ceiling is contaminated, you will need to contact a licensed asbestos abatement company for the job.
What You Need:
► Ladder ► Painting Tape ► Drop Cloths (Canvas or Plastic) ► Lightweight Plastic Sheeting ► Spray Bottle & Hot Water ► Liquid Fabric Softener ► Chemical Paint Remover (Optional) ► 10” Drywall Knife (Or A 12” Popcorn-Ceiling Scraper) ► Joint Compound ► Sanding Sheet or Block ► Ceiling Paint and Primer
Step ❶ – Room Prep
Get your work area set up. Clear out anything of value or
that will be in your way, such as furniture and décor. Then continue by laying
down your floor tarps and canvases to protect your flooring. Finish by taping
your lightweight plastic sheeting to the surrounding walls to protect them from
dirt and damage.
Step ❷ – Water or Chemicals
Your next step is to determine if your ceilings are painted
or not. If they are painted, water will not absorb well into them, making the
scraping process much harder and monumentally messier. In this case, you would
do better to use a chemical paint remover rather than water.
If your ceilings are NOT painted over, combine 4 cups of HOT
water with 1 tablespoon liquid fabric softener inside a plastic spray bottle. The
fabric softener will help reduce the rate of evaporation, keeping your ceilings
soaked while you work. Then, use your ladder to access the ceiling space and generously
spray the surface with your solution. Allow the water to soak in for 10 minutes,
and then spray the surface again. Wait another 10 minutes, and then move onto
the next step.
Step ❸ – SCRAPE!
It is time to start scraping off all of the saturated
drywall material. Keep in mind, this will be messy, so just set your stress
aside until it is time to clean up. Be sure to hold your drywall knife at a
very light angle so that you do not puncture the ceiling. If you have a popcorn
ceiling scraper, you can use it instead of a drywall knife. Try attaching it to
a broom handle and tie a plastic bag around the tip so that it catches material
in the bag while you scrape!
Step ❹ – Prime and Paint
Before you actually begin priming and painting your
freshly-scraped ceiling, sweep up all of the debris, but leave the tarps and
sheeting in place. Now you can fill in any holes or dents with joint compound,
and sand the surface flat when it dries. When your ceilings are back to basic,
you can prime them and paint them any way you like!
Is the Job Too Tough?
IF the whole project seems too tough to tackle on your own, just call Drywall by Renso at 317-269-7319 for Indianapolis drywall service you can afford! We are experienced drywall contractors who offer a wide range of residential and commercial drywall service, including repair, replacement, installation, new home construction, metal stud framing, custom drywall texture, grid ceilings, and much more. Call 317-269-7319 to request a free estimate, today.
Your search for reliable drywall work is over! You will get professional drywall installation and repair at a competitive price when you call Drywall by Renso in Indiana!
Indianapolis Drywall Contractors 317-269-7319
Drywall By Renso is Your Solution!
Here at Drywall By Renso, we are a locally owned and operated drywall company based out of Indianapolis, Indiana. Our highly-trained drywall contractors are licensed, insured, and bonded, with more than a decade of hands-on experience in the industry. We offer a wide range of drywall services for both residential and commercial properties, but for municipal and governmental properties as well!
Drywall by Renso is fully-equipped and staffed to
manage any drywall project, regardless of size or scope. We are proficient in
everything drywall, from simple drywall installation and repair, to major work
like new construction homes, grid ceilings, metal stud framing, custom drywall
textures, remodels, basements, and more!
Unparalleled Customer Support and Care
At Drywall by Renso, you can expect a prompt hello
and a warm greeting. We are true industry professionals who are always eager to
answer all of your drywall questions! Request a free estimate, information, or
referrals, anytime! Just take a look below at all the reasons why you should
choose us for your commercial drywall needs!
WHY CHOOSE US:
☑ Licensed, Bonded, & Insured ☑ Commercial & Residential ☑ 10+ Years of Experience ☑ Satisfaction Guarantee ☑ High Quality Craftsmanship ☑ Economy-Based Prices ☑ Unparalleled Customer Service ☑ Highly Trained Contractors ☑ Strong Work Ethic ☑ Flexible Scheduling ☑ Friendly Phone Attendants ☑ Devoted Business Owners ☑ Free Estimates ☑ Free Drywall Advice ☑ Job is Done Right the First Time
Contact Us Today!
Call the Drywall by Renso office today at 317-269-7319 to speak with a licensed Indianapolis drywall contractor about your property remodeling and renovation needs. Trust us for outstanding results at a competitive price! So pick up the phone and request your free estimate, today.