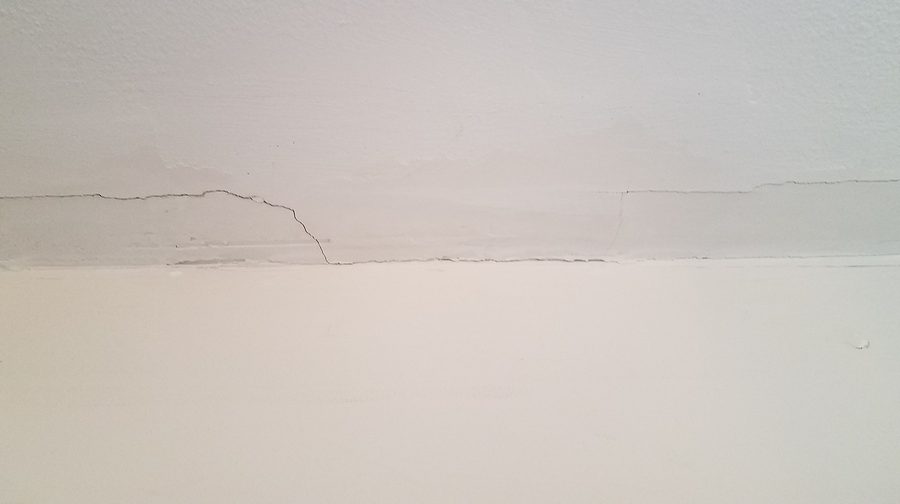
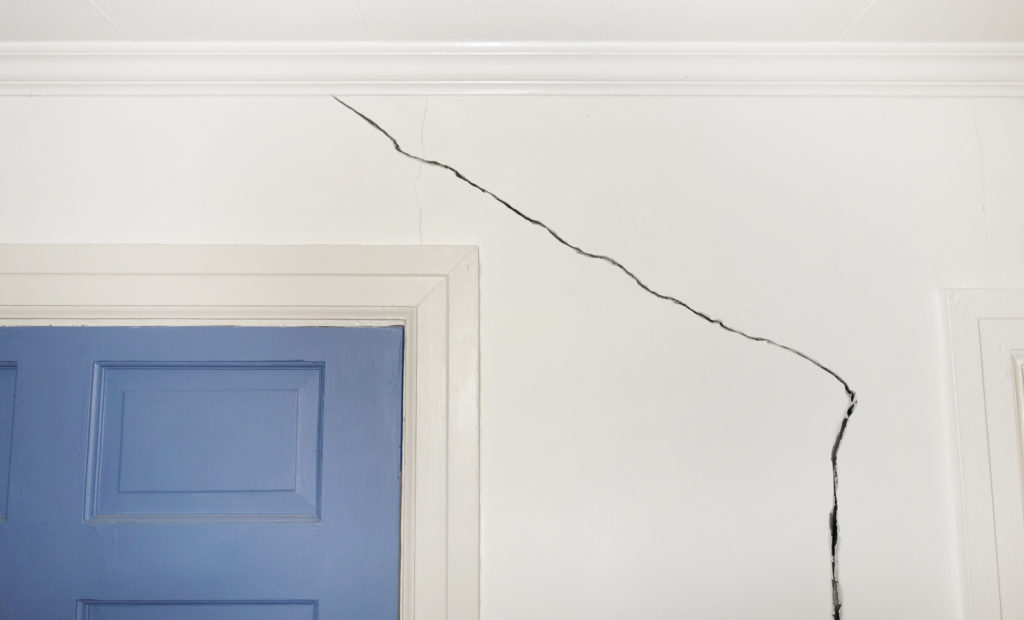
Drywall cracks are the worst. You spend so much time making sure
your home or office is in tip-top shape, and then you notice that alligator fissure
below the bathroom light switch plate. Fortunately, there is a simple and
convenient approach to dealing with this dilemma, but first, you need to figure
what it is that’s causing all your drywall to crack. Without resolving the
underlying problem, your drywall repairs and restorations will be all in vain.
Continue reading to learn the top causes for drywall
cracking, as well as, that simple and
convenient approach we mentioned before.
Indianapolis Drywall Crack Repair 317-269-7319
Causes For Drywall Cracks
Drywall can crack for a number of reasons, making it a
common occurrence. And often times, the appearance or location of a crack can
say a lot about how and why it showed up. They can occur as a result of
contractor error, stress produced from the foundation of the home settling overtime,
and much more. The most common causes for cracking drywall include, but are not
limited to:
⚠ Foundation Settling –When a foundation settles, it can create cracks in the walls and ceilings, overtime.
⚠ Moisture –Moisture can create drywall cracking, especially around screws and wall studs.
⚠ Wall Décor –Heavy wall décor can cause cracks in drywall overtime, but often remain hidden behind the art.
⚠ Structural Movement –Structural movements, like heavy storms, can cause stress, which can cause walls to crack.
What To Do About Drywall Cracks
If you have just one hairline crack or small hole, you can
possibly repair it yourself. Any defects larger than those should be managed by
a professional drywall repair company. They have the proper training and
resources to repair drywall, efficiently and accurately. When people attempt to
do their own drywall repairs, the potential for making mistakes is high.
Without the proper resources and knowledge, drywall repairs can be messy,
complex, and unpredictable. They are not the everyday chore you can easily
tackle.
Indianapolis Drywall Repair You Can Trust
Call Drywall by Renso at 317-269-7319 for Indianapolis drywall repair and installation service. We are experienced drywall contractors who offer a wide range of residential and commercial drywall service, including repair, replacement, installation, new home construction, metal stud framing, custom drywall texture, grid ceilings, and much more. Call 317-269-7319 to request a free estimate, today.
Baseboard removal doesn’t have to be a hassle. With the right materials and knowledge, you can remove baseboards without damaging them or your walls. This way, you can restore the look of your existing baseboards and then re-install them for a cost-effective interior upgrade, or, you can reuse them for another woodworking or crafts project. If you are installing new floors, you will also be required to remove your baseboards, so preventing damage during the process will allow you to reuse them and save money.
In the past, removing baseboard without damaging them was a
very difficult job to do. It required a lot of hard work, time, money, and
patience to get the job done right; and even then it wasn’t always successful.
But with the advancements of tools and materials available today, you can get
professional-grade results in a convenient time frame!
Continue reading to learn how you can remove baseboards
without causing them damage, as well as, drywall tips for expert results.
One of the most important tools to acquire for a baseboard
removal job is a trim puller. This ergonomic tool is what makes baseboard
removal much easier than it was years ago. Before trim pullers, you would have
to insert a putty knife in between the trim and the wall and twist back and
forth in order to loosen the boards. With a trim puller, the 15 degree center
wedge allows for simple and quick extraction, and prevents wall and baseboard
damage. This saves loads of time and money, not to mention stress.
If your baseboard seams are caulked, then you will need to
get caulk remover product. But if they are sealed with standard latex paint,
you will only need your utility knife. Gloves are optional but help to prevent
splinters, blisters, and sores. Side-cut pliers are optional as well, but very helpful
for removing leftover pins and nails in walls after the baseboards are removed.
If you have a hammer, the backside will work just as well.
Step 1
If your walls and baseboards are sealed with latex paint, start by using your utility knife to cut along the seam where the baseboards meet the wall to release them from their seal. Be sure to stay along the seam to prevent pulling off any wall color. If your baseboard and wall seams are sealed with caulk, you will need to apply a line of caulk remover instead. Follow the instructions on the label. Then move onto the next step.
Step 2
Starting at one end of a strip of baseboard, place the trim
puller front-faced against the wall, with the sharp edge along the baseboard
seam.
Step 3
Hold the trim puller with one hand, and with the other hand,
strike the top of it with your hammer or mallet. This should drive the
sharpened edge in between the trim and wall. You will notice that the center
wedge of the trim puller (the part that sticks out in the middle) automatically
separates the baseboard from the wall.
Step 4
Gently pull the trim away from the wall with your puller
tool. Then, continue step 3, moving along the baseboard in 1 foot increments
until you reach the end of the strip.
Step 5
Remove any leftover pins or nails with your side-cutting
pliers or the back part of your hammer.
Need Help With Drywall Repairs in Indianapolis?
Call Drywall by Renso at 317-269-7319 to request a free estimate for drywall repair and service in Indianapolis, Indiana. We offer a wide range of drywall services, for both residential and commercial properties, including new construction homes, remodels, repairs, metal stud framing, ceiling grids, and of course, baseboard installation. Request a free estimate, today.
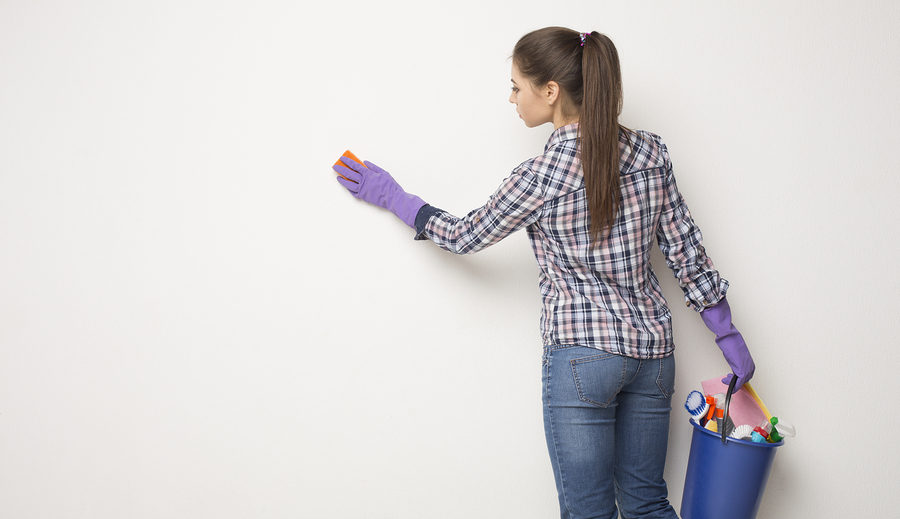
Just like so many other assets and commodities in the home, walls
require a certain level of routine maintenance. So if you want to maintain that
level 5 drywall finish and professional paint job, you will need to learn the
best methods for taking good care of your walls, and then adopt them as a
permanent plan. This includes implementing regular upkeep and care.
Continue reading to learn what you need to know about
getting started with routine wall maintenance, as well as, what to do when you
are stuck with a wall-related problem.
Indianapolis Drywall Contractors 317-269-7319
Odor Control
It is not reasonable, nor entirely possible, to change your
life around in order to prevent your walls from absorbing everyday odors like
cooking grease, smoke, pets, and more. But you can implement some strategies to
help abate the absorption of such smells. For starters, you can choose a paint
that is formulated to retain less odors. Otherwise, it is effective to simply
clean your walls on a periodic basis. See our blog, “How to Remove Odors From
Walls” for a step-by-step guide.
Stain Control
Aside from odors, your walls are also prone to stains.
Everything from fingers and spills, to pet dander, dust, and more, can cause
walls to stain or discolor. To remove a wall stain, use a chemical dry cleaning
sponge, like Mr. Clean Magic Eraserâ,
then finish by using a standard soft sponge and rubbing alcohol to gently wipe
the wall clean.
Damage Control
A small defect can quickly evolve into a large one if it is not
dealt with in a suitable time frame. A good approach to routine wall maintenance
is to stay ahead of drywall and ceiling repairs. Have a hole patched up as soon
as it happens, and have cracks filled when they begin to spread. This will
prevent a small problem from turning into an invasive, time-intensive, costly
drywall repair.
Professional Drywall Service and Repair
Call Drywall by Renso at 317-269-7319 for affordable Indianapolis drywall repair and installation services you can trust. We service all of Central Indiana, as well as the Metro Indy areas. We offer a wide range of residential and commercial drywall services, including new home construction, grid ceilings, metal stud framing, and more. Call 317-269-7319 for drywall repair and installation in Indianapolis, IN and its surrounding locations today.
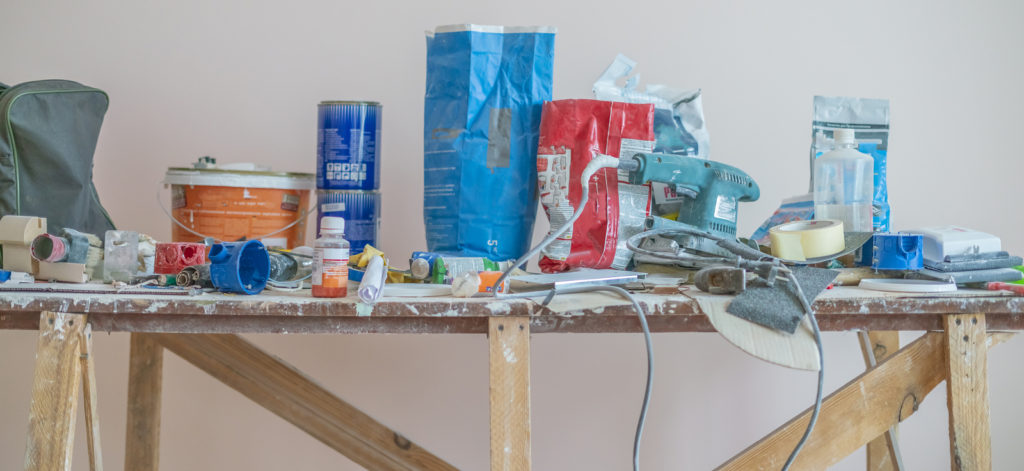
Looking to step up your drywall repair game? One of the easiest
and most rewarding approaches is to fill up your work shed inventory with all
the drywall supplies you will ever need, from basics to pro-grade. Continue
reading for a recommended list to get you started!
Indianapolis Drywall & Painting Contractors 317-269-7319
Drywall Repair and Installation Supplies
For all drywall projects, there is a fundamental set of supplies
for basic tasks, and then a more comprehensive set for higher-level work. From
start to finish, here are all the tools, supplies, and materials you will need
for do-it-yourself drywall projects and repairs:
☑ Sheetrock
Sheetrock is actually a registered brand of drywall manufactured
by the U.S. Gypsum Company. But, it is also informally known as drywall, gypsum
board, gypsum rock, plasterboard, and wallboard. You can purchase drywall at
any local home improvement store, online, or through a contractor. It is
generally sold by the square foot, and doesn’t usually require any minimum purchase
unless you are opting for delivery.
☑ Drill
Drills come in several makes and models. You can choose
between a cordless or corded drill. Both work well with drywall work. Many
professionals prefer cordless for obvious reasons. Drills are used in the
drywall industry for installation purposes. Installing gypsum board requires a
power drill and screws.
☑ Drywall Saw
Saws for drywall come in various shapes, sizes, and
serrations. They are used to cut board to size, so the type you need will vary
depending on the particular needs of your project. You can choose among double-sided
saws, hand saws, fine-finish saws, hacksaws, and more.
☑ Drywall Screws
These are special screws used to hold up gypsum board. They
have extra course threads that stay secure in drywall. There are several kinds,
all with different sizes and applications, including fine-head, self-drilling,
pan-head, and more.
☑ Drywall Tape
Drywall tape is an important tool because it creates a physical
bond between adjacent sheets of drywall. It is the surface to which the plaster
sticks to. It provides a seamless surface for drywall installation and repairs
and more.
☑ Edge Sander
An edge sander will allow you to perfectly finish off and
smooth out the edges of your drywall boards. With a removable sanding disc on
the bottom and an easy-to-grip handle on the top, it is no surprise they are a
popular tool for any do-it-yourself-er.
☑ Joint Compound
This is a white powder containing gypsum board dust that is
combined with water to produce a mud. This mud is then used to seal joints
between drywall sheets. This is also called mud, spackle, or plaster. It is
used to create the smooth, level 5 drywall finishes you see in quality
constructed buildings and homes.
☑ Joint Knife
Also called a taping knife, a joint knife is the tool used
to scoop, scrape, spread, and smooth out drywall mud. It has a wide blade that
comes in various sizes, from 4 inches to 14 inches.
☑ Miter Box
A miter box is a terrific tool used to measure saw strokes
and miter cuts. Not only do they provide smooth and even cutting motion, they
provide safety for your hands and fingers.
☑ Mud Pans
A mud pan is the flat plate, usually paper or metal, that
holds spackle and mud. They come in all different shapes and sizes. Some can
hold up to ½ a gallon of drywall mud.
☑ Rasp
A rasp is an instrument that looks and behaves much like a nail
file. It has a double-sided, hardened steel blade with a course textured surface,
usually rectangular or tapered at the end, and a handle made of plastic, wood,
or metal. It is a handheld, manually-operated tool used to form, file, and
shape gypsum board.
☑ T-Square
A T-square is a helpful, yet technical, tool because it
ensures you make straight cuts on your drywall board. It assists with drawing
diagonals and 90 degree angles as well. In fact, they are often used on drafting
tables.
☑ Utility Knife
Utility knives are used for cutting, leveling, trimming, and
scraping drywall board. They come in multiple fashions and multiple blade
sizes. They are usually made of stainless steel, so they are durable and
long-lasting.
? Masking Paper and Film ? Drywall Bench ? Dust Barriers/Liners ? Drywall Vacuum ? Hammer ? Tape Measurer ? Multi-Pocket Apron ? Respirator Mask ? Gloves ? Safety Goggles ? Hard Hat
When Your Drywall Job is Better Suited for a Pro
Call Drywall by Renso at 317-269-7319 for Indianapolis drywall repair and installation service. We are experienced drywall contractors who offer a wide range of residential and commercial drywall service, including repair, replacement, installation, new home construction, metal stud framing, custom drywall texture, grid ceilings, and much more. Call 317-269-7319 to request a free estimate, today.
Textured popcorn ceiling patterns used to be all the rage
back when oak cabinets were still considered modern and microwave ovens were
sitting on their own stands in the kitchen. But just like cabinets and
microwaves, design concepts and trends have changed dramatically over the past
two decades. So if you have popcorn ceilings that are driving you mad, chances
are, your tastes have changed along with everyone else’s. Fortunately, you have
two sensible options for removing a popcorn ceiling, both of which are
economical in price and efficacy.
Continue reading to learn the 4 basic steps for removing
popcorn ceilings, as well as, what you can do if DIY drywall is not something
you have time or energy for.
Indianapolis Drywall Contractors 317-269-7319
ASBESTOS WARNING: Spray-on acoustic ceiling finishes (including textured popcorn ceilings) that were manufactured before 1980 might possibly contain asbestos, which is a known carcinogen. If your ceilings fall within this time frame, have it tested for asbestos before getting started on your project. Covering your face, scrap a small piece from your ceiling and seal it in a container or plastic bag. Then drop off the sample at the local EPA office to have it tested for asbestos. If your ceiling is contaminated, you will need to contact a licensed asbestos abatement company for the job.
What You Need:
► Ladder ► Painting Tape ► Drop Cloths (Canvas or Plastic) ► Lightweight Plastic Sheeting ► Spray Bottle & Hot Water ► Liquid Fabric Softener ► Chemical Paint Remover (Optional) ► 10” Drywall Knife (Or A 12” Popcorn-Ceiling Scraper) ► Joint Compound ► Sanding Sheet or Block ► Ceiling Paint and Primer
Step ❶ – Room Prep
Get your work area set up. Clear out anything of value or
that will be in your way, such as furniture and décor. Then continue by laying
down your floor tarps and canvases to protect your flooring. Finish by taping
your lightweight plastic sheeting to the surrounding walls to protect them from
dirt and damage.
Step ❷ – Water or Chemicals
Your next step is to determine if your ceilings are painted
or not. If they are painted, water will not absorb well into them, making the
scraping process much harder and monumentally messier. In this case, you would
do better to use a chemical paint remover rather than water.
If your ceilings are NOT painted over, combine 4 cups of HOT
water with 1 tablespoon liquid fabric softener inside a plastic spray bottle. The
fabric softener will help reduce the rate of evaporation, keeping your ceilings
soaked while you work. Then, use your ladder to access the ceiling space and generously
spray the surface with your solution. Allow the water to soak in for 10 minutes,
and then spray the surface again. Wait another 10 minutes, and then move onto
the next step.
Step ❸ – SCRAPE!
It is time to start scraping off all of the saturated
drywall material. Keep in mind, this will be messy, so just set your stress
aside until it is time to clean up. Be sure to hold your drywall knife at a
very light angle so that you do not puncture the ceiling. If you have a popcorn
ceiling scraper, you can use it instead of a drywall knife. Try attaching it to
a broom handle and tie a plastic bag around the tip so that it catches material
in the bag while you scrape!
Step ❹ – Prime and Paint
Before you actually begin priming and painting your
freshly-scraped ceiling, sweep up all of the debris, but leave the tarps and
sheeting in place. Now you can fill in any holes or dents with joint compound,
and sand the surface flat when it dries. When your ceilings are back to basic,
you can prime them and paint them any way you like!
Is the Job Too Tough?
IF the whole project seems too tough to tackle on your own, just call Drywall by Renso at 317-269-7319 for Indianapolis drywall service you can afford! We are experienced drywall contractors who offer a wide range of residential and commercial drywall service, including repair, replacement, installation, new home construction, metal stud framing, custom drywall texture, grid ceilings, and much more. Call 317-269-7319 to request a free estimate, today.
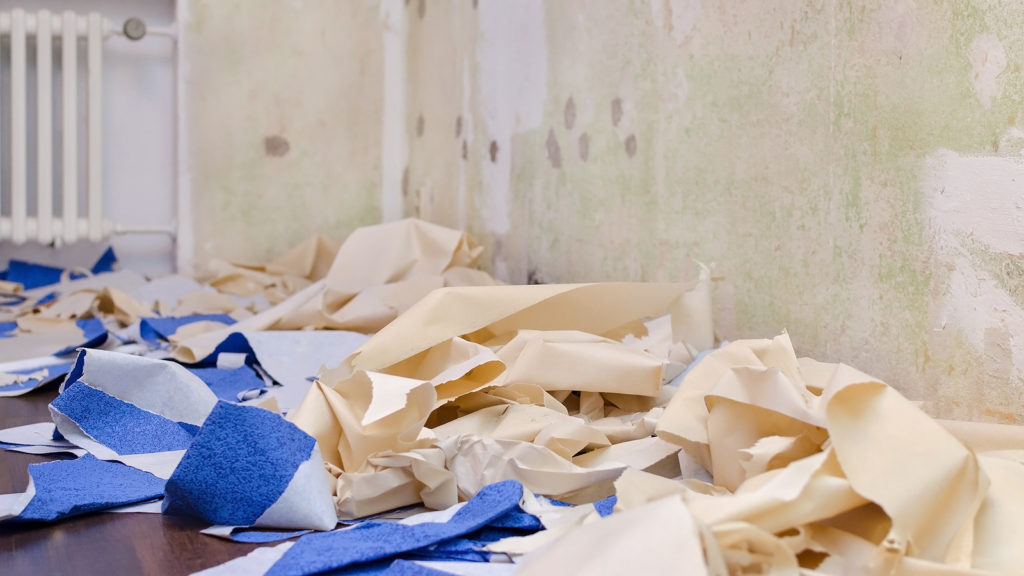
If you discover walls in your new home that were originally
wallpapered, and then later painted over, you are probably looking for the
fastest way to undo these outdated renovations. However, there is no real “quick
fix” or secret method behind removing painted wallpaper; it simply takes a lot of
time, effort, and materials, especially compared to a traditional wallpapered
wall. Furthermore, if your wallpapered wall is covered in several layers of
paint, the best option is to simply replace the drywall altogether.
If this is not an option for you, continue reading to learn
the best practice for removing painted-over wallpaper.
Indianapolis Drywall & Painting 317-269-7319
What You Need
If you do not already know how to remove wallpaper, simply
review the steps before getting started. What you will see is that it is a very
similar process to removing painted wallpaper. You will first need to gather
all the necessary items, including:
☑ 3-in-1 Scraper Tool or Broad Knife
☑ Serrated Paper Scoring Tool (or stiff wire brush)
☑ Wallpaper Stripper Solution (or liquid fabric softener mixed with water and vinegar)
☑ Wallpaper Removal Cloth
☑ Ladder or Step Stool
☑ Large Plastic Bucket
☑ 2 Gallons Warm Water
☑ Rubber Gloves
☑ Protective Eye Wear
☑ Drop Cloths or Tarps
What To Do
Keep in mind that you may require new drywall installation
if you find that there are several layers of paint on top of the wallpaper. If
there are only a few layers of paint, you may be successful at removing it
without having to replace the drywall. Once you have all the necessary
supplies, you are ready to get your hands wet! Here’s how to get started:
Using medium pressure, score the outer layer on the wall
with the paper scoring tool. Too much pressure can damage the wall so take your
time on this part. You may also use a thick-bristled wire brush, or both.
Choose the tool that you are more comfortable using and that produces the most
results.
Once you have scored the paint, spray on your wallpaper
stripper solution, focusing on small sections at a time. Then allow the solution
to soak into the wall for a few minutes. Spraying too much solution on at once
can damage the wall, so don’t be too generous with the spray bottle. If you do
not wish to use a commercial wallpaper stripper solutions, you can mix water,
vinegar, and liquid fabric softener into a plastic spray bottle instead.
After the solution has soaked into the wall for a few
minutes, grab your 3-in-1 scraper tool (available at any local hardware or home
improvement store for a low cost), and start with the sharpest edge. Get
underneath the painted wallpaper and work slowly to scrape it away. Scraping in
alternate directions will help expedite the effects.
Expect this process to take several hours, or even days
depending on the drywall or plaster used, the type of wallpaper adhesive, the square
footage of the wall, the extent of paint on top of the wallpaper, and much more.
After an abundant amount of dedication,
patience, and effort, you will eventually get it all!
And if the Job Proves to Be Too Big…
Call Drywall by Renso at 317-269-7319 when you need professional drywall service in Indianapolis, Indiana. We are a licensed, bonded, and insured drywall company that provides residential and commercial drywall work at competitive prices. Call 317-269-7319 to request a free estimate, today.
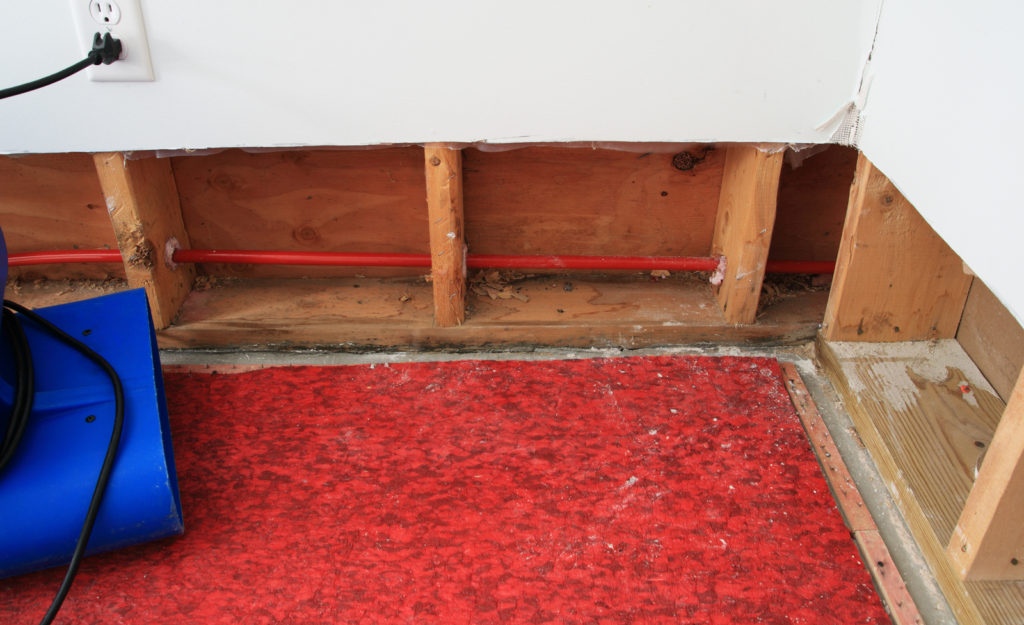
When you have a major flood or water leak inside your
property, you can be sure you’ll have damaged drywall as well. Soaked or soggy
drywall should be removed immediately, before mold and mildew can develop. But
before you decide to take on the project yourself, it may be wise to review the
basic steps you can expect the process to involve. This insight may convince
you that drywall removal and installation is best left in the hands of trained
and equipped professionals.
Continue reading to review the 10 basic steps for removing soaked
drywall, as well as, who to trust to get the job done right, and at a fair
price.
Indianapolis Drywall Contractors 317-269-7319
How to Remove Water-Damaged Drywall
The steps for removing water-damaged, soggy drywall are
quite comprehensive and detailed. Furthermore, they ebb and flow depending on
certain conditions and circumstances, both foreseen and unexpected. However,
below are the basic, “skeletal steps”, so to say, for taking out soaked
drywall. These will give you an idea of what the project will entail and to
what extent. In order to learn how to remove water-damaged drywall exactly, you
will need to do your research or consult a professional for advice.
Step ❶: Laying Down Tarps
In the first step, you will do all of your project area
preparations, including placing down plastic protective floor tarps. These will
make cleanup much easier, and protect floors from a big mess or irreversible damage.
Step ❷: Marking the Cut Line
In this step, you will need to locate the highest point reached
by the water. This water line is where you will base your cut marks on. Cut
marks should be made 6 to 12 inches above the water line using a laser level.
Step ❸: Cutting the Drywall
Now you are ready to make the actual cuts, following along
your original markings from the previous step. You will do this using a very
sharp utility knife that is specially designed for drywall, gypsum board work.
Step ❹: Making a Hole
In this step, you can look forward to puncturing a hole in
the drywall using a framing hammer. The hole should be made in a center section
of the damaged drywall, below the cut line, and between two wall studs. Furthermore,
it should be large enough to fit your hand through to the other side.
Step ❺: Pulling Out the Drywall
In this step, you will have to first remove the baseboards
and electrical outlet plate covers, if any. Once this is done, you will have to
reach inside the hole you made (hopefully wearing work gloves) and pull on the
drywall until it comes loose from the wall studs. Then you will need to use a
flat bar, hammer, or flat-nosed shovel to pry it the rest of the away off.
Step ❻: Testing for Moisture
In this step, you’ll need to assess the moisture level of
the exterior walls, as well as, the inner insulation. You need to remove all
the drywall up to where the insulation is dry. So if you still feel damp
insulation or drywall, you’ll need to go back step 2. Keep in mind, if any electrical
cables, outlets, or outlet boxes have to be removed and replaced, you must hire
a licensed electrician.
Step ❼: Removing Soggy Components
Drywall won’t be the only component that is soggy and
water-soaked. You will also need to remove wet fiberglass insulation in this
step, as well as, the drywall screws, nails, and anything else that is affected
by water or that will be trashed.
Step ❽: Disposal and Cleanup
When you have cut all the soggy drywall out and removed the
wet insulation, you will have quite the mess on your hands. In this step, you
can look forward to carrying all the debris and scrap drywall out to the
appointed dumpster or truck that will eventually take it to a landfill.
Step ❾: Ventilation
Even after taking out all the wet, damaged components of
drywall, you will still have to air it all out and ventilate the affected
areas. High-powered construction floor fans are needed for the job, which will
speed up evaporation of moisture, and prevent condensation and mold growth.
Step ❿: Drywall Replacement
Of course, you don’t want gaping holes or missing walls in
your home; so you will need to replace the damaged drywall with new material.
In addition to drywall installation, you will also have to prime, sand, and
paint all over again.
As you can see, the process of removing soggy drywall is
tedious and exhausting. This is why it is best left to trained professionals
who are fully-equipped for the job!
Call Drywall by Renso at 317-269-7319 for Indianapolis drywall repair and installation service. We are experienced drywall contractors who offer a wide range of residential and commercial drywall service, including repair, replacement, installation, new home construction, metal stud framing, custom drywall texture, grid ceilings, and much more. Call 317-269-7319 to request a free estimate, today.
It’s not until we are older, wiser, and well, financially
responsible for our own homes, that finding wall studs prior to hanging décor becomes
a priority. No more do we use wall tacks for pictures, or blindly bang nails
into drywall. Now that we are accountable homeowners, we make sure to locate
wall studs for all our wall handing and decorating needs.
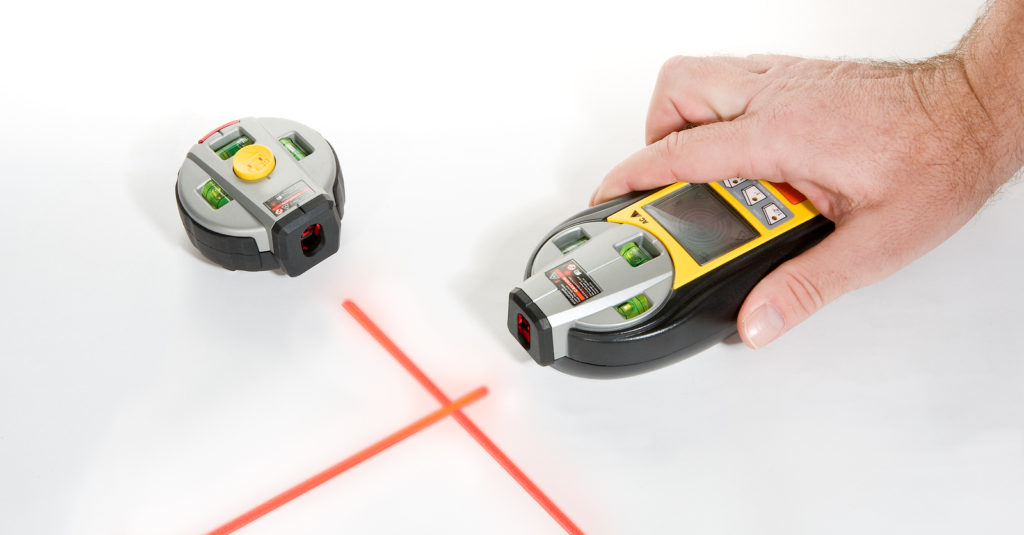
Locating wall studs is not something to be nervous about. There
are several effective methods for finding wall studs fast and with ease. To
make the process more accurate, it is recommended to use a stud locating
device. Some of the most innovative technologies in stud finding can be found
online or at your local home improvement stores!
Continue reading for some top-rated electronic wall stud
finders on the market, including how much they cost and where to buy them.
Indianapolis Drywall Contractors 317-269-7319
Electronic stud finders come in a variety of brands, which
range in price, model, size, and overall quality. It is important to read
customer reviews, being careful to weed out the fake ones, in order to find a
reliable and well-liked device. Some popular retailers to consider include
Amazon, Lowes, Home Depot, and even your neighborhood hardware or home improvement
store.
For some help, below are some top-rated and affordable
electronic stud finders we recommend for you!
? Franklin® Sensors Professional Stud Finder
Average price $53 – Sold
at Home Depot
? DeWalt® DW0100 Center Sensor Stud Finder
Average price $20 – Sold
at Ace Hardware
? Zircon® StudSensor HD55 Stud Finder
Average price $20 – Sold
at Home Depot
? Black and Decker® Self-Leveling Laser Line & Stud Finder
Average price $55 – Sold
at Ace Hardware
? Bosch® Digital Multi-Scanner GMS120
Average price $65 – Sold
at Amazon
Need Help With Drywall Repairs in Indianapolis?
Call Drywall by Renso at 317-269-7319 to request a free estimate for drywall repair and service in Indianapolis, Indiana. We offer a wide range of drywall services, for both residential and commercial properties, including new construction homes, remodels, repairs, metal stud framing, ceiling grids, and of course, moulding installation. Request a free estimate, today.
When drywall does not look or perform the way it should, it
usually boils down to improper installation. Drywall installation is the key to
longevity and appeal, making the decision of hiring a drywall contractor a
serious one. If you are on the market for a new property, or perhaps have
already purchased a new place, you may want to learn what improper drywall
installation looks like. Spotting drywall problems early on can save you loads
of money down the line.
Continue reading to learn the most common consequences of incorrect
or poor drywall installation, as well as, who to call for drywall repair near
you.
Indianapolis Drywall Repair 317-269-7319
✨ Always Hire a Qualified Pro
If you do not hire a licensed and insured drywall
installation company with the proper industry credentials, you can face a series
of aesthetic disappointments, out-of-pocket costs, and various other
inconveniences. Basically, professional-grade drywall installation starts with
a skilled contractor who is fully-equipped and capable of taking on the job.
Otherwise, these are some things that can go wrong with your property:
Inadequate Dust Management
If you have ever witnessed drywall being cut and installed,
you know that the process is extremely messy. This is especially true when it
comes to the finishing portion of the job, which is even messier if done
improperly. The amount of dust and debris produced by drywall cutting,
finishing, and overall installation, is massive, and can spread through vents
and air ducts, and travel into the living quarters of the home. Not only is the
cleanup a hassle, the inhalation of drywall dust and debris can be harmful, especially
to young children and those with suppressed immune systems. You must hire a
qualified drywall company that is equipped with the proper materials,
equipment, and knowledge of technique, to abate dust and debris.
Un-Leveled Surfaces
If drywall finishing is not done properly, not only will it
cause a massive amount of harmful dust and debris, it will also be uneven and
look terrible. If you notice that certain areas of wall look lumpy, uneven, or
off in anyway, it could be due to improper drywall finishing. Take a closer
look at corners and edges of the walls too; if they are not taped and finished
properly at the time of installation, these areas can appear uneven as well. To
make matters worse, you may think that covering these imperfections with primer
and paint will solve the problem, but the truth is, these mistakes are
challenging to fix.
Cracking and Splitting
If you see areas on the wall that are cracked, splitting,
breaking off, or fractured, you can chalk it up to poor installation. This
applies to ceilings too. Although this could also be a result of the property’s
foundation shifting or settling, most often, improper drywall taping and
finishing are mostly to blame. Corners, edges, and seams are commonly affected
areas to watch out for. Drywall blemishes like these can show up right after
installation, or even years down the road. You would need to talk to a qualified
drywall contractor for advice on the best strategies to remedy drywall cracking
and breaking.
Indianapolis Drywall Contractors You Can Trust
Call Drywall by Renso at 317-269-7319 for affordable Indianapolis drywall repair and installation services you can trust. We service all of Central Indiana, as well as the Metro Indy areas. We offer a wide range of residential and commercial drywall services, including new home construction, grid ceilings, metal stud framing, and more.
If you have a small hole in your wall, you likely want a
fast and affordable solution. Aluminum screen wall patches are a product that
can make this happen. Continue reading to learn more about aluminum mesh patches
for drywall, as well as, additional materials you may need for your drywall
repair project.
Indianapolis Drywall Contractors 317-269-7319
Traditionally, repairing a hole in the wall requires you to
cut out a square around the hole, install a wood panel backing, cut out a patch
of drywall, screw it in, tape it up, mud it, cure it, sand it, and more. This
tedious process, although full-proof, is time-consuming and requires a lot of
materials. Alternatively, you could use aluminum screen patches for easier
project completion, and still get the same results.
Aluminum Mesh Patches
Aluminum mesh patches are an abundant drywall installation
product available at any hardware, home improvement, or paint store. They are
inexpensive, ranging in price between $1 and $5, depending on retailer, brand, and
size. Generally, they come in 4 inch, 6 inch and 8 inch squares, which are
large enough to cover a hole, but thin enough to be rendered indistinguishable
with tape and mud.
Application Tips
First, you will need to choose a mesh patch that is large enough
to cover the hole, with an inch of material to spare on all sides. Start by
cleaning off the edges of the wall around the inside of the hole. Then position
your aluminum patch over the hole, sticky side down, so that one inch of patch
is overlapping on each side. Press down firmly, to ensure the patch adheres to
the wall.
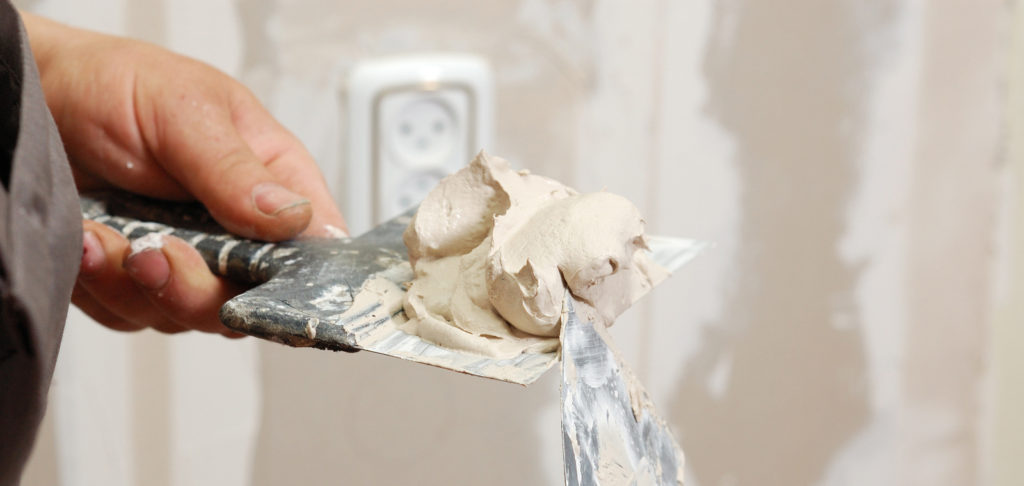
Now just apply the drywall compound using your trowel. You
want to spread this first coat thin enough so that you can see the outline of
the mesh screen. Allow it to dry overnight, then add a second coat of drywall
compound wider than the first coat.
Allow this second coat to dry, and then repeat for a third
time, spreading the compound out 8 to 12 inches past the outline of the mesh
screen in all directions. After the third layer of compound dries, sand it down
to match the surface level of the wall. Then just prime and paint as usual!
What You Will Need:
⇀ Aluminum Mesh Patch
⇀ Drywall Compound
⇀ Taping Knife (12 inch)
⇀ Utility Knife
⇀ Trowel
⇀ Drywall Tape
⇀ Sanding Sheet or Sponge (120 grit)
⇀ Mud Pan
⇀ Paint and Primer
Professional Drywall Help
Call Drywall by Renso at 317-269-7319 for professional drywall repair in Indianapolis, Indiana. We are licensed, bonded, and insured drywall contractors with over 10 years of experience in the industry. Our drywall services include installation, repair, replacement, new construction, metal stud framing, remodels, and more. Request a free estimate, today.