
Are you a DIY enthusiast, home renovator, or Dad trying to fix a hole in the wall? Achieving a flawless drywall finish can be the key to transforming any space. Proper drywall preparation is crucial in the renovation process, ensuring that your walls look smooth and professional. In this comprehensive guide, we’ll explore the ins and outs of sanding drywall, offering valuable tips, techniques, and step-by-step instructions to help you achieve the perfect finish.
A Preview to the Drywall Sanding Process
Before we jump into the how-to, let’s familiarize ourselves with the basics of sanding drywall. The sanding process involves using various types of sandpaper and sanding tools to smooth out the surface of drywall joints, corners, and imperfections. The goal is to create a seamless and even surface that blends perfectly with the surrounding wall.
Types of Sandpapers
The key to a successful sanding job lies in choosing the right type of sandpaper. Generally, sandpapers com e in different grits, ranging from coarse to fine. Coarse grits (40-80) are ideal for initial sanding to remove excess joint compound quickly. Medium grits (100-150) are used for smoothing out the surface, while fine grits (180-220) provide that final polished finish.
Essential Sanding Tools
To achieve professional results, it’s essential to have the right tools on hand. Here are some must-have sanding tools for drywall:
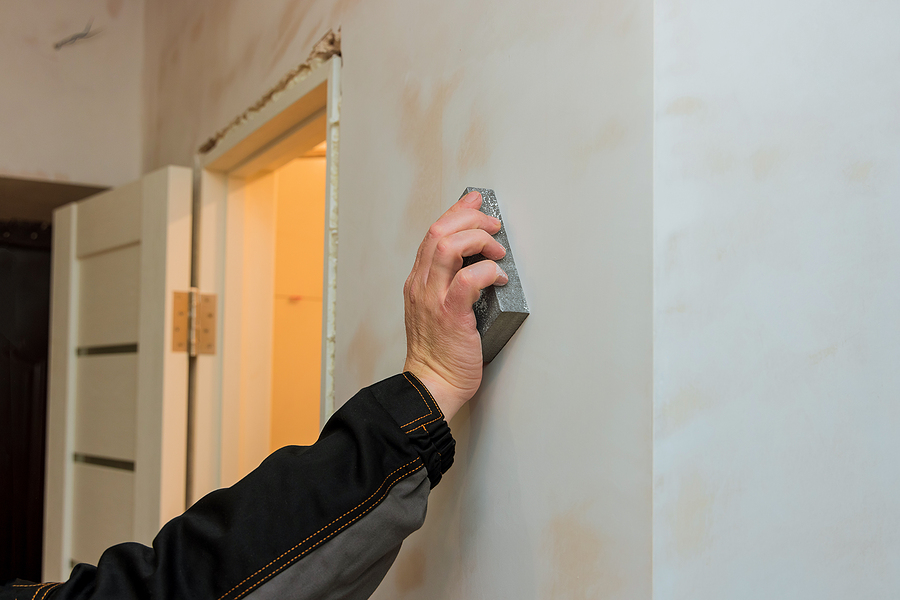
- Sanding Block: A simple yet effective tool for manual sanding, providing better control over pressure.
- Pole Sander: Ideal for reaching high or extended areas, ensuring even sanding across large surfaces.
- Orbital Sander: A power tool that makes quick work of extensive sanding tasks, delivering consistent results.
- Sanding Sponge: Perfect for detailed work and corners, offering flexibility and precision.
Step-by-Step Guide to Sanding Drywall
Mastering drywall sanding requires a systematic approach. Follow these steps to achieve a smooth and professional finish:
Initial Preparation
Preparation is the key to success in any renovation project. Start by ensuring the drywall surface is clean and free of any debris. Cover the floors and furniture with drop cloths to protect them from dust. Wear protective gear, including a mask, goggles, and gloves, to safeguard yourself from dust particles.
Applying Joint Compound
Before sanding, apply a thin layer of joint compound to the seams and screw holes. Use a taping knife to feather the edges, creating a smooth transition between the drywall and compound. Allow the joint compound to dry completely before proceeding to the next step.
Sanding the Surface
Begin sanding the dried joint compound using coarse grit sandpaper. Hold the sanding block or pole sander at a slight angle and use light pressure. Move in circular motions to avoid creating grooves or uneven surfaces. Once the majority of the compound is smoothed out, switch to medium grit sandpaper for further refinement.
Blending and Feathering
To achieve a seamless finish, focus on blending and feathering the edges of the joint compound. Use fine grit sandpaper to gently sand the edges, ensuring they blend smoothly with the surrounding drywall. This step is crucial to creating an even surface that hides the seams and imperfections.
Tips and Techniques for a Professional Finish
Achieving a flawless drywall finish takes practice and attention to detail. Here are some tips and techniques to help you along the way:
Avoiding Common Mistakes
One common mistake is applying too much pressure while sanding, leading to uneven surfaces. Instead, use light, consistent pressure to avoid creating indentations. Additionally, be cautious not to over-sand the joint compound, which can result in exposed seams.
Checking for Smoothness
Periodically check the smoothness of the surface by running your hand over it. If you feel any rough spots or ridges, continue sanding until the surface feels even and polished. Using a bright light source can also help highlight any imperfections that need further attention.
Sanding the Corners
Sanding corners can be challenging, but using a sanding sponge can make the task easier. Fold the sponge to create a sharp edge and gently sand the corners in a back-and-forth motion. This will help achieve a clean and sharp corner finish.
Importance of Dust Control and Safety Measures
Sanding drywall generates a significant amount of dust, which can be harmful if not properly managed. Implementing dust control measures is essential to ensure a safe and clean working environment.
Using a Dust Extractor
Investing in a dust extractor or vacuum with a HEPA filter can significantly reduce dust levels. Attach the extractor to your sanding tools to capture dust particles at the source, preventing them from spreading throughout the room.
Sealing Off the Work Area
Seal off the work area using plastic sheeting and painter’s tape to contain the dust. Close doors and windows to prevent dust from circulating into other parts of your home. After sanding, use a damp cloth to wipe down surfaces and remove any remaining dust.
Personal Protective Equipment (PPE)
Always wear appropriate PPE, including a dust mask, safety goggles, and gloves. This protective gear will shield you from inhaling dust particles and protect your eyes and hands from irritation.
Conclusion
Mastering the art of drywall sanding is a valuable skill for any DIY enthusiast, home renovator, or interior designer. By following the step-by-step guide and implementing the tips and techniques outlined in this post, you can achieve a smooth and professional finish that enhances the overall look of your space.
If you’re ready to take your sanding skills to the next level, don’t hesitate to reach out to our expert team for personalized advice and assistance. Contact Drywall by Renso at 317-269-7319 for professional drywall services in Indianapolis, Indiana. Whether you’re tackling a small repair or a large-scale renovation, we’re here to help you achieve the perfect finish.
Related Posts:
Avoid Drywall Dust With Wet Sanding
Tips for Avoiding DIY Drywall Mistakes
How to Cut Drywall With Just Two Simple Tools