Indianapolis Drywall Contractors 317-269-7319
On the other hand, drywall hardly moves with humidity changes, making it perfect for homes and buildings in all climates. And by wet-sanding the drywall joints, you can avoid all the dust. Continue reading to learn some helpful tips for wet-sanding drywall joint compound.
Wet-Sanding Drywall
When it comes to drywall work, you can substantially limit dust by wet-sanding the drywall joints. And if you tape with caution, you can even limit the amount of sanding you need to do. A few supplies are required in order to wet-sand drywall. Visit your local home improvement store and purchase a large, flat drywall sponge for under $5. They have a course and less-course side, so they can be used for multiple applications. For drywall joint sanding, you’ll mostly need the less-course side.
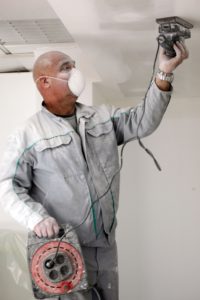
Once you have applied the final coat of compound to your drywall, dampen the drywall sponge and smooth out any minor flaws on the surface of the wall. For rougher blemishes, use the course side of the sponge. The moisture in the drywall sponge controls the amount of dust created by smoothing out joint compound, thus making the process easier and more comfortable! By placing drop clothes or old bed sheets around the work space and wearing a respirator, you can reduce the effects of dust even more.
Professional Drywall Repair and Service
For professional drywall installation and repair, choose an experienced drywall contractor for results you can trust. This eliminates the need to exert effort in taking time off work, gathering all the supplies, implementing the project, and cleaning up after. With professional drywall service, you won’t have to miss work, take time out of your weekend, or spend hours shopping for materials. For a fair price, they can handle all aspects of your drywall needs.
Indianapolis Drywall Contractors

Indianapolis Drywall Contractors 317-269-7319