Do I Use Joint Compound or Drywall Spackle?

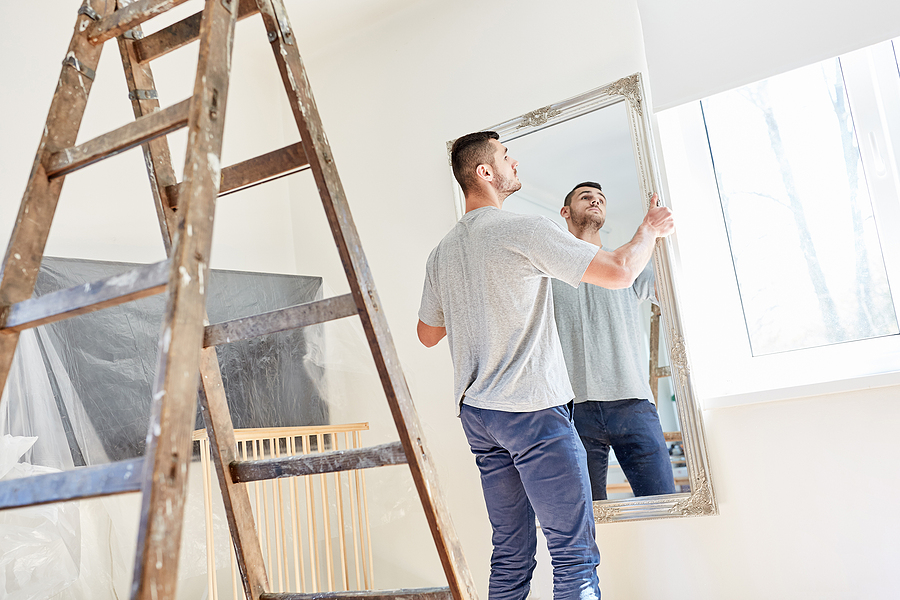
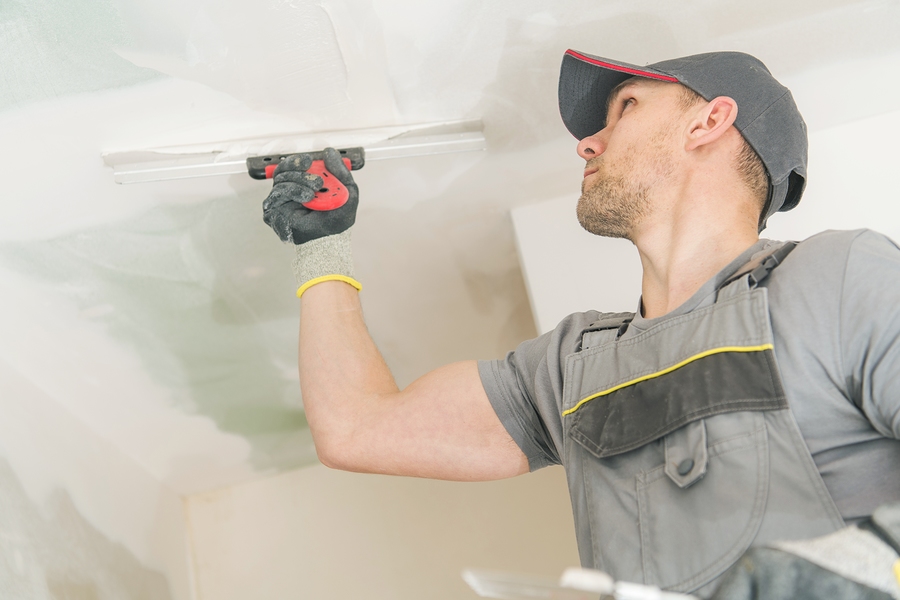
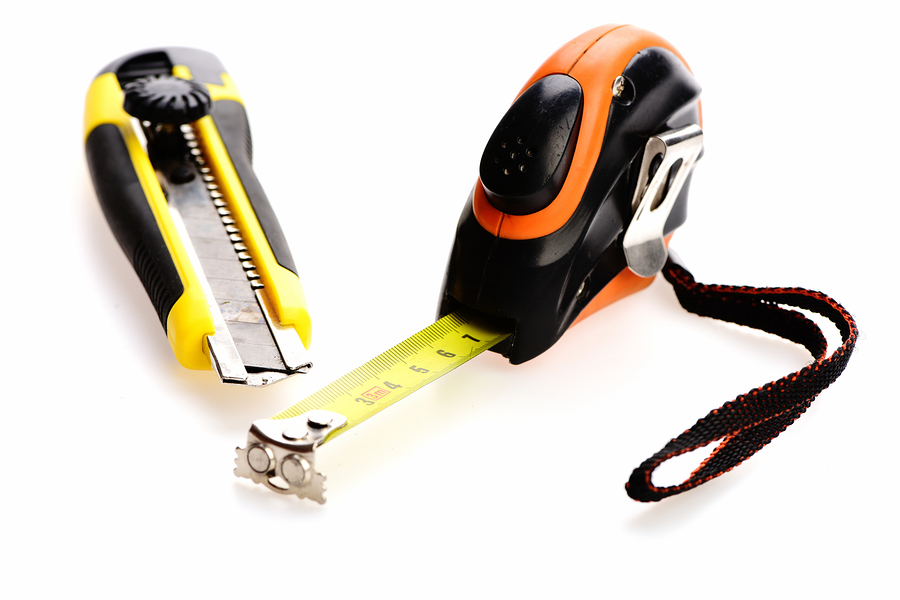
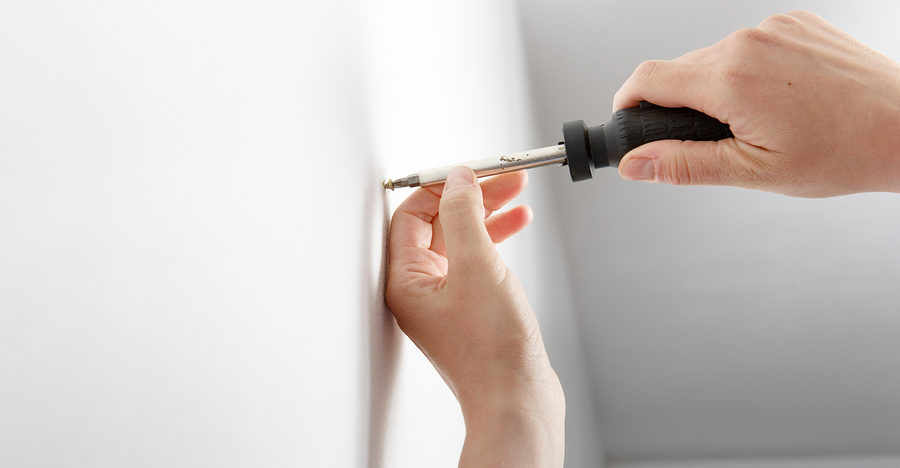
If you have a drywall repair to do, and you have no idea what you are doing, it is wise to do your research first. It is very easy to make drywall repair mistakes, so familiarize yourself with the basics before you take a turn at drywall repair. A great place to start is understanding the various tools you need for drywall repair, like drills, saws, miter boxes, utility knives, taping knives, drywall tape, mud pans, drywall screws, and of course, your adhesion product. This can be either joint compound or spackle.

Continue reading to learn the primary differences between joint compound and drywall spackle, and which applications call for each.

Indianapolis Drywall and Painting 317-269-7319

Joint Compound

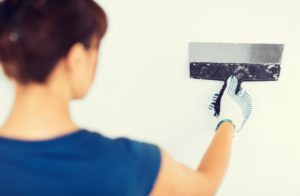
Drywall joint compound is a white powder containing gypsum board dust as its main ingredient. It is combined with water to produce a mud, which can be used for joining drywall seams and bedding drywall seam tape. It has a lighter consistency than spackle, which means it is not well-suited for the same applications. It can be used to patch holes and cracks, but it takes longer to dry and shrinks more than spackling paste.

Drywall Spackle

Spackle is different from joint compound since it is mainly used to patch up holes and cracks in plaster and gypsum board. It has a thicker consistency, which is why it is also known as “drywall mud.” Spackle comes in two primary forms: quick-setting and premixed. Quick-setting drywall mud is also referred to as “hot” mud because a chemical reaction occurs during the curing process that causes heat release.

Premixed Drywall Mud

Premixed drywall mud is the more common or traditional drywall spackle, probably because it is ready to use. The type of spackle you choose for your project depends on the type of drywall work you are doing. Hot mud is recommended for small patch jobs, like door knob holes because you don’t have to wait 24 hours to reapply your second or third coat.

Drywall Repair Tips

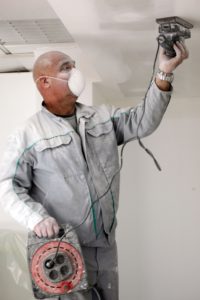
It is important to have the proper tools, materials, and equipment to finish drywall. Not only is it a challenging task to undertake without experience or knowledge, but it is also a costly investment. A better option would be to hire professional Indianapolis drywall contractors. They have the specialized training, experience, and resources to get the job done right, and in a convenient time frame.  This is strongly encouraged for large-scale or complex drywall repair projects.

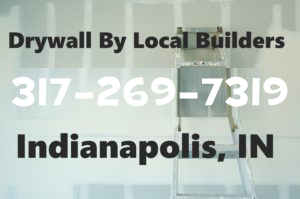
Indianapolis Indiana Drywall Installation and Repair at the Best Price

Call Drywall by Local Builders at 317-269-7319 for Indianapolis drywall repair and installation service. We are experienced drywall contractors who offer a wide range of residential and commercial drywall service, including repair, replacement, installation, new home construction, metal stud framing, custom drywall texture, grid ceilings, and much more. Call 317-269-7319 to request a free estimate, today.

Indianapolis Drywall Contractors
Indianapolis Drywall Contractors 317-269-7319

How to Find Dry Wall Studs Without Stud Finder Tool

Five holes in the wall and counting, with one hand holding a leveler and the other holding a pen; and the system continues to repeat, only to fail over and over again. Sound familiar? It is frustrating enough trying to hang a picture just right, let alone finding a stud to do it on first; but it’s vital to use studs in order to retain proper support and avoid wall damage. So many walls have suffered from failed stud finders and bad hunches. Not to worry, as we have all had our failed stud-exploration experiences that we so badly wish to forget. Fortunately, that it is all in the past now. There are easier ways to find dry wall studs, rather than using an ineffective tool or stud finder to do it.

Continue reading and learn how to locate drywall studs without using a stud finder or other tool.

Indianapolis Drywall & Painting Contractors

Tips for Locating Wall Studs

Before looking in the right place for wall studs, you must first know a few important facts about walls. For instance, the purpose of a stud is to hold up interior drywall and exterior sheathing. So, you can always safely assume that studs are located at the top, bottom, or corners of walls. You can also assume that studs are 16 inches apart from center in newer homes, and mostly likely 24 inches from center in older homes.

You can count on finding a stud behind an electrical box as they are generally held up by one. Another fact about walls you should know before going on a stud-hunt is that most molding and trim are nailed to studs. Also important to know, studs are typically located on either side of a window. This is good knowledge for curtain and valance hanging.

Instructions for Finding Drywall Studs:

If present, start at the trim or crown molding. Even though these areas are painted and caulked, you can sometimes see the nail cavity, or the point in which it was nailed into the wall. These features are only nailed into studs, so if you find where trim is nailed to the wall, simply measure 16 inches up and you should find a stud.

For properties without trim, you can start with the outlets and light switches. These are another indication of nearby wall studs. There is an electrical box on either side of an outlet, you simply have to figure out which one with a quick knock or tap. When you find the right side, measure 3/4th inch out, and then in 16 inch increments until you hit the right stud. 

Since we mentioned studs are at tops, bottoms, and corners of walls, you can also start at a corner wall and measure 16 inches inward to the center. Since all rooms are not always divisible by 16, use intuition and the knock-test to find a wall stud if measuring from a corner to center. Keep in mind that a stud could be just before, or just after, 16 inches from a corner wall, depending on the room’s dimensions.

Always remember to mark each stud as you find them, and patch up and fix any practice or mistake holes with caulk and paint. In the case that you have put too many holes in your wall, or you simply need to replace drywall for another reason, your best option is to call an Indianapolis drywall contractor for professional service.

Indianapolis Drywall Services You Can Trust

Call Drywall by Local Builders at 317-269-7319 when you need professional drywall services in Indianapolis, Indiana. We are a licensed, bonded, and insured drywall company that provides residential and commercial drywall work at competitive prices. Call 317-269-7319 to request a free estimate, today. Call 317-269-7319 to request a free estimate, today.

Indianapolis Drywall Contractors
Indianapolis Drywall Contractors 317-269-7319

The Difference Between Manual and Spray Drywall Textures

Drywall texture is an important design application that delivers enhanced warmth, appeal, and overall aesthetic to an interior. Although there are hundreds of different styles of drywall texture, all fall under one of two primary application processes: manual or spray. Continue reading to learn more about each category of drywall texture application, including what sets them apart and how to choose which style for your remodel.

Indianapolis Drywall and  Painting 317-269-7319
Indianapolis Drywall and Painting 317-269-7319

Manual Drywall Textures

When drywall texture is applied by hand, they are manual textures, or hand textures. For this type of drywall texture application, basic hand tools, like trowels and hawks, are used to achieve the desired look. Most often, a simple pan and knife are the tools chosen to apply manual drywall textures. Additional hand tools, such as specialized brushes and rollers, are used to complete the textured swirl, stomp, and swoosh motifs into the drywall mud. Sometimes, commercial paint sprayers are used to apply drywall texture, but this method is still considered manual.

Spray Drywall Textures

When drywall texture is sprayed onto a surface, they are spray textures. This method of drywall texture application requires specialized machinery that pumps drywall texture onto surfaces. Such machines are can be electric or gas-powered, but all are manufactured with powerful pumps that supply drywall mud through inner lines, and out of a special nozzle or tip. The designs in the drywall mud are created using compressed air and a sprayer gun, rather than by hand.

Common Drywall Texture Names:

➤ Skip Trowel
➤ Popcorn
➤ Smooth Wall
➤ Hawk and Trowel
➤ Crows-Foot Stomp
➤ Splatter Knockdown
➤ Orange Peel
➤ Rosebud
➤ Stomp Knockdown
➤ Santa-Fe Texture
➤ Double Skip
➤ Swirl Drywall

Indianapolis Drywall Services You Can Trust

Call Drywall by Local Builders at 317-269-7319 when you need professional drywall services in Indianapolis, Indiana. We are a licensed, bonded, and insured drywall company that provides residential and commercial drywall work at competitive prices. Call 317-269-7319 to request a free estimate, today. Call 317-269-7319 to request a free estimate, today.

Indianapolis Drywall Contractors
Indianapolis Drywall Contractors 317-269-7319

What You Need to Cut Drywall in a Short Amount of Time

Ever wonder how professional contractors can get drywall cutting needs met within a short amount of time? Well, that is because they use an age-old, industry secret to save time. Interestingly, this secret method only requires two very basic and common toolbox staples: a tape measurer and a utility knife. But before you rush to the work shed for your toolbox and drywall supplies, it is important to understand that this method of cutting drywall requires a learning curve of practice.

After a lot of practice and patience, you too can cut drywall using this method, just like the pros do. Continue reading to learn how!

Indianapolis Drywall Contractors
Indianapolis Drywall Contractors 317-269-7319

How to Cut Drywall With Only 2 Tools

Many people naturally want to place the tape measurer hook at the edge of the drywall sheet for stability, but this is actually wrong. Instead, the tape measurer hook should be placed along the drywall board where you will be making the actual cut.

From there, you must place the tip of the utility blade against the tape measurer hook and then hold it in place by pinching it with your thumb. Steadily move your free hand to the end of the drywall board and pinch your thumb and forefinger together on the tape measurer at the right increment.

Here’s where practice will pay off for you. In one swift movement, simultaneously move your knife and hands down the drywall using a consistent downward pressure. Once you have completed the cut, simply snap off the scrap piece and cut the paper liner on the other side to separate it entirely.

Practice is the Real Secret

Be sure to practice this method of drywall cutting before making it a staple move in your work. Furthermore, be sure you are wearing all the proper protective gear to reduce the risk of serious injuries. If you are not adept in drywall work, or have little to no experience working with drywall materials, it is not recommended to start with this method of cutting. Learn the basics first, practice for a long time, and then commit to improving your skills as you ride the learning curve. This is the best method of becoming a skilled handyman in any trade.

Indianapolis Drywall Services You Can Trust

Call Drywall by Local Builders at 317-269-7319 when you need professional drywall services in Indianapolis, Indiana. We are a licensed, bonded, and insured drywall company that provides residential and commercial drywall work at competitive prices. Our highly trained and experienced drywall contractors are fully equipped to provide quality drywall repair services regardless of your projects size and scope. And as a licensed, bonded, and insured company, we guarantee all of our drywall work. Call 317-269-7319 to request a free estimate, today. Call 317-269-7319 to request a free estimate, today.

Indianapolis Drywall Contractors
Indianapolis Drywall Contractors 317-269-7319

How to Take Out Dry Wall Anchors

Old, exposed drywall anchors are not appealing. So it is only natural to want them removed. But many homeowners are scared to try this task on their own because they are concerned about damaging their drywall. Also totally natural. If you are in the same position right now, you don’t have to fret much longer with your DIY decision. Waiting for you below is a simple step-by-step guide that just might change your mind about removing unwanted dry wall anchors by yourself!

Continue reading to get started!

Indianapolis Drywall Contractors 317-269-7319

What You’ll Need

✅ Drill
✅ Drill Bit (or Set)
✅ Putty Knife
✅ Utility Gloves
✅ Old Towel

Before You Begin

It is important to gather all your items and supplies before you start. The gloves will protect your hands from scratches or blisters, while the towel can be laid on the floor below to manage any drywall mess. It is also important to choose the correct drill bit size for the best results. If you do not have a full set of drill bits, simply purchase one that is a couple sizes larger than the opening in the wall anchor.

Keep in mind that if you plan to paint the wall you are working on, you will first need to prime the patched areas where the wall anchor holes were. And if you are planning to install new drywall anchors, be sure to buy ones that can be easily removed for future convenience!

Step One

Remove the screw from the wall anchor.

Step Two

Place the bit inside the center hole of the wall anchor and begin slowly drilling. Use a drill bit that is two sizes larger than the width of the center hole of the anchor. The bit should sit perfectly outside of the edge of the hole, without slipping inside.

Step Three

Once you begin drilling, the collar of the wall anchor should break free from the wall and automatically push itself out. Let it fall on the floor so you are not tempted to grab it while the drill is rotating. Be careful not to let the bit push deep into the wall cavity, which can interrupt electrical wiring or plumbing pipes.

Step Four

Push the residual drywall material back into the hole using your putty knife. You may have to fill this hole in stages for best results.

Step Five

Sand, prime, and paint!

Indianapolis Drywall Services You Can Trust

Call Drywall by Local Builders at 317-269-7319 when you need professional drywall services in Indianapolis, Indiana. We are a licensed, bonded, and insured drywall company that provides residential and commercial drywall work at competitive prices. Call 317-269-7319 to request a free estimate, today. Call 317-269-7319 to request a free estimate, today.

Indianapolis Drywall Contractors
Indianapolis Drywall Contractors 317-269-7319

Tips for Avoiding DIY Drywall Mistakes

Indianapolis Drywall Contractors 317-269-7319

Indianapolis Drywall Contractors 317-269-7319

When people attempt to do their own drywall repairs, the potential for making mistakes is high. Without the proper resources and knowledge, drywall repairs can be messy, complex, and unpredictable. They are not the everyday chore you can easily tackle. However, for small jobs, do-it-yourself repairs are possible. If you are preparing to fix a small hole or area of damaged drywall, it is important to review some common mistakes so that you do not repeat them.

Continue reading to learn the most common DIY drywall errors, and how to avoid making them yourself.

Be Sure You Have Proper Edge Support

Many people make the mistake of not checking the framing at the inside corners before starting their drywall repair or installation project. You must have adequate framing and support, or the drywall you hang will be too heavy. For most jobs, you need at least one inch of exposed framing. If you do not have this extra framing, you’ll need to attach an additional 2×4 to provide alongside the framing you do have. You may also have to add blocking, so be sure to check the top of the wall that runs parallel to the ceiling.

Mark Your Framing

Do not forget to mark your framing members. If you forget, and go on to cover your framing with drywall, you will have a lot of trouble finding the proper places to screw. You need to mark the ceiling joists, and then the center of each stud in the floor, as well as the ceiling.

Avoid Tapering Drywall Corners

A tapered edge of a sheet of drywall will not do you any good once it comes time to install the corner bead. This will cause the corner bead to hang too low, which will make it a challenge covering the joint compound. If you have cut edges, place them on the outside corners of the framing.

Trim Openings Before Fastening Drywall

It is common to measure incorrectly or come across an outlet that doesn’t fit. This is why it is important to always check the fit before you fasten anything to the framing.

Use the Longest Drywall Sheets Possible

You want to avoid adding extra joints, especially butt joints. Taping around these joints is time-consuming and complicated, so reduce the quantity by procuring the longest and biggest drywall sheets possible for your project. For the average 8 to 9 foot wall, it is recommended to get specially-cut 54 inch wide drywall sheets. If you have a larger job, you should use 12 foot sheets, but it is recommended to get the materials delivered. They are heavy, and difficult to transport.

Call a Professional Indianapolis Drywall Repair Company

Indianapolis Drywall Contractors 317-269-7319

Indianapolis Drywall Contractors 317-269-7319

Call Drywall by Local Builders at 317-269-7319 for professional Indianapolis drywall repair at an affordable price. We are highly-trained and licensed drywall contractors that offer a wide range of drywall services for residential and commercial properties. Trust us for outstanding results at a competitive price! Call 317-269-7319 to request an estimate for Indianapolis drywall repair, today.

The 8 Basic Phases of a Basement Refinishing Project

Indianapolis Drywall Contractors 317-269-7319

Indianapolis Drywall Contractors 317-269-7319

Are you considering refinishing your basement on your own? If so, this is a big decision that will involve comprehensive research, trial and error, long hours, and slow progress. Unless you are an experienced handyman, or have experience in the building and construction industry, it is not recommended to refinish a basement without professional assistance. Not only are there several steps involved, there are even more safety and building codes you must adhere to at all times. Furthermore, refinishing a basement is already a huge investment, so adding on the cost of all the needed tools and equipment is just another hit to the budget. Basically, if you want your basement refinished the right way, you need to hire a professional team of drywall contractors who can manage the project effectively and efficiently.

On the other hand, if you are experienced and ready to take on the job, start by reviewing the basic phases of your upcoming remodel in order to prepare yourself on what to expect. Continue reading to review these phases, and who to call for trusted basement refinishing in your town.

8 Basement Refinishing Phases:

Phase 1 – Framing

You will need to frame your walls. Generally, this will involve the majority of planning, as well as, lumber, power tools (framing gun, masonry gun, air compressor, a chop saw, etc.), permits, inspections, wall blocking, ductwork framing, window framing, fire blocking, register extensions, basement poles, existing wall insulation, and much more.

Phase 2 – Electrical

Although you can save hundreds of dollars doing your own electrical, it is never recommended. Money saved is not worth putting your home and your family’s safety at risk. With the innovative changes to the industry, the requirements of professional electricians are much stricter and more complex. Also, there are various codes, new and old, that must always be met. Electricians must know so much more than they did 20 years ago, and this knowledge is critical to electrical safety.

Phase 3 – Plumbing

Just like electrical, it is strongly recommended to hire a professional plumber to ensure your basement plumbing is up to code. You don’t want a septic blowout on your hands! However, with experience and the right knowledge, it is possible to do your own plumbing. Decide wisely.

Phase 4 – Audio Visual

This phase is optional, but most people want television and sound in their finished basement. You can prewire your basement to be a hot spot for all your audio visual and internet needs.

Phase 5 – Drywall

Drywall is heavy, awkward, and challenging to work with. It is dusty, messy, and easily damaged if not handled properly. It also takes a lot of trial and error to learn how to finish drywall properly. You can so this phase yourself, but it will take some time to learn if you do not have experience. Fortunately, you can always hire professional drywall contractors to do the job for you! They can get an entire basement framed and finished in as little as a few days.

Phase 6 – Painting

This is a phase you can certainly do yourself, even without much experience. Just be sure you purchase quality materials and discuss your objectives with the knowledgeable sales people at the paint store. They can get you set up with everything you need.

Phase 7 – Trim & Doors

Trim and doors are an important part of refinishing a basement because it adds the final touches that makes the room feel like the rest of the home. Subtle but impactful, trim and doors are something you want to put some time and effort into for a great result.

Phase 8 – Flooring

Whether you choose tile, carpet, or some other type of flooring, it will be the last step of your basement refinishing project. You can do this step yourself, but it helps to have a partner. However, if you are installing carpet, you may want to use professional installation.

Indianapolis Drywall Contractors

Indianapolis Drywall Contractors 317-269-7319

Indianapolis Drywall Contractors 317-269-7319

Call Drywall by Local Builders at 317-269-7319 to request a free estimate for drywall installation in Indianapolis, Indiana. We offer a wide range of drywall services, for both residential and commercial properties, including new construction homes, remodels, repairs, metal stud framing, ceiling grids, and more. Call 317-269-7319 and speak with our Indianapolis drywall contractors about your home remodeling needs, today.

How to Match Drywall Texture

Indianapolis Drywall Installation 317-269-7319

Indianapolis Drywall Installation 317-269-7319

When you have to patch textured drywall, matching the textures properly can be quite the challenge since there are so many variables involved. In fact, it is strongly recommended to use professional drywall service for patching and repair work on textured drywall unless you have experience. Professional drywall contractors retain all the proper tools, materials, and training to match drywall textures effortlessly. However, if you are going to take on the project yourself, there are a few tips to learn before
you get started.

Continue reading to learn some advice on how to match drywall textures and achieve a seamless finish.

Be Sure the Width of the Drywall Matches the Existing Layer

It is important that the wall is level. To ensure this, you must use the same thickness drywall as the new layer. Otherwise, the new layer will protrude or cave in, which will look defective when finished. Simply measure the width of the existing drywall and find the matching size at your local home improvement store. One exception to this rule is plaster. You may have to use shimming to raise the final layer of your drywall patch since plaster is not always an exact size.

Use as Little Drywall Mud as Possible on the Surrounding Drywall

When taping and coating the surrounding patch area in an effort to make it as flat as possible, be sure to limit the amount of mud you use. Use the thinnest layer possible to get the job done.

Blend the Lines that Distinguish the New Layer with the Existing Layer of Mud

One of the primary focuses of a drywall patching job is to blend the lines so they are not distinguishable when the wall is finished. But there is more to this strategy than this obvious factor. For flat finishes, you could simply feather out the mud and do away with these lines entirely; but for textures, you will need to use a drywall knife or other tool to fill these crevices with excess drywall mud.

Mimic the Same Application Technique Used for the Original Texture

It is vital to use the same tools and techniques used for the existing drywall texture. If you do anything differently, you will not get the same results and your patch will not match the rest of the wall. If you did not apply the initial layer of drywall, you may want to hire a professional for assistance.

Be Sure You Use the Same Amount of Spackle as the Existing Layer of Drywall

Just like you matched the drywall width and technique, you must also match the same amount of drywall mud. If you use less mud than the existing layer, it will appear concaved; and if you use too much, it will look swollen. Work in moderate amounts so you can match the layer accurately.

Indianapolis Drywall Installation and Repair

Indianapolis Drywall Contractors 317-269-7319

Indianapolis Drywall Contractors 317-269-7319

Call Drywall by Local Builders at 317-269-7319 for professional drywall installation and repair in Indianapolis, Indiana and its surrounding areas. We provide residential and commercial drywall service at competitive prices. Call 317-269-7319 to request a free estimate, today.

How to Remove Water Stains from Drywall

As soon as you start to notice water stains accumulating in areas of your walls and ceilings, it is important to act fast. Your first priority should be to locate and remedy the source of the water staining, which is generally a water leak. Once you have your water leak under control, you can move forward with treating your drywall to remove the unwanted stains left behind. Continue reading to learn one of the most recommended practices for removing water stains from drywall and plaster.

Indianapolis Drywall Contractors 317-269-7319

Indianapolis Drywall Contractors 317-269-7319

Tools and Supplies to Get:

Large Bucket
Bleach
Clean Water
Rubber Gloves
Soft Sponge
Towels
Drop Clothes
Oil-Based Primer
Water-Based Paint
Paint Brush or Roller

Step ❶

After you gather all your needed materials, start by laying down your drop cloths under your work space. You can use old bed sheets or plastic tarp as well.

Step ❷

Once your surrounding floors and possessions are protected with drop cloths, mix together equal parts of bleach and water in your bucket.

Step ❸

Put on your rubber gloves, and begin to apply the bleach solution to the drywall using your soft sponge. You may also pour the solution into a clean, plastic spray bottle for easier application. The bleach and water combo will remove any mold.

Step ❹

Allow the drywall to dry completely from the bleach water application.

Step ❺

After the area is dry, apply a shellac or oil-based primer to cover the stain. One coat should be enough. You may use a spray can or a roll-on primer.

Step ❻

Allow the primer to dry completely.

Step ❼

Apply your acrylic or water-based paint over the area covering the stain. You may need to re-paint the entire wall or ceiling to ensure the paint shades match.

Indianapolis Drywall Repair

Indianapolis Drywall Contractors 317-269-7319

Indianapolis Drywall Contractors 317-269-7319

Call Drywall by Local Builders at 317-269-7319 for Indianapolis drywall repair and installation service. We are experienced drywall contractors who offer a wide range of residential and commercial drywall service, including repair, replacement, installation, new home construction, metal stud framing, custom drywall texture, grid ceilings, and much more. Call 317-269-7319 to request a free estimate, today.

Avoid Drywall Dust With Wet Sanding

Indianapolis Drywall Contractors 317-269-7319

Indianapolis Drywall Contractors 317-269-7319

Many property owners are tempted to use medium density fiberboard (MDF) instead of drywall to avoid all the dust that comes with sanding joint compound. But this is a novice mistake! Although theoretically its smooth fine surface would make an excellent choice for wall material, medium density fiberboard is better off used for wainscoting (paneled crown molding) than for walls. True, MDF is stronger and more stable than wood, but it will still move. Fluctuations in interior and exterior humidity levels causes medium density fiberboard to bend and warp. In fact, a 4 foot panel of MDF can expand and contract as much as 1/8th of an inch simply from average humidity variations. This would cause gaps to open up somewhere in the wall, regardless of how much glue and spline you used on the edges, thus wasting all the labor and money spent on installation in the first place.

On the other hand, drywall hardly moves with humidity changes, making it perfect for homes and buildings in all climates. And by wet-sanding the drywall joints, you can avoid all the dust. Continue reading to learn some helpful tips for wet-sanding drywall joint compound.

Wet-Sanding Drywall

When it comes to drywall work, you can substantially limit dust by wet-sanding the drywall joints. And if you tape with caution, you can even limit the amount of sanding you need to do. A few supplies are required in order to wet-sand drywall. Visit your local home improvement store and purchase a large, flat drywall sponge for under $5. They have a course and less-course side, so they can be used for multiple applications. For drywall joint sanding, you’ll mostly need the less-course side.

Once you have applied the final coat of compound to your drywall, dampen the drywall sponge and smooth out any minor flaws on the surface of the wall. For rougher blemishes, use the course side of the sponge. The moisture in the drywall sponge controls the amount of dust created by smoothing out joint compound, thus making the process easier and more comfortable! By placing drop clothes or old bed sheets around the work space and wearing a respirator, you can reduce the effects of dust even more.

Professional Drywall Repair and Service

For professional drywall installation and repair, choose an experienced drywall contractor for results you can trust. This eliminates the need to exert effort in taking time off work, gathering all the supplies, implementing the project, and cleaning up after. With professional drywall service, you won’t have to miss work, take time out of your weekend, or spend hours shopping for materials. For a fair price, they can handle all aspects of your drywall needs.

Indianapolis Drywall Contractors

Indianapolis Drywall Contractors 317-269-7319

Indianapolis Drywall Contractors 317-269-7319

Call Drywall by Local Builders at 317-269-7319 for professional drywall repair in Indianapolis, Indiana. We are licensed, bonded, and insured drywall contractors with over 10 years of experience in the industry. Our drywall services include installation, repair, replacement, new construction, metal stud framing, remodels, and more. Call 317-269-7319 to request a free estimate for Indianapolis drywall installation and repair, today.